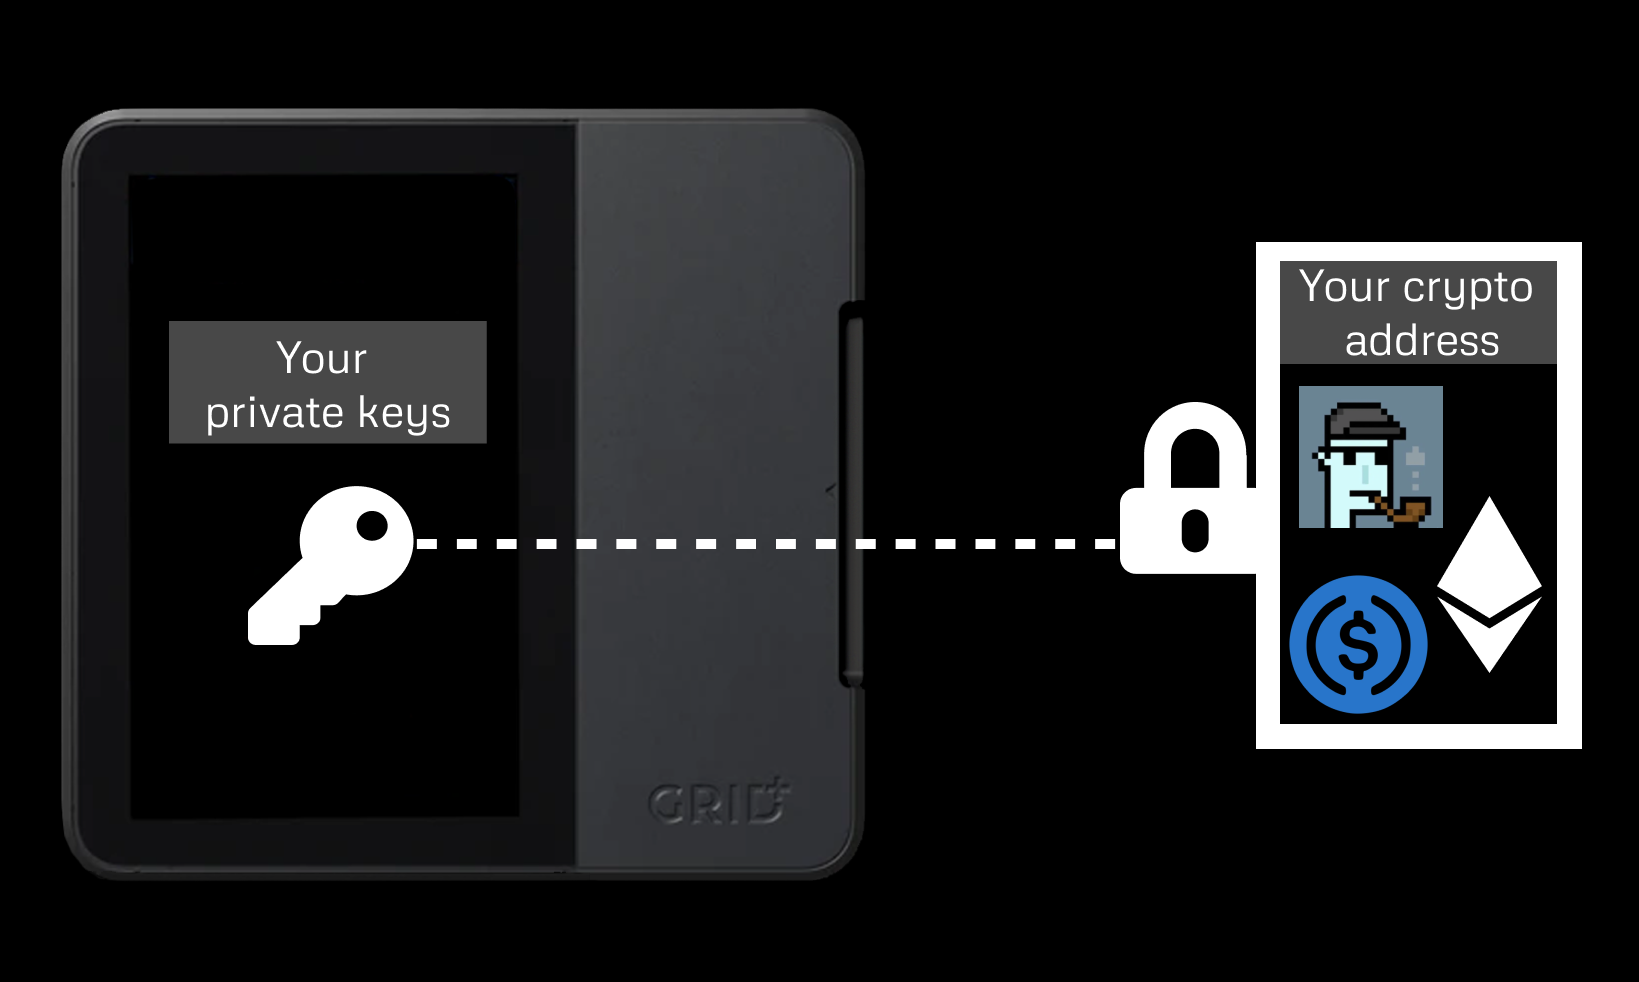
# Welcome!

You found the GridPlus Knowledge Base, well done.

<figure><img src="/files/ATYsaQyqcHqqwbyAyh2r" alt=""><figcaption></figcaption></figure>

We want you to get the most out of your **Lattice1** and this knowledge base provides device & services documentation, information and best practices for you to become a power user in no time.

Learn more about the **Lattice1 hardware wallet** here:

{% embed url="<https://docs.gridplus.io/lattice1/lattice1-introduction>" %}

Just received your Lattice1? **Get started! ↓**

{% embed url="<https://docs.gridplus.io/setup/lattice1>" %}

If you'd like to get in touch with us with a **support inquiry**, you can contact us through different channels. You can join [**our Discord server**](https://discord.gg/gridplus) or **create a ticket**:

{% embed url="<https://gridplus.io/pages/form/>" fullWidth="false" %}

If you have a **media inquiry**, please send us a message to **<media@gridplus.io>**.&#x20;


# Lattice1 First Time Setup

**Welcome to your new Lattice1, the most advanced and secure hardware wallet on the market, designed for actively using your crypto every day!**

When you unbox your Lattice1, here's what you will find:

* **The Lattice1 device**
* **One SafeCard**
* **Power supply**
* **LAN cable**

Now that you have everything out of the box, you can get started with the setup.

{% embed url="<https://www.youtube.com/watch?v=Mr3Vivy5ff0>" %}

### 1. System Initialization&#x20;

The first step is to plug **your Lattice1 to the wall socket**.&#x20;

{% hint style="info" %}
Please note that if you're outside the US, Canada or Japan, you will need to use a **plug adapter** as the [**power supply**](/lattice1/power-supply) is a standard **Type A** (but supports voltage ranges from 100V to 240V, so with an adapter, you can use it anywhere in the world).
{% endhint %}

You will see a **Starting up** screen with the GridPlus logo on it and then, the **system will initialize**. This can take a few minutes.

{% hint style="warning" %}
Very rarely you can encounter a **System Not Loaded message** telling you to wait a minute and retry - simply tap on the **Retry** button to do exactly that and everything will be ok.
{% endhint %}

When the system initialization is finished, you will see the welcome screen with all the steps you need to take to start using your Lattice1 listed on it. Click on **Setup**.

### 2. Connecting to WiFi

The first step of the device setup is connecting your Lattice1 **to the internet** - you will be prompted to choose **WiFi** as the primary method of connecting, but you can click on **Skip** and connect via Ethernet. There is [**no difference in security**](/lattice1/security-features), the only difference is the cable on your desk.

If you want to connect via WiFi, tap on **Yes** and wait for the device to look for **available WiFi networks**. Once the list is loaded, **select your WiFi and type in your password**. The device will take some time to connect and when it's done, you're good to move on to the next step.

{% hint style="info" %}
The Lattice1's WiFi module **supports 2.4 GHz** only, along with the most commonly used **encryption types**. If you're having any problems with WiFi whatsoever (you can't see your network or you cannot connect to it), please check [**Lattice1 WiFi Troubleshooting**](/lattice1/lattice1-wifi-troubleshooting)**.**

**Advanced users** can also [**turn their WiFi radio off completely via SSH**](https://docs.gridplus.io/lattice1/lattice1-guides/how-to-manually-disable-wifi-when-connected-via-ethernet) if they wish to use their Lattices with Ethernet only.
{% endhint %}

### 3. Device PIN Setup

The next step is to **create a system PIN** which you will use to unlock your Lattice1. Enter a 4-6 digit PIN and confirm it in the next step.

**Make sure to remember this PIN!** Brute force attacks are prevented by a countdown timer that starts at 1 minute after 3 incorrect unlock attempts and doubles with every incorrect attempts afterwards. It is impossible to try to unlock the device while the timer is active.

{% hint style="success" %}
The **Device PIN can be changed later** if you wish to.
{% endhint %}

### 4. Configure Security Mesh

The security mesh is a unique security feature that **protects the wallet from physical attacks**. When the mesh is active, any intrusion attempt that would aim to take the device apart and access the secure chip that holds sensitive information will trigger the mesh, which will then erase all data (including your wallet). It's basically a kill switch. [**You can read more about the mesh here**](https://docs.gridplus.io/lattice1/security-features#tamper-mesh)**.**

{% hint style="danger" %}
**WE HIGHLY RECOMMEND ARMING THE SECURITY MESH!**\
\
You can always turn it off in system preferences when you don't need it for the moment.&#x20;

The mesh can be the last barrier between an attacker and all your crypto.

**You should also have multiple backups of your wallet in case the mesh is triggered and wipes your wallet clean.**&#x20;
{% endhint %}

If you decide to arm the mesh, you will have to reboot your Lattice. You can also see the current status of the anti-tamper security mesh in the **top left corner** of your Lattice screen.&#x20;

**You can arm and disarm the mesh in System Preferences → Security & Privacy → Configure Security Mesh.**

### 5. Lattice Wallet Setup

Once you have a PIN, tap on **Let's go** to set up a wallet. You now have two options:

1. **Generate Wallet**
2. **Restore from Seed Phrase**

As a first time user, you will most likely not have a SafeCard with a wallet on it, but if you want to **restore from a SafeCard** down the line, please **generate a new wallet** on this step first, you can then restore from the card when you insert it, unlock it and go to the Manage Wallets menu on the homescreen.

{% hint style="warning" %}
So, which option is best for **you**? Read carefully and decide for yourself:
{% endhint %}

From a security standpoint, there's a very simple general rule that everyone should follow: **your wallet is as safe as the least safe app it's ever been on**.&#x20;

If you're upgrading to the Lattice1 from another hardware wallet, you can **safely import** your cold wallet via the seed phrase, as long as the wallet was **originally created** on hardware.

If you currently use a **hot wallet** such as MetaMask or Exodus and the Lattice1 is your first hardware wallet, **the safest approach is to generate a new wallet on the Lattice1 and then transfer all of your funds and assets over to it**.&#x20;

That being said, the chance that your former hot wallet will be hacked after you import it to the Lattice1 is **very slim**. Even though creating a new wallet on hardware eliminates the possibility of this entirely, if you were not hacked until now, you will most likely not be hacked in the future.

**The final decision is yours** - people who want the best security will opt for option 1, people for whom transferring all their assets to a newly generated wallet would be too costly (e.g. NFT collectors) will opt for option 2.

{% hint style="warning" %}
If you choose option two, you may consider **revoking all previous permissions** you have initiated with your wallet before you import it into the Lattice with [**Etherscan's revoking tool**](https://etherscan.io/tokenapprovalchecker).
{% endhint %}

#### 5a. Generating a new wallet

If you decided to create a new wallet completely, tap on **Generate Wallet** and you will then have the possibility of creating a **passphrase**.

{% hint style="info" %}
The passphrase is **optional**, but note that this is NOT a password, it's an additional **25th word** of the **seed phrase** from which addresses are derived - so make sure to **note it down if you want to create one!**&#x20;

**If you lose the passphrase, you will lose access to your wallet.**
{% endhint %}

You can **skip the passphrase setup** by hitting **No**.

Now you will see your **seed phrase (the 24 words)** - make sure to **note the words down**! Tap on **Continue.** You can later view the seed phrase by going to the first menu item on the Lattice homescreen - Lattice1/SafeCard Wallet and selecting **Display Lattice1/SafeCard Seed Phrase.**

You will now need to **re-enter four random words of the seed phrase string you've written down one by one**, this ensures that you have your backup.&#x20;

{% hint style="danger" %}
If you are backing your wallet up to a SafeCard (step 5) you can consider destroying the paper backup. **Backing up your wallet with a SafeCard instead of a paper backup is much more secure** since an attacker couldn't gain access to a wallet on a SafeCard without knowing the PIN. Using a single SafeCard as the only backup of your seed phrase is not recommended as the card have their own limitations.

**We strongly recommend you read through our article abour seed phrase safety and think about your backup system thoroughly:**
{% endhint %}

{% embed url="<https://docs.gridplus.io/lattice1-guides/how-to-manage-your-seed-phrase>" %}

After this, your wallet will be set up and you may **skip step 5b**.

#### 5b. Restoring from Seed Phrase

If you wish to import your current wallet, select this option. You can import any **12/18/24 word seed phrase**. Enter your seed phrase word by word on the screen and you're done.&#x20;

Only create a **passphrase** on the next if your original wallet was created with one! If it wasn't, you'll end up with a completely different set of addresses and you'll have to reset the wallet and import it again.

**You're now finished with the initial device setup, good job!**

### Connecting to Apps

Now it's time to connect your Lattice to the apps you'll be using.&#x20;

We suggest you start with the **Lattice Manager**, our own app used to, well, manage the Lattice. Right now, it's also the only wallet app with BTC support for the Lattice.

{% embed url="<https://docs.gridplus.io/apps-and-integrations/lattice-manager>" %}

Once you're familiar with connecting to the Lattice Manager, you can also choose one or more apps for EVM, check them out in the **Apps & Integrations** category on the left sidebar.

{% embed url="<https://docs.gridplus.io/apps-and-integrations/metamask>" %}

{% embed url="<https://docs.gridplus.io/apps-and-integrations/frame>" %}

{% embed url="<https://docs.gridplus.io/apps-and-integrations/rabby>" %}


# Lattice1 Introduction

<figure><img src="/files/4tv7FtCpflboJ91nUZU4" alt=""><figcaption></figcaption></figure>

The **GridPlus Lattice1** is a next-generation hardware wallet designed by crypto users for crypto users - created to be a **digital asset management hub** for a world which **actively uses** cryptocurrency and where creating cryptographic signatures will become as common as sending a text message today.

## The Best Way to Use Crypto Today

The Lattice1 was designed to be the most user-friendly hardware wallet for crypto enthusiasts ranging from blockchain devs, traders and NFT collectors to DeFi degens and stacking holders - during device development, we focused on two main areas - **user experience and security**.

### Lattice1 User Experience

#### Secure signing and readable data

If you're used to clicking through multiple screens of unreadable transaction data before you're able to confirm a transaction, we have good news for you - the Lattice has a big **5" TFT touchscreen** that lets you check what you're signing as all transaction data is translated into **human-readable form** thanks to our [**automatic ABI decoding**](https://docs.gridplus.io/lattice1/how-the-lattice1-makes-transactions-readable-with-abi-decoding).&#x20;

No more interacting with malicious smart contracts by mistake! And no more endless clicking.

#### One device, unlimited wallets

Our [**SafeCard smart cards**](https://docs.gridplus.io/safecards/introduction-to-safecards) allows you to manage **unlimited hardware-backed crypto wallets** with just **one Lattice1 device** - in addition to this, they serve as easily accessible, convenient and secure backups for all of your wallets. Using SafeCards allows you split your crypto holdings into multiple wallets with unique seed phrases, which enhances the overall security of your wallet management.

So, how do you use SafeCards? You simply insert the card into the Lattice, unlock it with its PIN and you can now sign transaction requests with private keys from a wallet that may be completely different from the wallet you have on the Lattice1.

One Lattice1 device + unlimited SafeCards = unlimited wallets.

#### Integrated with the most popular crypto apps

We understand you, like most other crypto users today, have a preference for the **software wallet** you want to use in your daily interactions with the blockchain, so we partnered up with multiple wallet providers and integrated the Lattice1 with their apps. You can choose one (or more!) apps from the list below, connect your Lattice to the app directly and then just continue using it the way you're used to - with all of your accounts now **protected** by the Lattice1's robust secure architecture:

* [**MetaMask**](https://docs.gridplus.io/apps-and-integrations/metamask)
* [**Rabby**](https://docs.gridplus.io/apps-and-integrations/rabby)
* [**NuFi**](https://docs.gridplus.io/apps-and-integrations/nufi)
* [**Frame**](https://docs.gridplus.io/apps-and-integrations/frame)
* [**MyCrypto**](https://docs.gridplus.io/apps-and-integrations/mycrypto)
* [**Ambire**](https://docs.gridplus.io/apps-and-integrations/ambire-wallet)

We also have our very own [**Lattice Manager**](https://docs.gridplus.io/apps-and-integrations/lattice-manager) loaded with cool features for managing your Bitcoin, customizing your EVM experience and more!

#### Authenticity, privacy and ownership

Lattices and SafeCards can be verified to be genuine GridPlus products thanks to the unique **GridPlus certificate** that's stored on them - if you were ever afraid of getting a hardware wallet that might have compromised firmware, you can restore your peace of mind with the Lattice. [**Here's how this works**](https://docs.gridplus.io/lattice1-guides/how-to-verify-that-your-lattice1-is-authentic).

We don't collect any user data on the Lattice Manager and we delete your personal info from our store database 6 months after your order in order to protect your privacy. **We welcome anons**.

When it comes to data flow, the Lattice1 uses **GridPlus infrastructure** as a default way to receive input from third-party apps, but advanced users can choose to use [**their own cloud endpoint**](https://docs.gridplus.io/apps-and-integrations/lattice-manager/connecting-your-lattice-to-your-own-private-endpoint) for this purpose - this means that if you wish to, you can completely opt out of using our servers to relay transaction signatures to the blockchain - 100% ownership of your device and your crypto.

{% hint style="success" %}
The device can also be used as a remote signer for your apps and more - check out our **resources for devs** here: [**Developer Resources**](https://docs.gridplus.io/resources/developer-resources)
{% endhint %}

### Lattice1 Security

There are a lot of safety features in the Lattice1 and we have a dedicated article to explore all of them in more detail, but here's a short overview:

* **Device architecture** is designed in a way which prevents 100% of physical attacks
* **Your private keys** are never accessible from the internet because of two separate compute environments, despite the Lattice1 being an always-online device
* **Screen contents** are always drawn from Lattice firmware, which runs in a secure computation environment, separated from the internet (more on this later) - this ensures you are always signing what you see on the screen
* **PIN-protected SafeCards** allow you to both backup your wallet and have a safe cold storage only you can access with your PIN - the cards have a GridPlus issued certificate that only works with an original Lattice1, so nobody can read or change the data from on your card in any way
* **And more. You can find everything about Lattice security in this article:**

{% embed url="<https://docs.gridplus.io/lattice1/security-features>" %}


# Lattice1 Security Features

### Lattice1 Secure Architecture <a href="#lattice-1-secure-architecture" id="lattice-1-secure-architecture"></a>

<figure><img src="/files/AYoehS4rbGcIPkNcGP9A" alt=""><figcaption></figcaption></figure>

When we designed the Lattice1, the highest priority and our biggest focus was - of course - **the security of your funds**. The Lattice1 has a smaller attack surface than legacy hardware wallets because it's got **two totally separate hardware environments inside the box**. We also took into account some unusual edge case attack vectors like **reading your inputs from radio frequency emissions** - people have demonstrated capturing Ledger PINs and seed phrase words this way without a physical connection to the device. Let's have a look at how the components work together (feel free to come back to the diagram above for reference if needed).

The two separate hardware environments are the **General Compute Environment (GCE)** and the **Secure Compute Environment (SCE**, also sometimes called Hardware Security Module, HSM). You can think of them as two independent computers that can communicate with each other (we'll get to how they do this) but they are still **segregated at the component level**. Both the GCE and the SCE are responsible for different tasks that need to be performed in order for the Lattice1 to properly work.

### General Compute Environment (GCE)

The GCE software runs on Linux and can connect to the internet (either via WiFi or Ethernet). Our security model operates under the assumption that it's **always compromised** (even though that is unlikely) - this means that no sensitive data such as your private keys is stored on or goes through the GCE, ever.

### Secure Compute Environment (SCE)

The secure part of the Lattice1 is completely cut off from the outside world - it is enclosed in what we call a **tamper mesh** - more on that below - which prevents physical attacks. The SCE is a microprocessor that runs embedded code in C and is responsible for all actions within the secure part of the device - communicating with the GCE, getting transaction messages signed, generating screen images and more.

There are no factory or engineering debug features that would allow direct access to the SCE. This means you have a flexible always-online device, but **your private keys are completely inaccessible from the internet**.

### Anti-tamper Security Mesh <a href="#tamper-mesh" id="tamper-mesh"></a>

All these secure elements inside the Lattice1 are enclosed in an **anti-tamper security mesh** which is like a **tripwire that will erase your secrets if a physical intrusion attempt is detected**.

The anti-tamper mesh is a **Laser Directed Structure (LDS) mesh** - you could say a 3D maze of tiny electrical traces with a **waveform** running through it constantly. If it's shorted out or the waveform is altered - the device bricks. **This essentialy prevents 100% of physical attack attempts.**

The security mesh is always active but may be **armed or disarmed** according to your preference. If you arm the mesh and it detects a tamper event, your Lattice wallet and all secure data will be erased and the device will be **permanently unusable**. You must choose to arm or disarm the mesh as part of the **setup process** - this ensures your wallet is protected against intrusion attempts (if you choose to arm) from the moment you create/import it on the Lattice.

The mesh can then be **armed or disarmed** at any time in **System Preferences -> Security & Privacy -> Configure Security Mesh**, but this of course requires PIN entry into your device. You can see if the mesh is currently armed or disarmed in the top left corner of the Lattice screen. If your device's mesh has been triggered while **disarmed**, you will not be able to re-arm it but you **will** be able to use the Lattice **without the mesh armed**.

We recommend **arming the mesh on** for most users most of the time. Keep in mind, though, that if the mesh is triggered while active (e.g. from dropping the Lattice too hard), your Lattice wallet and secure data **will be deleted**. You may wish to disarm the mesh for e.g. travelling or moving where you'd be transporting the Lattice on a bumpy ride.

{% hint style="info" %}
Note that the anti-tamper mesh is an **enhanced security feature** for detecting intrusion attempts - with the mesh armed, it should be impossible for even the most sophisticated attackers to access your device and its Lattice wallet. However, **your data is still encrypted and extremely difficult for an attacker to access even with the mesh disarmed**.
{% endhint %}

Tamper detection is controlled by **the SCE** and is active even when the device is not plugged in the socket. The Lattice1 has enough power stored in its batteries to power the tamper mesh **for around 5 years when unplugged**. The battery will also last at least 20 years when plugged in, so you should get decades out of your Lattice1 (at least).

{% hint style="info" %}
When the battery runs out, the device will **permanently lock** and **delete all secure data** (note: this only applies to devices where the tamper mesh is **armed** - if you want to safely store your Lattice for some time without using it, you can backup your Lattice wallet, remove your Lattice wallet in the **Manage Wallets** menu, and disarm the mesh. You can then restore your wallet and re-arm the mesh when you start using the device again).
{% endhint %}

### Mailbox, Multiplexer, Doorbell

Although the GCE and the SCE cannot directly connect to each other, they pass signing requests and signatures through a **size-limited** (limiting the payload to a fixed memory size eliminates overflow attacks) [**FRAM**](https://en.wikipedia.org/wiki/Ferroelectric_RAM) **storage -** which we call the **mailbox.** Only **one side** can connect to the mailbox at a time. When the message inside the mailbox is read, it's automatically **deleted**.

This is done through a [**multiplexer**](https://en.wikipedia.org/wiki/Multiplexer) (mux - data selector), a component that selects between inputs and connects the selected input to a single output line. At a time, the mux can be connected either to the GCE or the SCE - there's **never a direct connection** between the two, all messages are passed via the mailbox.

By default, the multiplexer is **connected to the SCE**, so in order to send a message to the mailbox, the GCE has to request access (the SCE needs to switch the mux connection to the GCE). A set of two simple one-way GPIO connections (one for the GCE and one for the SCE) is used for this - we call this the **doorbell.**

### **Secure Enclave (SE) and SafeCard Slot**

The Secure Enclave is where your **private keys** to the built-in Lattice1 wallet are stored on the device. The SE is actually a **chip which has a** [**PUF**](https://en.wikipedia.org/wiki/Physical_unclonable_function) (you could say it's a physically encrypted flash memory) almost identical to the one used in the SafeCards (and in standard credit/debit cards as well). Each PUF is unique and copies of it are impossible to create.

Both the Secure Enclave chip and SafeCard chips are made with a **GridPlus-issued certificate** that allows the device to actually use the private keys stored on these chips for signing transaction requests. Inserting a SafeCard or any other card with a PUF without a GridPlus cert will result in the Lattice1 **not recognizing the card**.

### Large Touchscreen With Support for Smart Contract Definitions

The large 60hz touchscreen is important for **both UX and security**, the screen image is drawn **by the SCE** and stored on a **graphics RAM (GRAM)** which cannot be hacked as it's only a memory. The screen allows you to **see what you're actually signing** even if your phone, computer, or even the Lattice1 GCE are somehow compromised. Touch display input is sent to the SCE directly via I²C. This diminishes the likelihood of **man in the middle attacks** like we see with USB legacy hardware wallets.

If you have a hardware wallet and you don't verify what you're signing on a secure screen, **you're not getting a security benefit at all.**

{% hint style="success" %}
The **components** we use for the Lattice1 are sourced from **multiple hardware manufacturers in different locations** - this means that a **supply chain attack** would have to span three continents and involve multiple governments.
{% endhint %}

### Wallet generation

The Lattices uses a **TRNG (true random number generator)** to ensure wallets generated on the device or SafeCards using the device offer the highest level of safety possible. We of course also support 24-word **seed phrases** as per **BIP39**.&#x20;

You can read more about random number generation on the Lattice here:

{% embed url="<https://docs.gridplus.io/lattice1/lattice1-random-number-generation>" %}

### **Signing Process**

**Here's how the whole communication process works:**

1. A **signature is requested** via the internet and this request lands in the GCE.
2. The GCE rings the doorbell to **request access** to the multiplexer (and the mailbox).
3. The SCE **gives access** to the GCE (losing access itself - only one connection at a time can be made).
4. The GCE puts a signature request **into the mailbox**, switches the mux back over to the SCE and rings the doorbell to let the SCE know it has a message waiting.
5. The SCE **reads** the signing request from the mailbox, after which it's deleted.
6. The SCE **draws the device screen image** and shows you what you're signing.
7. After you approve, the request **hash** is sent to either the Secure Enclave (SE) or an inserted SafeCard **to be signed** with your private keys.
8. A **signed message** is retrieved from the SE or the SafeCard.
9. This message is put into the **mailbox** by the SCE and access to the mailbox is given to the GCE.
10. The SCE **rings the doorbell** to let the GCE know it has a message waiting.
11. The signed message is read by the GCE - the message is then deleted from the mailbox and the signed message is passed on to the app that made the request - and the **transaction is signed**.


# Lattice1 Random Number Generation

When you generate a new crypto wallet on the Lattice, you can rest assured that the process is entirely safe and adheres to the highest level of security possible. We of course support [**BIP-39**](https://github.com/bitcoin/bips/blob/master/bip-0039/english.txt), which means that the 24 words in seed phrases generated on the Lattice are taken from the list of 2048 words that are defined by that proposal (that is industry standard).

In addition to that, we also use a very secure way of **generating random numbers.**&#x20;

{% hint style="info" %}
**RNG or random number generation** is a very important security aspect of hardware/software. There are two kinds - **pseudorandom number generators** (generally software) and **true random number generators** (generally hardware).&#x20;

The difference between them is that even though the numbers generated by a **PRNG** appear random, they are in fact **pre-determined** by the algorithm and if you know the current state of the RNG, you will be able to replicate the rolls - this has some uses in e.g. computer games and other areas, but in order to secure significant amounts of money in crypto on a hardware wallet, it is preferrable to use a TRNG.&#x20;

**TRNGs** are "truly" random because the algorithm adds **entropy from an unpredictable source**, e.g. temperature on the CPU, or input from other physical sensors. TRNGs are always hardware devices as you cannot pull random entropy from software only, but there are sophisticated software-only RNGs that can produce random numbers which are safe to use in cryptography - these are not the topic of this article though, and we're mentioning them just to highlight that they exist.
{% endhint %}

The Lattice1's RNG is a **true random number generator**. The device follows a standard called [**SP800-90A**](https://csrc.nist.gov/pubs/sp/800/90/a/r1/final), which defines how to generate random numbers based on some source of noise (entropy). With the Lattice's HSM ([**the SCE**](https://docs.gridplus.io/lattice1/security-features#secure-compute-environment-sce)), the random noise signal comes from multiple sources - a ring oscillator that takes into account temperature and voltage variations within the [**Secure Enclave**](https://docs.gridplus.io/lattice1/security-features#secure-compute-environment-sce), the device's **unique hardware fingerprint** (PUF AKA physically uncloneable function - each Lattice chip is unique like a snowflake), as well as additional sources of entropy.

{% hint style="success" %}
Strict adherence to this standard and using multiple sources of noise for our TRNG rather than just one or a software PRNG puts the Lattice's entropy a class ahead of other commercially available crypto hardware wallets.
{% endhint %}


# How the Lattice1 Makes Transactions Readable with ABI Decoding

What does ABI decoding mean?

The acronym, ABI, stands for **A**pplication **B**inary **I**nterface.\
\
ABIs define how data is formatted when it is used to call a function on an Ethereum smart contract. More generally, ABIs are used for all [**EVM**](https://ethereum.org/en/developers/docs/evm/) based chains, which include Binance Smart Chain, Avalanche C-Chain, Optimism, Arbitrum, and more.

Without ABIs, users have no reasonable way to interpret the message they are signing in the transaction request. This opens up many attacks and reduce the benefit of using a secure hardware wallet such as the Lattice1. Fortunately, Lattice firmware is able to use ABIs to decode calldata and display it in a more readable way. This decoding is done **automatically** as long as you are using an integration that leverages this encoding, such as [**MetaMask**](https://metamask.io) or [**Frame**](https://frame.sh).

### Basic ABI decoding demonstrated on the Lattice1

{% hint style="success" %}
Starting in **Lattice firmware v0.15.0**, ABI decoding is done **automatically** for all contracts on the Lattice and comes with the device firmware itself - no need to install anything.
{% endhint %}

Here is an example of the raw calldata in a simple transaction. Can you figure out what's happening by looking at this [**hexadecimal**](https://en.wikipedia.org/wiki/Hexadecimal) string?

<figure><img src="/files/I9C3kzkzOAmbYaMk7TSI" alt=""><figcaption></figcaption></figure>

This raw data is unintelligible, which makes transacting with large amounts of value quite dangerous. If you can't read what you're signing, how can you be sure you aren't being attacked and that you won't accidentally send a bunch of coins to your attacker?

Fortunately, your Lattice can help. Using the large display and our advanced ABI decoding features, this obfuscation is a thing of the past. Here is that same transaction decoded and displayed on the Lattice1's screen:

<figure><img src="/files/CzFTPNHYZtmUuJ241h9j" alt=""><figcaption></figcaption></figure>

This screen shows us that the user is sending a single DAI token to a friend. Let's break down what each field of this transaction request decoded on the Lattice1 means:

1. This section includes all the basic transaction fields
   * **Signer:** The account/address from which the transaction is being requested.
   * **Nonce:** A special number that acts as a transaction counter in each account.
   * **Gas:** How much gas will be used in this transaction.
   * **Gas Price:** Current gas price determined by network conditions, this is ETH burned permanently.
   * **Tip:** A tip paid to the validator who includes your tx into the next Ethereum block.
2. The **contract** field here shows the which contract is being called in the transaction request. The user here has set up an [**address tag**](https://docs.gridplus.io/lattice-manager/address-tags) in the Lattice Manager so the DAI contract appears as "DAI" instead of `0x6B175474E89094C44Da98b954EedeAC495271d0F.`
3. This amount refers only to an amount of **ETH** being sent, gas not included.
4. This is the decoded calldata. Double brackets `[[]]` denote a function within a contract being called and single brackets `[]` denote the inputs being fed into those functions. Here, the user is calling the DAI contract's `transfer` function and the inputs `[dst]` and `[wad]` are the destination and amount fields for the transfer function. These have "`britten.eth`" and "`1.0` `* 10 E18`" as their respective inputs. Again, the user has set up an address tag so that `0xf6868a79e20a48eff2bd7688402cc5ea40133883` appears as "britten.eth".

> **NOTE:** 1.0 \* 10E18 is scientific notation, which indicates you are sending 1,000,000,000,000,000,000 units of DAI (1 followed by 18 zeroes). That sounds like a lot, but this is what we call "atomic" units, as opposed to "observed" units. To determine the unit conversion, you have to [**look up**](https://etherscan.io/address/0x6B175474E89094C44Da98b954EedeAC495271d0F#readContract) the contract's `decimals` value. DAI, and most other tokens (including ETH), use 18 decimals. This means 1E18 atomic units equal 1 observed unit, i.e. "1 DAI".

{% hint style="info" %}
For a deeper look into how our advanced ABI decoding feature works, please see the[ **Advanced ABI Decoding**](https://github.com/GridPlus/gitbook/blob/main/lattice1/how-the-lattice1-makes-transactions-readable-with-abi-decoding/broken-reference/README.md) article.
{% endhint %}


# Advanced ABI Decoding

Starting with Lattice firmware v0.16.0, your device has the ability to automatically decode more complex ABI-encoded data, such as `multicall` patterns, commonly used in crypto dApps like [**Gnosis Safe**](https://gnosis-safe.io) and [**Uniswap V3**](https://uniswap.org).

Let's go through a more advanced example to highlight how the information on your Lattice screen can be used to get a high degree of confidence over what you are signing. Consider the following payload, which comes from Uniswap V3 (this is the unfiltered version, pure hex):

<figure><img src="/files/QNWFYVLNENLNjR0SatHK" alt=""><figcaption></figcaption></figure>

If you send this to your Lattice, you will see the following decoded data:

<figure><img src="/files/g1s6epGqSdJrI3lmaJOb" alt=""><figcaption></figcaption></figure>

Let's take a dive into this example by first looking at the contract being called. In this case, the user has [**tagged**](https://docs.gridplus.io/lattice-manager/address-tags) the address `Uniswap V3`, which corresponds to [**this contract**](https://etherscan.io/address/0x68b3465833fb72a70ecdf485e0e4c7bd8665fc45#code). If this had not been tagged, you would see the contract address `0x68b3465833fb72a70ecdf485e0e4c7bd8665fc45`.&#x20;

#### Reading Contract Source Code On Etherscan

You can look up the contract code on Etherscan [**here**](https://etherscan.io/address/0x68b3465833fb72a70ecdf485e0e4c7bd8665fc45#code), where you should see a series of 63 contract source files - use the search bar to look for functions and definitions you want to inspect throughout this exercise.

<figure><img src="/files/YlrWi6jg1O1aD572Sygl" alt=""><figcaption></figcaption></figure>

#### Reading the Entry Point

Now that we have the source code pulled up, we're ready to verify what's going on. The Lattice screens above show that the entry point being called is `multicall`, since that's the first function listed on the screen.&#x20;

{% hint style="info" %}
**NOTE:** On Lattice decoding screens, **function calls** are closed with two brackets, `[[ ]]`, while **parameters** are closed with single brackets, `[ ]`.&#x20;
{% endhint %}

Indeed, this function can be found in the contract source in `MulticallExtended.sol`:

```
function multicall(uint256 deadline, bytes[] calldata data)
    external
    payable
    override
    checkDeadline(deadline)
    returns (bytes[] memory)
{
    return multicall(data);
}
```

Interestingly, that function is just performing some sanity checks on `deadline` and passing the `data` to another instance of `multicall`. We can search through the code again and we find the next instance of `multicall`, this time in `Multicall.sol`.&#x20;

```
function multicall(bytes[] calldata data) public payable override returns (bytes[] memory results) {
    results = new bytes[](data.length);
    for (uint256 i = 0; i < data.length; i++) {
        (bool success, bytes memory result) = address(this).delegatecall(data[i]);

        if (!success) {
            // Next 5 lines from https://ethereum.stackexchange.com/a/83577
            if (result.length < 68) revert();
            assembly {
                result := add(result, 0x04)
            }
            revert(abi.decode(result, (string)));
        }

        results[i] = result;
    }
}
```

This function is taking an array of `bytes` and using each one to perform a `delegatecall` on some function in the *same* contract's source code. This last part is important because it means no external contracts are being called -- everything you need to know about what's happening is on the [**Etherscan source page**](https://etherscan.io/address/0x68b3465833fb72a70ecdf485e0e4c7bd8665fc45#code) we've been already looking at.

Back to the Lattice screens. You should see that `multicall` has two parameters specified on the screen: `deadline` and `data`. These appear to match the *first* `multicall` function definition we found on Etherscan. So far so good.

Now take a look at `data`. You will notice it contains an array of *more* function calls. That's because your Lattice is actually decoding the individual `bytes` items that are getting looped through in the outer `multicall` request. This is what we refer to as "**nested ABI decoding**" because there are two layers of data being decoded: the original payload, and now each one of the `bytes` fields in the `data` param.

#### Nested Function #1:

The first nested function call is `exactOutputSingle`. Let's go back to the source code and look this function up. You can find it in `V3SwapRouter.sol`:

```
function exactOutputSingle(ExactOutputSingleParams calldata params)
    external
    payable
    override
    returns (uint256 amountIn)
{
    // avoid an SLOAD by using the swap return data
    amountIn = exactOutputInternal(
        params.amountOut,
        params.recipient,
        params.sqrtPriceLimitX96,
        SwapCallbackData({path: abi.encodePacked(params.tokenOut, params.fee, params.tokenIn), payer: msg.sender})
    );

    require(amountIn <= params.amountInMaximum, 'Too much requested');
    // has to be reset even though we don't use it in the single hop case
    amountInCached = DEFAULT_AMOUNT_IN_CACHED;
}
```

No comments. We should search again and see if there is a definition. Looks like there is one in `IV3SwapRouter.sol` (`I` usually denotes "interface", which is where function comments usually live):

```
/// @notice Swaps as little as possible of one token for `amountOut` of another token
/// that may remain in the router after the swap.
/// @param params The parameters necessary for the swap, encoded as `ExactOutputSingleParams` in calldata
/// @return amountIn The amount of the input token
function exactOutputSingle(ExactOutputSingleParams calldata params) external payable returns (uint256 amountIn);
```

So based on the comments (and basic inference), it appears this function is defining the boundaries for the swap function we would like to make. Namely, it specifies the recipient, tokens, and amounts that are within scope of the desired swap.

One important thing to point out with this function is that there is only one parameter and it is of type `ExactOutputSingleParams`. This is not a native ABI type (e.g. `addresss`, `uint256`, etc) - it is a **defined type**. We can do another search on the Etherscan source page and find a definition in `IV3SwapRouter.sol`:

```
struct ExactOutputSingleParams {
    address tokenIn;
    address tokenOut;
    uint24 fee;
    address recipient;
    uint256 amountOut;
    uint256 amountInMaximum;
    uint160 sqrtPriceLimitX96;
}
```

Defined types are often used by smart contract writers when a particular set of parameters is reused across functions - doing so can prevent errors and bugs.

{% hint style="info" %}
**Displaying parameter names**

Your Lattice should display named parameters, such as `[data]`, if it is able to fetch the contract data from [**Etherscan**](https://etherscan.io) (or similar explorer, e.g. [**Arbiscan**](https://arbiscan.io/)). This is only possible if the author uploads the verified contract source code, i.e. "open sources" the contract. This is the norm in Ethereum, but may not be as common in other ecosystems. \
\
If no source code is found, or if the Etherscan request fails, the requester (MetaMask or Frame) should fallback to searching [**4byte**](https://4byte.directory) for the definition. If this happens, your Lattice will end up displaying generic parameter names like `[#1]`, `[#2]`, etc. This is because 4byte does not hold source code - it is only a repository for raw function definitions, which do not include parameter names. In our current example, the nested function definition is:&#x20;

`exactOutputSingle(`

&#x20; `(address,address,uint24,address,uint256,uint256,uint160)`

`)`

This is still enough information to decode the parameters (based on type), but the requester can't tell your Lattice what they are named.<br>

You probably noticed from the above screens that nested functions do not display named parameters. Instead, you see `[#1]`, `[#1-1]`, `[#1-2]`, etc. This is because while our current example only makes calls internal to the same contract, more advanced examples might call out to *external contracts*, such as proxies. This becomes very tricky very fast because there is no specific way to know the address(es) of the external contract(s) being called - there are an infinite number of possible patterns and even covering common ones would introduce a lot of complexity and require continual maintenance. As such, we cannot request nested parameter names from Etherscan (which requires an address) and must instead rely on 4byte. In future updates we may add display of real param names in specific cases where nested calls are being made to functions inside the **same contract**, such as our current example.

\
[**This article**](https://mirror.xyz/alexmiller.eth/kiwpU01XZh-rCgDDRA-jB2-pjosjogGIqCZkxryZ9Oo) talks more about how your Lattice utilizes the ABI spec and its limitations.
{% endhint %}

You can use the definition above to determine which parameters have which values; in this case, `tokenIn` (`#1-1`) is `WETH`, which is another address that has been [**tagged**](https://docs.gridplus.io/lattice-manager/address-tags) by this Lattice's owner.  `fee` (`#1-3`) is `500`. It's unclear what unit this is, but as you may have noticed by now, the entire contract is open source, so you can figure it out if you dig deep enough into the code. We will leave that as an exercise for the reader :smile:.

#### Nested Function #2

The next nested function is `refundETH`. Here's the info on that:

```
/// @notice Refunds any ETH balance held by this contract to the `msg.sender`
/// @dev Useful for bundling with mint or increase liquidity that uses ether, or exact output swaps
/// that use ether for the input amount
function refundETH() external payable;
```

```
function refundETH() external payable override {
    if (address(this).balance > 0) TransferHelper.safeTransferETH(msg.sender, address(this).balance);
}
```

This function takes no arguments and refunds any ETH that is not spent in the swap. This is necessary because you call the swap with the "worst acceptable price", and usually you will get a better price than that, meaning you will likely have extra ETH that does not get swapped and should be refunded.

#### Putting it Together

In summary, there are three separate functions getting called:

1. `multicall` - accepts an array of calldata `bytes` arrays plus a `deadline` integer
2. `exactOutputSingle` - nested function, makes the swap
3. `refundETH` - nested function, refunds any unused ETH

After this exercise you should be quite confident that you are signing what you think you are. Although it is unlikely that all of your transactions will demand this level of scrutiny, remember that your Lattice should give you enough information to perform as much due diligence as you see fit.

{% hint style="danger" %}
The above exercise is only possible because of published contract code on [**Etherscan**](https://etherscan.io). If the contract you are using does not have published source code, this should make you skeptical of it. And if your Lattice does not decode the calldata at all, that should make you **extra** skeptical, as this means the contract was not published *and* the function you're calling is not defined on [**4byte**](https://www.4byte.directory/).
{% endhint %}


# How to Manage Your Seed Phrase

Your seed phrase is the most precious piece of information you've got if you want to "be your own bank" and manage your own money/digital assets without a 3rd party. But even with a robust security-focused device like the Lattice1, some of the dangers of self-custody are still present, so you should be always cautious when you work with crypto.

This article seeks to both inform you of the benefits and risks of the most common methods of backing up your seed phrase(s) and also show you some unusual backup methods. But first and foremost, this article is intended to help you think about potential faults in your current setup and point you in the right direction by offering some general advice that you can take to mitigate risk.

{% hint style="info" %}
**Quick intro to seed phrases and why you need to keep them secret and safe**

If you're not sure why the random 12/18/24 words you got with your new crypto wallet are important, this is for you - you can think of the seed phrase as the **master password** for your wallet on the blockchain.&#x20;

The seed phrase, according to [**BIP39**](https://github.com/bitcoin/bips/blob/master/bip-0039.mediawiki), is a mnemonic code consisting of a string of words that are randomly selected from a pre-defined list of 2048 English words encoded in the standard. This string of words is then used in generating a blockchain wallet as the base from which addresses are generated through a cryptographic mathematical operation, so the seed phrase is technically the seed of your wallet, hence the name.

The most commonly used crypto wallet apps (MetaMask, Exodus, Rabby, Frame, MyCrypto, MyEtherWallet, Electrum and others) as well as hardware wallets (GridPlus, Ledger, Trezor and others) allow you to import your seed phrase to the app/device and control your blockchain wallet using the app's/device's interface - with access to your seed phrase, you have FULL access to your blockchain wallet and you can freely move its content around.

This also means that if someone else gains access to your seed phrase, they will also have FULL access to your wallet - which is, of course, undesirable. And because of this, thinking deeply about your seed phrase setup is necessary if you want to keep your peace of mind.
{% endhint %}

#### Multiple Seed Phrases

Using multiple seed phrases is not necessary, but it is recommended if you're not completely new to crypto. One for your daily use such as trading NFTs, DeFi, etc., and one for long-term holdings that you usually only send your profits too is a good basic setup.

If you have significant amounts of money in crypto, you may consider splitting this further - please note that the seed phrase unlocks all addresses in your wallet, so using a different address doesn't really help you with security, it just makes organizing your crypto activies easier.

#### Passphrases

When you generate a new BIP39 seed phrase, some wallet apps and hardware wallets let you set up a **passphrase** - the passphrase is a word (or a string of characters, depends if the app/device lets you use non-letter characters for setting this up) you add to the seed phrase. This elevates security, but comes at a price, as importing a seed phrase with a passphrase is supported by a smaller number of wallet apps and might be a hurdle when you need to import your seed phrase somewhere else quickly.

On the Lattice, creating a passphrase is **optional** and not necessary to use the device.

{% hint style="warning" %}
Please note that the **passphrase** is NOT a password to access your seed phrase with - using it will **change the generated addresses**, so if you use one when generating your wallet and then use an app that only lets you import your seed phrase, you will **NOT** be able to access your wallet!&#x20;

Wallet apps that allow you to import a seed phrase with a passphrase include MyEtherWallet, [**MyCrypto**](https://docs.gridplus.io/apps-and-integrations/mycrypto) and others.&#x20;

Most hardware wallet manufacturers support creating a wallet with a passphrase.
{% endhint %}

### Seed Phrase Backup Methods

The way you store your seed phrase is your **backup method**. This includes GridPlus SafeCards, paper, steel, a hardware wallet, digital backups, etc. When it comes to selecting your backup method(s), you should be aware of several important aspects of each backup method you're going to use and set your seed phrase management system up in a way that makes sense.

{% hint style="success" %}
In addition to using seed phrase backups, you can also protect your funds in other ways, such as using **multisig**, which requires signatures from X/Y total wallets to approve spending your crypto, or **Shamir backups** - these will be addressed further down in this article.
{% endhint %}

**What's important to consider with each backup method:**

* **Ease of access**\
  How easy it is to obtain or read the seed phrase if you have physical access to the backup.
* **Convenience of use**\
  How quickly you can export the seedphrase and use the wallet it unlocks.
* **Reliability**\
  How easy it is to destroy the backup.

### Non-Digital Backup Methods

Now, let's have a look at a couple of backup methods - and let's start with the most commonly used one, a **paper backup**. A paper backup is simply a piece of paper on which you've written the seed phrase. Obviously, it's very easy to read the seed phrase when you have physical access to the paper, so it's not very secure, and paper as a material will not withstand fire or water and will disintegrate over time if not stored in ideal conditions, so it's not very reliable either.

A better option are **stainless steel backups** - the simplest is a steel plate with your seed phrase etched on it, but you can also have a steel backup in the form of a card or a capsule. With steel, you get the best reliability as it can withstand your standard house fire, won't corrode when exposed to water or most acids and can generally last for decades. But, it also suffers from the same problem as paper backups do - once you have access to the plate, you also have full access to the seed phrase.&#x20;

{% hint style="warning" %}
**Splitting the seed phrase**

Both steel and paper backups are **instant-access** backup methods, but you can mitigate the risk of your seed phrase getting exposed by **splitting the seed phrase** into two or more parts. If you have a 24-word seed phrase, backing it up on two (three) steel plates, each with 12 (8) words, significantly elevates the security of your seed phrase.&#x20;

However, this also comes with a loss of convenience, because splitting the seed phrase only makes sense if each backup with the partial seed phrase is stored in a **different location**, so if you need quick access to that wallet, you may not be able to recover all the plates in time.

**Shamir**

An even better alternative to splitting the seed phrase is using a **Shamir Backup Seed** - this is not possible to do with a BIP39 seed phrase and is defined by a different standard called [**SLIP39**](https://github.com/satoshilabs/slips/blob/master/slip-0039.md), but it's definitely something to take a look at and consider for very valuable wallets - it's basically a seed that is **generated with a multisig**, where the seed is split into multiple fragments and you can control the wallet with e.g. 3 out of 5 fragments.&#x20;

**Smart contract multisig**

**Right now, the Lattice does not support Shamir, but you can substitute it with using an Ethereum multisig service such as the** [**Safe account abstraction stack**](https://docs.safe.global/getting-started/readme)**.** Safe allows you to build a robust security solution on top of multiple BIP39 seed phrases, using customizable rules to set up programmable smart accounts.
{% endhint %}

You can also get creative and e.g. make a steel puzzle box that will only reveal the seed phrase if you solve the puzzle (which only you know how to solve), this will help with both the ease of access issue and the convenience issue, but is costly, takes a long time to design and create and will most likely not be a viable option for most crypto users - but we thought it was worth mentioning.

### Digital Backup Methods

These are methods of backing up your seed phrase that require some kind of technology or a device. This includes GridPlus SafeCards, hardware wallets in general, computers, data drives (HDD/SSD), USB flash drives, etc. All these different digital backup methods have their benefits and drawbacks, and some of them are generally a better option than others, but they all share the inescapable attribute of technology, and that is the problem of longevity over time, or **reliability**.

Electronics can melt in a fire, SafeCards chips can scratch, computers and hard drives can be wiped when magnetic field is applied to them, water will most likely damage and corrode the internals of devices, and so on. However, if set up and managed correctly, a digital backup can have the right balance of good accessibility and robust security, so they definitely should be used in your setup (ideally combined with a metal backup - just in case the technology breaks down, but this is not necessary if your setup is well designed).

{% hint style="danger" %}
The use of **a PIN or a password** is a recurring theme of digital backups that are worth considering and an absolutely necessary feature of anything you decide to use to store your seed phrase on - **NEVER** store your 24 words locally on your computer or especially on an online cloud service - this includes your password manager! Don't use one to store a seed phrase, unless you split it, but even then we still recommend against doing this.
{% endhint %}

Now, let's have a look at the best digital backup methods.

#### SafeCards

**GridPlus SafeCards** were created to make using multiple wallets with one device very easy and also as a convenient method of backing up your wallet(s). When used with the Lattice hardware wallet, they are the best digital backup option, because all you have to do to access your wallet is inserting the card and unlocking it - **the PIN adds the needed layer of protection** that solves the problem of instant-access backup methods like paper or steel (if the seed phrase is not split), while losing none of the convenience and quickness of access to the seed phrase in emergency situations, which can't be provided by paper or steel when the seed phrase is split into multiple distributed parts.

Safecards are a robust solution even in case your Lattice breaks as you can still extract the seed hash (or the actual seed phrase if your cards were purchased in 2023+) using a generic USB card reader (such as [**this one**](https://www.hidglobal.com/products/omnikey-3121)) and the [**SafeCard CLI**](https://docs.gridplus.io/safecards/safecard-cli) app.

#### Can I only use SafeCards to backup my seed phrase and nothing else?

Good question. Yes, you can, but if you want to go down that route, you should have at least **3 copies of each wallet** you want to store this way, and the 3+ cards should all be kept in different locations. If you want to have SafeCards as a long-term backup solution, we recommend you download the code for the **SafeCard CLI** linked above and also store at least some of the cards in weatherproof storage boxes, ideally wrapped in foil, completely isolated from the outside world. One of the locations used to store your SafeCards should be a commercial facility intended for this purpose, such as a bank safe.

SafeCards are a powerful tool for active crypto users as they allow you to easily switch between multiple wallets with one device and in our experience, they are very reliable, but you have to realize that your credit/debit card issuer replaces your card every 2-4 years due to the possibility of the card chip wearing out. This will most likely not happen to the two+ additional SafeCards you will have if you want to go SafeCards-only as they will not be in regular use, but combining the cards with a steel backup is a good option for very valuable wallets.

{% hint style="danger" %}
The **PIN** to your SafeCard(s) should **never** be written down on the SafeCard itself and/or stored anywhere near it. Ideally, you'd just remember it, but in case you need someone else to gain access to your crypto in the future or under certain conditions, no access to a PIN complicates this. So, the best solution is to have the PIN distributed (cut into 2+ parts) and stored in different locations (just like steel) or with your family with instructions on how to operate SafeCards.

Also, every one of your SafeCards should have a **different PIN**, of course.
{% endhint %}

#### Encrypted hard drives

Another secure way you can digitally store your seed phrase is an **encrypted hard drive** on which your seed phrase is stored in a password-protected file. **Encryption** is key here - you can use free open-source software like [**VeraCrypt**](https://www.veracrypt.fr/code/VeraCrypt/) to encrypt your hard drive and protect your data. This will prevent any attacker from reaching your secure info even with physical access to the hard drive, but please note that an encrypted hard drive can still be destroyed quite easily. To store the seed phrase, you can create a simple sheet/doc file and protect it with a password to add a layer of security.

{% hint style="success" %}
When you want to access your seed phrase, it's highly recommended to only connect to this hard drive with an **always-offline computer** to prevent any attacks via the Internet, or at least make sure the computer is offline at the time. In that case, the ideal way to connect to the hard drive is to boot your computer up with a [**Linux USB**](https://ubuntu.com/tutorials/create-a-usb-stick-on-ubuntu#1-overview) via the BIOS.
{% endhint %}

**Other digital backup** methods include computers, phones, USB flash drives, etc. - but we recommend against using them as there are more possible attack vectors and it's easier to extract your seed phrase from standard consumer products like that. However, if you insist on using a backup like this, just make sure you can encrypt the data storage chip where your seed phrase will be and you should be okay.

### Example Setups

#### Example 1: Johnny

Johnny got into crypto very recently. He read that he should use a hardware wallet on Twitter, so he decided to buy a Lattice. Until then, he had all his digital assets stored on Coinbase. Johnny generated a new wallet, wrote the seed phrase down on paper, and also created one SafeCard backup. He sent all of his crypto from Coinbase to his new wallet, now safely stored on the Lattice. He put his paper backup and SafeCard in a sock drawer and completely forgot about them. One day, Johnny's house burned down - very unlucky. In the rubble, Johnny found two pieces of melted plastic - one used to be his Lattice, and the other his SafeCard backup. Not a trace of his paper backup could be found.

Johnny has lost all of his crypto and is now ripping his hair out - **don't be like Johnny**.

{% hint style="info" %}
In this example of a **bad** setup, we wanted to highlight a common case of listening to the crypto community's advice of getting a hardware wallet (which is 100% sound!), but then making the mistake of not thinking of **all possible attack vectors/disaster scenarios** that could happen to your wallet/seed phrase backups.&#x20;

This example should serve as a reminder that once you decide to exclude all 3rd parties, you're on your own when it comes to managing your funds, and you can only hold yourself accountable if you lose them.

Getting a hardware wallet is **definitely** a step in the right direction, a hardware wallet is a very powerful tool, but like it is with all other tools, you have to know what you're doing.&#x20;

Use the tool, don't be one.
{% endhint %}

#### Example 2: Neil

Neil is a passionate NFT guy - he loves his jpegs very much, and he decided to get a Lattice to protect them. Neil actively uses two wallets - one for minting and quick trades and one for his long-term holdings. This played a major role in his decision to get the Lattice, as he wanted to be able to switch between the two wallets on one device quickly if needed.&#x20;

His first wallet (let's call it the **mint wallet**) is stored on the **built-in Lattice wallet** and Neil also created **one SafeCard backup** of it. He keeps this SafeCard in a fireproof sealed security box in his house.

His second wallet (we will call it the **vault**) is much more valuable than the mint wallet and Neil stores it primarily on SafeCards. Neil bought a couple of SafeCard packs and now has **3 SafeCard backups** of this wallet. He keeps one on his desk, right next to his Lattice for quick access to this wallet, another in the same security box as his mint wallet SafeCard, and the third one in his parents' house in a different ZIP code. In addition to this, Neil also has **2 steel plates**, each engraved with 12 words of his 24-word seed phrase - one in his house, and the other in his parents' house again.

One day, Neil's house also burned down and Neil's Lattice was destroyed in the fire. Luckily, but both the security box with his SafeCards and the steel plate with one half of his seed phrase were found relatively unscathed. Neil got a new Lattice very shortly and was able to resume working with both of his wallets, but while he was waiting for his new device to arrive, he missed out on a couple of opportunities and couldn't close an open position, so he lost a little bit of money.

{% hint style="info" %}
Neil's setup is an example of a **good**, albeit not excellent, setup. Neil managed to protect both of his wallets from the fire, but luck also played a role in this scenario - if the fireproof box he kept his SafeCards in wasn't as fireproof as advertised, he would have lost access to his mint wallet (because he only kept copies of that one on the Lattice and on one SafeCard at the same location - his house).

What's important to also think about in your setup is how many wallets you're using, for what purpose and how much you have on them or plan to have on them. Neil was 100% right in putting more effort into backing up the most valuable wallet - his vault. However, this doesn't mean that you should skip backing up your less valuable wallets altogether.

Also, Neil could have bought an emergency [**USB card reader**](https://docs.gridplus.io/safecards/safecard-cli) in case his Lattice stopped working and he still had access to his SafeCards - he would be able to obtain his seed phrase that way and use the wallet he needed quick access to.
{% endhint %}

#### Example 3: Chad

Chad is an OG. If you've ever been on crypto Twitter, you've most likely seen his profile picture. Chad does a little bit of everything; on-chain trading, NFTs, DeFi, etc. He's a member of multiple DAOs and also serves as one of the treasurers for some of them (he has access to a wallet that can be used to sign one out of X multisig signatures). He uses multiple wallets and also manages significant crypto holdings for his friends and family.

Chad manages three kinds of wallets, the first two are similar to Neil's setup; wallets that he needs **quick access** to (mint wallets and trading wallets), and wallets that he usually just sends some profits to when his trades go well or uses them to store valuable NFTs he's not planning on selling - **long-term holdings, vaults**. The third type of wallet Chad uses are the ones needed for multisig required to control a DAO's treasury - these need to be well protected, but should also be accessible quickly in case of an emergency.

Chad's **mint and trading wallets** are stored on the built-in wallet chips of a couple of Lattices on his desk, some smaller hardware wallets for when he travels (kept in a safebox), multiple SafeCards, an encrypted hard drive and also multiple steel capsules (each with 8 or 1/3 of the seed phrase). These "quick-access" wallets were generated using the BIP39 standard, but Chad also added a **passphrase** to all of them. The multisig wallets he's managing are also set up this way. Chad also sent a small amount of crypto to the wallets unlocked by the seed phrases **without** the passphrase in case someone attacks him in person and uses force to make him give his wallets up (a $5 wrench attack). The passphrase needed to unlock the valuable wallets is stored in multiple places (places where he does NOT have hardware wallets loaded with the correct seed phrases!), the most notable being Chad's head - he just remembers it. Chad owns multiple high-end USB card readers.

His wallets intended for **long-term holding** and his **NFT vaults** were created with a Shamir Backup Seed and split into 5 fragments (out of which 3 are needed to access the wallet). Each fragment is stored in a steel capsule and in a different location - bank vaults, vaults in some of Chad's properties, Chad's parents' house, trusted friends' houses, etc. Chad set these wallets up with the intention of not being able to access them unless he gathers fragments from multiple locations.

We don't really need to make up a catastrophic scenario for Chad, because his setup is so good that whatever happens, he will still be able to access all of his wallets. Manage your seed phrases like Chad.

{% hint style="info" %}
Chad's example is obviously blown out of proportions for most users, but we wanted to show a couple of core ideas you should work with if you want to design a **very secure seed phrase management system**:

* Each wallet you're using should have a **defined purpose** and should be used for this purpose only and nothing else
* At least 2, ideally 3+ backup methods for **each** wallet you're using, at least one of them non-digital (ideally steel), and if you're a Lattice user, multiple SafeCard copies
* **Split** seed phrases, **distributed** backups (different locations)
* Using a **passphrase** for BIP39 seed phrases
* Sending some expendable funds on the wallet unlocked by your BIP39 seed phrase **without** the passphrase in case of a $5 wrench attack - **a "dummy" wallet**
* Using a **Shamir Backup Seed** for very valuable wallets that you don't need instant or regular access to, with some of the fragments ideally stored in a bank vault
* If you're planning on only keeping SafeCards at home and other backup methods elsewhere, make sure to buy a [**USB card reader**](https://docs.gridplus.io/safecards/safecard-cli) in case your Lattice breaks down and you need quick access to your wallets
  {% endhint %}

**If you're unsure about your setup and you'd like us to help you, feel free to reach out to us:**

{% embed url="<https://gridplus.io/contact/>" %}


# Lattice1 Power Supply

The power supply we send with the Lattice1 is a standard **US 2-prong (type A)** power supply.

{% hint style="warning" %}
Customers outside the US, Canada and Japan will have to use a **plug adapter!**

You can also use a different power plug than the one provided with the device if you'd like to avoid using an adapter, just make sure the replacement plug **matches the specs below**.
{% endhint %}

### <img src="/files/EXOCQUNyZyXrskAxcLMz" alt="" data-size="original">

### Specifications

* **Model:** TDX-1201000
* **Type:** 5.5x2.5 mm barrel connector
* **Input:** 100-240V 50/60 Hz 0.5A
* **Output:** 12V 1.0A
* **Plug polarity**: inner positive (+), outer negative (-)

{% hint style="success" %}
If you want to move your Lattice1 and are worried about **unplugging it**, you can do so without any worries as long as there's not **anything going on** at the moment (e.g. a firmware update, system or router reset, etc.).
{% endhint %}


# Supported Digital Assets

<figure><img src="/files/hTPOUb7gGwAUWYrCJkx7" alt=""><figcaption></figcaption></figure>

The Lattice1 currently supports the following assets with specified derivation paths:

### Bitcoin (BTC) - NuFi/Lattice Manager&#x20;

* **Derivation path:** `m/49'/0'/0'/0/x`&#x20;
* **Supported address types:**
  * Legacy/P2PKH BTC addresses (starting with `1`)
  * Wrapped SegWit/P2SH addresses (starting with `3`) - this is the default address format on your Lattice device
  * We also support native SegWit/bech32 addresses (starting with `bc1`)

{% hint style="success" %}
Advanced users may request BTC addresses on any **BIP44 path** - these may be requested and signed against using the [**GridPlus SDK**](https://github.com/GridPlus/gridplus-sdk).
{% endhint %}

### Ethereum (ETH) - MetaMask/Rabby/Frame/MyCrypto

{% hint style="success" %}
When it comes to Ethereum-based assets, the general rule is that **if you can connect it to MetaMask or Rabby, you can use it with the Lattice1**.&#x20;
{% endhint %}

* **Derivation path:** `m/44'/60'/0'/0/x`
* **ETH Layer 2 protocols and forks:**
  * Binance Smart Chain
  * Polygon
  * Avalanche
  * Arbitrum
  * And others
* **ERC-20 tokens such as:**
  * USDT (stablecoin)
  * USDC (stablecoin)
  * DAI (stablecoin)
  * BAT
  * LINK
  * And others (list of all ERC-20 tokens can be found[ here)](https://bloxy.info/list_tokens/ERC20)
* **ETH and ETH Layer 2 NFTs:**
  * ERC-721, ERC-1155, ERC-998 (NFTs on Ethereum mainnet)
  * NFTs on Polygon, Immutable X, etc.

### Solana (SOL) - NuFi

* Derivation paths:\
  BIP 44 Root: `m/44'/501'`\
  Legacy (Solflare): `m/44'/501'/0'`\
  BIP 44: `m/44'/501'/0'/0'`
* All SPL tokens (stablecoins, memecoins, everything on SOL)
* Metaplex Protocol-based assets such as NFTs and RWAs
* Dapps such as Jupiter, Magic Eden or Tensor


# Lattice1 WiFi Troubleshooting

{% hint style="info" %}
Here are the conditions for your Lattice1 to be able to connect to your network:&#x20;

* The Lattice1's WiFi module uses **2.4GHz** only - 5 GHz SSIDs will NOT show up on the device. You can try creating a separate 2.4 GHz-only network.
* The supported encryption types are **WEP, WPA/PSK** and **WPA2-PSK.**
* Your network's **name (SSID)** has to be shorter than **32 characters**.
* Same goes for the **WiFi password**, also has to be **<32 characters**.
  {% endhint %}

## Troubleshooting

### A. Network not showing up on the Lattice1

{% hint style="danger" %}
**The network you wish to connect cannot be set up to operate on 5 GHz only!**\
**Please make sure the conditions above are met before continuing.**
{% endhint %}

So, your network works on 2.4 GHz, uses one of the supported encryption types and the SSID is not too long. What now?

#### 1. Refresh the list

The first step here would be to refresh the page with available networks several times and going through all the pages - the scan sometimes does not capture every wifi network, especially in a location where there may be many other networks interfering. We have also seen a very small number of cases where the network's SSID showed up on its own after some time.

#### 2. Try power cycling

Try power cycling both your Lattice1 and your router. Unplug your Lattice1, unplug your router, let them both sit for 1 minute and plug them both back in. Your router may take some time to restart and renew internet access. When your router comes back alive, refresh the list of available networks on the Lattice1 and you should see yours.

#### 3.  Create a dedicated 2.4 GHz network (if you don't have one already)

&#x20;If this doesn't help, try turning autoswitching off (in case your router switches between bands with the same SSID) and create separate SSIDs for 2.4 GHz and 5 Ghz. If that's a pain, you can configure a 2.4 GHz guest network with an alternate SSID (you should be able to find out how in your router's manual).

{% hint style="info" %}
You can also try [**connecting manually via SSH**](https://docs.gridplus.io/lattice1-guides/connect-to-wifi-using-ssh). This requires an Ethernet connection.
{% endhint %}

### B. "Unable to connect" error on a network your device can see

#### 1. Try a 2.4 GHz phone hotspot

Let's check if you can connect to another network to make sure the problem is not with the Lattice1's WiFi module. Please create a 2.4 GHz mobile hotspot and try connecting to it. If you can connect to your hotspot, the problem is most likely with your network's configuration.&#x20;

{% hint style="success" %}
By default, your phone hotspot will most likely be on 5 GHz and this invisible to the Lattice. To turn on 2.4 GHz, look around for a "**Maximize compatibility**" option in hotspot settings.
{% endhint %}

If you haven't yet, also try connecting via Ethernet to see if your Lattice can get online at all.

#### 2. Once again, make sure your network meets the conditions for a successful connection

If you can connect to a 2.4 GHz phone hotspot, please go into your router settings and:

* Make sure the encryption type used is one of these: WEP, WPA-PSK and WPA2-PSK
* Make sure your SSID and WiFi password are shorter than 32 characters
* Check if your **router** is not blocking the Lattice from accessing the internet
* Check if your **firewall** is not blocking the Lattice from accessing the internet
* Try turning **UPnP** on if it's off
* Etc. Different router models have different settings, try searching for something obvious that could be a problem, something preventing the Lattice from connecting

{% hint style="info" %}
Router settings can usually be accessed by typing the router's IP address into the address bar on your browser (the IP itself should be on the router sticker) and using login credentials provided by your ISP, or by using a web app provided by the router's manufacturer.

You should be able to find a guide on how to access your router settings in your router's manual - if you can't find it, try obtaining it from your ISP.
{% endhint %}

#### 3. Reset your Lattice's router

If everything else fails, you can opt to reset the device router. You can do that by going to **System Preferences → Security & Privacy → Reset Router**. Please note this will change the **Device ID** you use to connect to apps. After your reset the router, power cycle the device and let it sit for 5-10 minutes before attempting to connect again.

{% hint style="success" %}
The steps above will resolve 99% of WiFi issue cases we've seen.
{% endhint %}

### C. Other options

#### 1. Change the Lattice IP address

A very rare issue can be a cause of connection problems - the device can use the same subnet as your router - this means both the Lattice and your router have the same IP address. If this is the case, the two devices will overlap and this will cause the device to behave erratically - random disconnects, spotty connection, requests not being sent back to apps they were requested from, etc.

This only happens if your router's IP address is **192.168.3.1** (this is the default Lattice IP address) - the ideal solution here is to change either the IP address of the Lattice1 or the router. Below you can find a guide on how to change the Lattice IP.

First, you'll have to make sure you can connect to the device - since we're troubleshooting WiFi, your best bet here is connecting **via Ethernet**. Once your device is on your network, you will then [**SSH into your device**](/lattice1/lattice1-guides/how-to-communicate-with-your-lattice1-via-ssh) and use the following commands:

```
uci set network.wlan.ipaddr=192.168.9.1 
uci commit network
/etc/init.d/network restart
```

The **new IP address** from the first line can be whatever you want as long as it's unique within your network - we have used `192.168.9.1` as a general placeholder, but it's of course usable.

After you change the Lattice IP, power cycle the device and try connecting again.

{% hint style="info" %}
Please note that if you ever reset the Lattice's router after changing the IP manually, you will have to re-do this as the IP will revert back to the default `192.168.3.1`.
{% endhint %}

#### 2. Just wait...

We have seen a fair amount of WiFi issues over the years, and when everything else fails, one thing that has worked for some of our clients in the past was just **waiting** and trying again after some time.

For usually unknown reasons, their networks suddenly showed up on their devices, or they were able to connect despite getting multiple errors before - without any changes to their network setup.

So, just wait and try connecting again in a couple of hours. If that doesn't help, leave both your Lattice and your router unplugged overnight and give the Lattice another chance in the morning.

#### 3. Use a WiFi2Ethernet adapter

If you can connect the device via **Ethernet,** get it online and ready to sign transactions, but connecting via cable is not a viable long-term solution for you (your router is in another room, etc.), you can try getting a WiFi2Ethernet adapter such as [**this one**](https://www.iogear.com/product/GWU637/).

#### 4. Contact GridPlus and/or a networking expert

Feel free to join [**our Discord**](https://discord.gg/gridplus) or [**open a ticket**](https://gridplus.io/contact/) if you still can't connect after trying everything in the guide above. We'll do our best to help you. Also, consider consulting a networking expert in your area, there's only so much we can do without physical access to your location.&#x20;

{% hint style="success" %}
**But definitely get in touch with us first and we'll see what we can do.**
{% endhint %}


# Lattice1 Firmware Reference

> **For Lattice firmware v0.18.9**

### Status Icons

Various icons appear in the status bar at the top of the Lattice firmware screen and are used to indicate various system statuses.

<table><thead><tr><th width="86" align="center">Icon</th><th>Description</th></tr></thead><tbody><tr><td align="center"><img src="/files/2T46dewdFUKT3wZqUV7I" alt="" data-size="line"></td><td><strong>Security mesh is armed</strong> and intact. Any break in the circuit will permanently lock the device.</td></tr><tr><td align="center"><img src="/files/BZITwi6bIfTyfmCFKokX" alt="" data-size="line"></td><td><strong>Security mesh is disarmed</strong> or has not been configured. The device will not permanently lock, but may be susceptible to intrusion attempts while disarmed. It cannot ever be re-armed if the circuit is broken while in this state.</td></tr><tr><td align="center"><img src="/files/GTtCbajXkNfbqwr7kgLU" alt="" data-size="line"></td><td>Device is connected to the Internet via <strong>WiFi</strong>.</td></tr><tr><td align="center"><img src="/files/OeaTAoHMDPXj8nzgHteP" alt="" data-size="line"></td><td>Device is connected to the Internet by a <strong>wired connection (Ethernet)</strong>.</td></tr><tr><td align="center"><img src="/files/HyeFLRBUMCcefCrtBLNy" alt="" data-size="line"></td><td>Device is <strong>not</strong> connected to the Internet.</td></tr><tr><td align="center"><img src="/files/Ihz1n3zIvCY6IJVIw0bB" alt="" data-size="line"></td><td><strong>Secure system has not yet connected to the router</strong>. It takes about a minute from boot for the two systems to connect.</td></tr><tr><td align="center"><img src="/files/vOjUXqSSCFOvr8u8mZKO" alt="" data-size="line"></td><td><strong>Secure system failed to connect to the router</strong>. There may be an issue with the device.</td></tr></tbody></table>

### Menus and Options

This section outlines different menus and options you will encounter in Lattice firmware.

#### Homescreen

<table><thead><tr><th width="94" align="center">Icon</th><th width="194">Label</th><th>Description</th></tr></thead><tbody><tr><td align="center"><p><img src="/files/bQf9T35RRRzLAxSQaZQq" alt="" data-size="line"></p><p> <img src="/files/gKbPQHHQZCq2Dt81PXhz" alt="" data-size="line"> </p></td><td><p><strong>Lattice1 Wallet</strong></p><p><strong>SafeCard Wallet</strong></p></td><td>View addresses related to the active wallet. Will read "SafeCard Wallet" if a card is inserted and unlocked, or "Lattice1 Wallet" otherwise. You can find your <a href="/pages/Gl5bzqtj0RaGpF7DSKgg"><strong>ETH staking keys</strong></a> here and also <a href="/pages/4Vu7zQqLOGRp1t9BG4nR"><strong>view the seed phrase</strong></a>.</td></tr><tr><td align="center"><a href="#manage-wallets"><img src="/files/aBfQOq0Ob6JVo553pqMd" alt="" data-size="line"> </a></td><td><a href="#manage-wallets"><strong>Manage Wallets</strong></a></td><td>Various actions related to the Lattice and/or SafeCard wallet. Options you can find here explained below.</td></tr><tr><td align="center"><a href="#permissions"><img src="/files/vQ7W8149Cnb8QQLA8Q6K" alt="" data-size="line"> </a></td><td><a href="#permissions"><strong>Permissions</strong></a></td><td>Manage permissions for connected applications.</td></tr><tr><td align="center"><a href="#system-preferences"><img src="/files/f884ug8r6Q6vhIbldNXt" alt="" data-size="line"> </a></td><td><a href="#system-preferences"><strong>System Preferences</strong></a></td><td>Manage settings, security configurations, and do advanced user things.</td></tr><tr><td align="center"><img src="/files/eHbaOkCrRht6wqavCxVh" alt="" data-size="line"> </td><td><strong>Device ID</strong></td><td>View the Device ID, which is needed to connect to external applications.</td></tr></tbody></table>

#### <img src="/files/aBfQOq0Ob6JVo553pqMd" alt="" data-size="line"> Manage Wallets

{% hint style="info" %}
For more details and a couple of examples, please see [**SafeCard Operations**](https://docs.gridplus.io/safecards/safecard-operations).
{% endhint %}

<table><thead><tr><th width="144" align="center">Icon</th><th width="214">Label</th><th>Description</th></tr></thead><tbody><tr><td align="center"><img src="/files/gKbPQHHQZCq2Dt81PXhz" alt="" data-size="line"><img src="/files/uWVCgNrVlwQwWDlvwxPq" alt="" data-size="line"><img src="/files/bQf9T35RRRzLAxSQaZQq" alt="" data-size="line"> </td><td><strong>Restore from SafeCard</strong></td><td>With an unlocked SafeCard inserted, this copies that card's wallet to the Lattice. <strong>This will remove your current Lattice wallet</strong>.</td></tr><tr><td align="center"><img src="/files/bQf9T35RRRzLAxSQaZQq" alt="" data-size="line"><img src="/files/uWVCgNrVlwQwWDlvwxPq" alt="" data-size="line"><img src="/files/gKbPQHHQZCq2Dt81PXhz" alt="" data-size="line"> </td><td><strong>Backup to SafeCard</strong></td><td>Backup the Lattice wallet onto a SafeCard that has no wallet. This process must be started without a SafeCard inserted.</td></tr><tr><td align="center"><img src="/files/gKbPQHHQZCq2Dt81PXhz" alt="" data-size="line"><img src="/files/uWVCgNrVlwQwWDlvwxPq" alt="" data-size="line"><img src="/files/gKbPQHHQZCq2Dt81PXhz" alt="" data-size="line"> </td><td><strong>Copy SafeCard</strong></td><td>With an unlocked SafeCard inserted, this copies that card's wallet to a different SafeCard that has no wallet.</td></tr><tr><td align="center"><img src="/files/bQf9T35RRRzLAxSQaZQq" alt="" data-size="line"><img src="/files/uWVCgNrVlwQwWDlvwxPq" alt="" data-size="line"><img src="/files/a8BG92Ik64XHi8J6ZIJe" alt="" data-size="line"> </td><td><strong>Change Lattice PIN</strong></td><td>Change the PIN for your Lattice device's system.</td></tr><tr><td align="center"><img src="/files/gKbPQHHQZCq2Dt81PXhz" alt="" data-size="line"><img src="/files/uWVCgNrVlwQwWDlvwxPq" alt="" data-size="line"><img src="/files/a8BG92Ik64XHi8J6ZIJe" alt="" data-size="line"> </td><td><strong>Change SafeCard PIN</strong></td><td>Change the PIN for an unlocked and inserted SafeCard.</td></tr><tr><td align="center"><img src="/files/bQf9T35RRRzLAxSQaZQq" alt="" data-size="line"><img src="/files/uWVCgNrVlwQwWDlvwxPq" alt="" data-size="line"><img src="/files/asFZ4v7VXiL65XOOphcs" alt="" data-size="line"> </td><td><strong>Reset Lattice Wallet</strong></td><td>Removes the current Lattice wallet.</td></tr><tr><td align="center"><img src="/files/gKbPQHHQZCq2Dt81PXhz" alt="" data-size="line"><img src="/files/uWVCgNrVlwQwWDlvwxPq" alt="" data-size="line"><img src="/files/asFZ4v7VXiL65XOOphcs" alt="" data-size="line"> </td><td><strong>Reset SafeCard Wallet</strong></td><td>Removes SafeCard wallet for card that is inserted and unlocked.</td></tr></tbody></table>

#### <img src="/files/vQ7W8149Cnb8QQLA8Q6K" alt="" data-size="line"> Permissions

The **Permissions menu** contains a list of connected applications (if any). These items are added when you pair an app with a Lattice and can be removed in this menu at any time.

Currently all connected apps have permission to make any type of request, but all signing requests must be authorized by the user by approving on the device screen.

#### <img src="/files/f884ug8r6Q6vhIbldNXt" alt="" data-size="line"> System Preferences

<table><thead><tr><th width="89" align="center">Icon</th><th width="178">Label</th><th>Description</th></tr></thead><tbody><tr><td align="center"><a href="#system-settings"><img src="/files/f884ug8r6Q6vhIbldNXt" alt="" data-size="line"> </a></td><td><a href="#system-settings"><strong>System Settings</strong></a></td><td>Manage various settings for the device.</td></tr><tr><td align="center"><a href="#security-and-privacy"><img src="/files/ErUwa7k0AhQcDevUB8WA" alt="" data-size="line"></a></td><td><a href="#security-and-privacy"><strong>Security &#x26; Privacy</strong></a></td><td>Manage security settings and reset subsystems.</td></tr><tr><td align="center"><a href="#wifi"><img src="/files/GTtCbajXkNfbqwr7kgLU" alt="" data-size="line"> </a></td><td><a href="#wifi"><strong>WiFi</strong></a></td><td>Setup WiFi or change network.</td></tr><tr><td align="center"><a href="#software-update"><img src="/files/sK8rI6scpJBVjyn8V9ws" alt="" data-size="line"> </a></td><td><a href="#software-update"><strong>Software Update</strong></a></td><td>Check for Lattice software updates.</td></tr><tr><td align="center"><img src="/files/eHbaOkCrRht6wqavCxVh" alt="" data-size="line"> </td><td><strong>Device Info</strong></td><td>Displays info such as software versions and SSH settings.</td></tr><tr><td align="center"><img src="/files/6lGo0eVTILVgHyW3s8Rb" alt="" data-size="line"> </td><td><strong>Help</strong></td><td>Scan a QR code to launch the docs page (i.e. this).</td></tr></tbody></table>

#### <img src="/files/f884ug8r6Q6vhIbldNXt" alt="" data-size="line"> System Settings

<table><thead><tr><th width="106" align="center">Icon</th><th width="183">Label</th><th>Description</th></tr></thead><tbody><tr><td align="center"><p><img src="/files/AEcgRh7DSDjJSdsXV87d" alt="" data-size="line"></p><p><img src="/files/pY4vDgBnKwgO5OPiozKC" alt="" data-size="line"> </p></td><td><strong>Confirm Mnemonic</strong></td><td><em><strong>Required</strong></em> or <em><strong>Not Required</strong></em>. If required, user must confirm four words for each newly generated mnemonic before the wallet can be setup with it. Does not apply to restore/backup/copy operations.</td></tr><tr><td align="center"><p><img src="/files/AEcgRh7DSDjJSdsXV87d" alt="" data-size="line"></p><p><img src="/files/pY4vDgBnKwgO5OPiozKC" alt="" data-size="line"> </p></td><td><strong>bech32 addresses</strong></td><td><em><strong>Enabled</strong></em> or <em><strong>Disabled</strong></em>. If enabled, bech32 style addresses will be the default for Bitcoin. Otherwise, wrapped segwit addresses will be the default. Note that any address type may be requested by an app regardless of this setting.</td></tr><tr><td align="center"><img src="/files/LOHsz9TmtZRZ80n8ePzc" alt="" data-size="line"> </td><td><strong>Screen Brightness</strong></td><td>Adjust the brightness of all screens.</td></tr><tr><td align="center"><img src="/files/ovAIVSxVWly1Qv02yFfd" alt="" data-size="line"> </td><td><strong>Sleep Timer</strong></td><td>Adjust the time it takes for the screen to go to sleep and lock (4 - 60 minutes).</td></tr></tbody></table>

#### <img src="/files/ErUwa7k0AhQcDevUB8WA" alt="" data-size="line"> Security & Privacy

<table><thead><tr><th width="86" align="center">Icon</th><th width="230">Label</th><th>Description</th></tr></thead><tbody><tr><td align="center"></td><td><strong>Encryption Password</strong></td><td>Used for exporting secure data, currently only useful for <a href="/pages/Gl5bzqtj0RaGpF7DSKgg"><strong>staking ETH</strong></a>.</td></tr><tr><td align="center"><img src="/files/ZVCnvOwWfJG1K6zepVqF" alt="" data-size="line"> </td><td><strong>Verify Lattice</strong></td><td>Verify the authenticity of your Lattice device. Read more about <a href="https://docs.gridplus.io/lattice1-guides/how-to-verify-that-your-lattice1-is-authentic"><strong>this feature and how it works here</strong></a>.<br><br>You can also claim a unique <a href="https://docs.gridplus.io/lattice1/lattice1-guides/how-to-claim-your-verified-lattice1-owner-poap"><strong>Lattice owner POAP</strong></a> via this feature!</td></tr><tr><td align="center"><img src="/files/cBLCJhQ91jDhb0XSQNCN" alt="" data-size="line"> </td><td><strong>Configure Security Mesh</strong></td><td>Arm or disarm the security mesh. If the mesh is armed, any break in the circuit will permanently lock the device. This is designed to prevent physical intrusion attempts.</td></tr><tr><td align="center"><img src="/files/0r3YX8SolkRGaMftjypW" alt="" data-size="line"> </td><td><strong>Reset Router</strong></td><td>Perform a factory reset on your router module. Will remove wifi network and generate a new <strong>Device ID</strong>. This may result in an automatic update to sync with the latest router software version. <br><br>This action will <strong>NOT</strong> reset your crypto wallet currently stored on the Lattice.</td></tr><tr><td align="center"><img src="/files/ErUwa7k0AhQcDevUB8WA" alt="" data-size="line"> </td><td><strong>Reset Secure System</strong></td><td>Perform a factory reset on your <strong>secure system</strong> module. <strong>Will erase your Lattice wallet</strong>, system PIN, and all secure data.<br><br><strong>Only</strong> do this if you have a <strong>backup</strong> of your wallet - seed phrase and/or SafeCard!</td></tr></tbody></table>

#### <img src="/files/GTtCbajXkNfbqwr7kgLU" alt="" data-size="line"> WiFi

The WiFi menu allows you to view your current WiFi network, forget your current WiFi network, and/or connect to a new network. The device may only connect to one WiFi network at a time and may not connect to WiFi if a wired (Ethernet) connection was established when the device booted.

#### <img src="/files/sK8rI6scpJBVjyn8V9ws" alt="" data-size="line"> Software Update

This menu option will check for the latest versions of Lattice software.

<table><thead><tr><th width="150">Software Type</th><th width="268">Description</th><th width="183">Installation Method</th><th width="166">Latest Version</th></tr></thead><tbody><tr><td><strong>Firmware</strong></td><td>Runs the Lattice UI and all secure systems.</td><td>User approval required</td><td>0.18.9</td></tr><tr><td><strong>Bootloader</strong></td><td>Secure bootloader for Lattice firmware. Ensures firmware updates are signed and valid.</td><td>User approval required</td><td>0.3.3</td></tr><tr><td><strong>Router</strong></td><td>Routes encrypted messages from the Internet to firmware. This software exists on a different physical chip than the secure system.</td><td>Automatic</td><td>0.49.0</td></tr></tbody></table>


# Lattice1 Guides 🛠️

You can find guides for a couple of tricks you can do with your Lattice here.

### Firmware operations

**Update the Firmware** - a short article about how the Lattice1's firmware is updated and where you can find this option on the device.

{% embed url="<https://docs.gridplus.io/lattice1/lattice1-guides/how-to-upgrade-the-firmware>" %}

**Verify That Your Lattice1 Is Authentic** - a useful firmware tool that lets you confirm your device is a an original GridPlus product via reaching out to our servers to prove its authenticity.

{% embed url="<https://docs.gridplus.io/lattice1/lattice1-guides/how-to-verify-that-your-lattice1-is-authentic>" %}

**View the Seed Phrase on Your Lattice and SafeCard** - an in-depth look on a feature released in 2024 that lets you view the seed phrase on both your Lattice1 hardware wallet and your SafeCards - if they meet certain conditions.

{% embed url="<https://docs.gridplus.io/lattice1/lattice1-guides/view-the-seed-phrase-on-your-lattice-and-safecard>" %}

### GridPlus community

**Claim Your "Verified Lattice1 Owner" POAP and Discord Role** - a guide on how to get the Lattice1 Owner role on our Discord and be eligible to mint our unique NFT (the first hardware-backed one ever!) - a GridPunk.

{% embed url="<https://docs.gridplus.io/lattice1/lattice1-guides/how-to-claim-your-verified-lattice1-owner-poap>" %}

**Mint Your GridPunk!** - a guide on how to mint yours once you're a verified Lattice1 owner.

{% embed url="<https://docs.gridplus.io/lattice1/lattice1-guides/mint-your-gridpunk>" %}

### SSH guides

{% hint style="info" %}
SSH allows you to communicate with your Lattice via command line and lets you do things you can't do directly on the device screen. Usually used in troubleshooting issues.
{% endhint %}

**Establish a Connection With Your Lattice1 via SSH** - a guide on how to open a communication channel with your device so you can then send commands to it and request info.

{% embed url="<https://docs.gridplus.io/lattice1/lattice1-guides/how-to-communicate-with-your-lattice1-via-ssh>" %}

**Connect to WiFi Using SSH** - a set of commands that allows you to connect your Lattice1 to a WiFi network manually.

{% embed url="<https://docs.gridplus.io/lattice1/lattice1-guides/connect-to-wifi-using-ssh>" %}

**Disable Wifi When Connected via Ethernet Using SSH** - the Lattice1 will keep the WiFi module active by default, but if you wish to turn it off completely and only use Ethernet, this is the guide for you.

{% embed url="<https://docs.gridplus.io/lattice1/lattice1-guides/how-to-manually-disable-wifi-when-connected-via-ethernet>" %}

### Staking Ethereum

**Managing ETH Validator Keys** - a guide for ETH stakers running a node.

{% embed url="<https://docs.gridplus.io/lattice1/lattice1-guides/managing-eth-validator-keys>" %}


# Update the Firmware

### Latest Firmware

If you're looking for what's new, you can find the latest firmware revision on our GitHub, along with the full revision history.

{% embed url="<https://github.com/GridPlus/lattice-firmware-history>" %}

{% embed url="<https://www.youtube.com/watch?v=ZTFhcJoMdQk>" %}

### The Process

The Lattice1 will check for **updates to the HSM firmware** automatically every 6 hours. Once an update is available, the device will prompt you to confirm the installation of the new update manually.

<figure><img src="/files/C3JvcWwumrBq5jkjguf3" alt=""><figcaption></figcaption></figure>

Then all you need to do is kick back and watch the progress bar for a minute or two. Your device will reboot and you’ll be back in action with an upgraded Lattice1.

The HSM update will never be installed **without your approval**. However, we strongly recommend you upgrade to every single new update available.

{% hint style="success" %}
You can also check if an update is available **manually** without waiting for the regular 6-hour scan if you go to **System Preferences → Software Update** on your Lattice1.

Also, if you want to make sure what **firmware revision** you have in your device, you can check this if you go to **System Preferences → Device info**.
{% endhint %}

Check out the current version of our firmware with explanation for each function here:

{% embed url="<https://docs.gridplus.io/lattice1/lattice1-firmware-reference>" %}

{% hint style="danger" %}
Never unplug the Lattice while it's installing a firmware update!

It's also possible to encounter the firmware update failing, if this happens to you, just wait for 5-10 minutes and try again. If this doesn't help, try powercycling the Lattice - unplug it and plug it back in. Only do this if the device is **not** currently installing the update.
{% endhint %}

### Update Security

How can we safely update your secure hardware over the air like this? Every release must be signed by **multiple GridPlus private keys** which are separated geographically so your device can verify the provenance of the release. The **secure bootloader** will reject any updates that do not meet these strict criteria before installing anything. You can also use the [**verification tool**](/lattice1/lattice1-guides/how-to-verify-that-your-lattice1-is-authentic) to make sure your Lattice1 is authentic - no other device can receive our update.

The device is made up of two elements (the HSM/SCE and the GCE) - the **GCE** that runs a simple Linux system updates automatically (far less often than the SCE), but every single part of the device is constructed with the **idea that the GCE is vulnerable at all times** - this means that no part of the system that handles secure data is ever exposed to the update.

In other words, **funds are safu**.

{% hint style="info" %}
The **Linux GCE is also updated** - the updates are very infrequent and automatic - you're not prompted to approve them. These happen completely outside of the secure chip running the firmware and do not touch any secure data or private keys.
{% endhint %}


# Verify That Your Lattice1 Is Authentic

You can verify that your Lattice1 is a **GridPlus original** for peace of mind when managing your funds.

{% embed url="<https://www.youtube.com/watch?v=KLld7tKR1WI>" %}

### How to Do It

Here's how to verify:

1. On your Lattice1 screen, go to **System Preferences.**
2. Select the second option - **Security & Privacy.**
3. Now select **Verify Lattice.**
4. Type in **any characters** and press enter (ENT).
5. The device will generate a **QR code** - if you go to the URL that's contained within, you should end up at a **gridplus.io subdomain** that confirms the authenticity of your Lattice1.

### How It Works

This process validates the **origin of the device** itself. Every Lattice1 has a **unique ID key pair** saved in the applet when it is initialized. The public key gets signed by the issuer (us - GridPlus) and that signature is saved in the applet - we call this signature **the certificate**.

When you type in **the characters** from step 4 of the guide above, your Lattice’s ID key signs that message and exports that signature along with the **certificate**. The data is displayed as a QR code and can be scanned, bringing the user to a gridplus.io subdomain page which informs them whether **both** the Lattice1’s ID key signed the provided message (what the user just typed in should be on the page as the **message**) AND if the card’s ID key was itself signed by the card issuer - GridPlus (if it was, you will see the **verified checkmark**). This is what the page the QR code sends you to should look like:

<figure><img src="/files/AnFlTAPlClwguEQn9fCU" alt=""><figcaption></figcaption></figure>

### Get Your Role, POAP and GridPunk!

This feature is involved in getting the **Verified Lattice1 Owner** role on our Discord and then minting one of the official GridPlus NFTs - a GridPunk! Find out how to get yours here:

{% embed url="<https://docs.gridplus.io/lattice1-guides/how-to-claim-your-verified-lattice1-owner-poap>" %}


# View the Seed Phrase on Your Lattice and SafeCard

You can view the seed phrase stored on the Lattice or on a SafeCard very easily, but there are a couple of conditions that need to be met for you to be able to do that.

1. If you want to view the seed phrase on the Lattice1 wallet, you will need to have a device that was purchased in 2023 and onwards.
2. If you want to view the seed phrase on a SafeCard wallet, you will need to have a SafeCard with an updated applet. If your SafeCards were purchased in 2023 and on, they will have the new applet.

{% embed url="<https://www.youtube.com/watch?v=u1wp5A6z4uA>" %}

{% hint style="success" %}
You can of course still use your old SafeCards the way you're used to. Think of it this way: older Lattices/cards will only have **one slot** on the secure chip, and this slot will hold the seed hash, the hexadecimal string used in deriving addresses and private keys.

On newer devices/cards, this seed hash slot will stay the same, but in addition to it, there will also be a second slot that will hold the seed phrase itself in the 12/18/24-word format.
{% endhint %}

If your Lattice1 and/or SafeCard(s) have the updated applet, you can easily view the seed phrase by clicking on the first option on the Lattice homescreen (**Lattice1/SafeCard Wallet**) and then selecting **Display Lattice1/SafeCard Seed Phrase**.

Please note that this feature is **PIN-protected**, and you will have to unlock your device with its PIN if you want to see the Lattice1 wallet's seed phrase, or type in the SafeCard PIN if you want to see the seed phrase of the SafeCard wallet. You will ONLY see the **seed phrase** (12/18/24 words) - if you created a [**passphrase**](https://docs.gridplus.io/lattice1-guides/how-to-manage-your-seed-phrase#passphrases), it will not be shown on this screen.

{% hint style="danger" %}
**NEVER view your seed phrase in public! ONLY do this if you're alone!**&#x20;

If someone gains access to your seed phrase, they will be able to control your wallet and all its assets - unless your wallet was generated with a custom passphrase. But even that situation is far from ideal and you should make sure your seed phrase is well-protected - if you're not sure about your setup, **please read through our article on this topic**:
{% endhint %}

{% embed url="<https://docs.gridplus.io/lattice1-guides/how-to-manage-your-seed-phrase>" %}

{% hint style="info" %}
Also, Lattices/cards with the older applet are **100% compatible** with Lattices/cards with the new applet, but please note this might have impact on Manage Wallets operations.&#x20;

For example, if you copy an older SafeCard to a brand new and unused one with the new applet, the **seed hash/wallet will get copied just fine**, but since the older SafeCard wasn't able to store the seed phrase, your new card will now only hold the seed hash and you won't be able to view the seed phrase on the device (because it's not there).

In this particular case, it's better to create the wallet on the new card via the [**Restore from Seed Phrase option**](https://docs.gridplus.io/safecards/safecard-operations) instead of copying an older SafeCard with the same wallet, as you will get both the seed hash AND the seed phrase.&#x20;
{% endhint %}


# Claim Your "Verified Lattice1 Owner" POAP and Discord Role

You can sign a message via your Lattice1 hardware wallet and earn your very own "Verified Lattice1 Owner" POAP. This is the first time ever that one could earn a POAP via hardware verification! Using this POAP, you can also claim a special Discord role on our server giving you access to mint a GridPunk!\
![](/files/EBwySjdcuB56ueANmllM)

### How to Claim your POAP

In short: Using our built-in Lattice1 verification feature and by signing the word "POAP" (or "poap") you will be forwarded to a POAP claim page.\
\
**Detailed step-by-step guide:**

1. First, from the Lattice1 home screen navigate to **System Preferences → Security & Privacy → Verify Lattice.**\
   \
   ![](/files/AecgNZcJckVnsLSCokzI)
2. Now, your Lattice’s ID key signs that message and exports that signature along with the **certificate**. The data is displayed as a QR code and can be scanned, which links to a gridplus.io subdomain page which verifies that your device is an authentic GridPlus Lattice1, it now also checks if the message you typed in is "POAP" or "poap".\
   ![](/files/0Ya1JmGsJac4esNen5xT)
3. Your Lattice1 is now verified to have genuine GridPlus firmware! As a n added bonus, since you've entered "POAP/poap" as your message, you will now see a POAP claim link at the bottom of the verification page:\
   ![](/files/3YJSkn4ecIhgbny8YEqI)
4. On the POAP page simply enter your ENS or Ethereum address. You now have the special "Verified Lattice1 Owner" POAP in your wallet!\
   ![](/files/wygmOIlM3NaZm54g13oe)

### How to claim your Discord Role

1. After you have the POAP claimed in an address you can sign with, head over to our [**Discord server**](https://discord.gg/gridplus) and to this [**specific announcement**](https://discord.com/channels/727934140980396063/1267974377530462351/1267974380164612146). <br>

   <figure><img src="/files/ARSIp8bkOusQ7fly9ZCA" alt=""><figcaption></figcaption></figure>
2. Click the "Claim Role" button and a link will appear at the bottom of the thread.&#x20;
3. Connect the **same Ethereum address that you minted the POAP to.**
4. You should now be granted the "**Verified Lattice Owner**" role!

**Now go mint your GridPunk!**

{% embed url="<https://docs.gridplus.io/lattice1-guides/mint-your-gridpunk>" %}

### Privacy Considerations

GridPlus does not, and can not, make the connection between a specific user's Lattice when a user claims the POAP to their address. We (our backend code) only know that a valid Lattice1 key has signed the message "POAP". The POAP can be minted to any wallet the user chooses. Also, the POAP does not have to be minted to a Lattice1 wallet's address at all. If the user wishes the POAP, which is a publicly viewable NFT, can be minted to a new address to maintain anonymity.

To claim the Discord role GridPlus uses the Guild.xyz discord bot which checks a users connected address for the required POAP to claim the role. [ **The guild bot is completely open source**.](https://github.com/guildxyz/guild.xyz) Again, the Discord account can be connected through the bot to any of the user's addresses they wish to connect, and the role will be awarded if the connected address contains the POAP.


# Mint Your GridPunk!

**GridPunks** are the first ever **hardware-verified NFTs,** meaning that in order to claim the NFT, you must sign with a Lattice1's unique PUF chip to claim. GridPunks are limited to 1000 total and they come with a variation of traits, some of them rarer than others, just like the original CryptoPunks.

<figure><img src="/files/PVClNeuSIRX40Ee7Kdmm" alt=""><figcaption></figcaption></figure>

### How It Works

Irreproducible atomic scale variations on the secure enclave chip inside the Lattice1 and our firmware keys are combined in true entropy to create unique keys for each Lattice1. Using the subsequent key, a message can be signed to earn a special "Verified Lattice1 Owner" POAP. This POAP can be claimed to any Ethereum address. Using the POAP in our discord, a "Verified Lattice Owner" Discord server role can be assigned which gives the ability to mint one **GridPunk** per each Lattice1.&#x20;

### Step-By-Step Guide

1. [**Claim your "Verified Lattice Owner" POAP** ](https://docs.gridplus.io/lattice1/lattice1-guides/how-to-claim-your-verified-lattice1-owner-poap)\
   In short, on your Lattice1 go to: **System Preferences → Security & Privacy → Verify Lattice** and sign the message "**POAP**". You will then be directed to a page with a claim link for your POAP. via QR code.
2. [**Join our Discord** ](https://discord.gg/gridplus)and then claim your [**Verified-Lattice-Owner role**](https://discord.com/channels/727934140980396063/797946570518691870/1037096059580711076)&#x20;
3. Head over to [**the mint page** ](https://gridplus.io/gridpunks)to mint your GridPunk! They are free to mint, just pay the Ethereum gas fee.

### Privacy Considerations

GridPlus does not, and can not, make the connection between a specific user's Lattice and their personal information when a user claims the POAP/GridPunk to their address. We (our backend code) only know that a valid Lattice1 key has signed the message "POAP", and the POAP can be minted to any wallet the user chooses. Also, they do not have to be minted to a Lattice1 wallet's address at all. If the user wishes the POAP and subsequently the GridPunk, which is a publicly viewable NFT, can be minted to a new address to maintain anonymity.

To claim the Discord role GridPlus uses the Guild.xyz discord bot which checks a users connected address for the required POAP to claim the role.  [**The guild bot is completely open source.**](https://github.com/guildxyz/guild.xyz) Again, the Discord account can be connected through the bot to any of the user's addresses they wish to connect, and the role will be awarded if the connected address contains the POAP.


# Establish a Connection With Your Lattice1 via SSH

{% hint style="success" %}
Before you start, make sure your Lattice1 is **connected to your router** either through WiFi or Ethernet. Also, make sure you can communicate with your router through your computer.
{% endhint %}

If you want to change any network configuration or run software on your Lattice's router chip, which is a very lightweight Linux environment, you can **SSH into your device** using the following steps:

1. On your Lattice screen, go to **System Preferences → Device Info.**
2. The parameters you will want to use are "**SSH Host**" and "**SSH Password**".
3. Open a terminal on your computer and type this **SSH command**: `ssh root@<SSH Host>.local` (just what you see under SSH Host without the <> marks)
4. If this is your first time, it will ask you add the **RSA key**. Type `yes` and hit enter.
5. You will be asked for the **password** - type in the `<SSH Password>` from your Lattice1 screen. Again, only the password itself, not the <> marks. Please note you might **not see your input** on this step, but type the password in and hit enter and you should be okay.
6. If successful, you will see a **welcome prompt** with Lattice1 ASCII art and information about the GCE version. This is how the whole process should look on your terminal:

![](/files/-MaEyBq0hZVSDwQt4iM6)

Done, you can now **control your Lattice’s Linux environment**: update configurations, run whatever software you want, or just poke around under the hood.

But if you’re looking for your private keys, [**you’ll be out of luck**](/lattice1/security-features)!

### Troubleshooting

{% hint style="danger" %}
If you can't ping the Lattice1 through **your router,** your router is probably not configured for **mDNS** - the protocol that allows devices to broadcast their hostname on the local router network and for the router to rebroadcast it to other devices - which allows you to search for devices with the **'.local' suffix**.

To solve this, please check your router's user manual and look for enabling mDNS.

You can still communicate with the device even **without mDNS enabled**, but you will have to use the device's **IP address** instead of the hostname - so the command `ssh root@GridPlus-xyz123.local`would become`ssh root@123.456.789.012`.
{% endhint %}


# Connect to WiFi Using SSH

In most cases, your Lattice1 will connect to your network without any issues, however, you can encounter situations in which connecting **manually via SSH** is worth trying.

A perfect example where you'd want to try connecting manually via SSH would be living in a large apartment building with lots of different networks and **not seeing your WiFi's SSID** in the list of available networks on the device - this can sometimes happen, although it's rare.&#x20;

{% hint style="info" %}
In this situation, we presume there's **nothing wrong** with the way your network is set up, and the only action you have to take is actually connect to it - but you can't do that through the device, because you can't tap on the SSID to initiate the process. Before you attempt this, make sure your network meets these conditions:

* Your network's SSID (name) is **less than 32 characters**
* Your network is set to **2.4 GHz** (ideally 2.4 GHz only, or autoswitching bands)
* Your network uses one of these encryption types: **WEP, WPA-PSK** or **WPA2-PSK**
  {% endhint %}

**Conditions met?** Good, let's have a look at how to connect via SSH.

### Step-by-Step Guide

1. First, you have to open a **communication channel** with your Lattice. And since you cannot connect to WiFi, you have to connect via **Ethernet** (the cable has to be plugged into the same router as your computer, but your computer can be connected to WiFi provided by that router too).
2. Once your Lattice is connected to your router via the Ethernet cable, **SSH into it**:

{% embed url="<https://docs.gridplus.io/lattice1-guides/how-to-communicate-with-your-lattice1-via-ssh>" %}

3. Once you're in and you see the ASCII art spelling out "Lattice1", all you have to do is send this command to connect: \
   \
   `wifisetup add -ssid "networkssid" -encr "encryptiontype" -password "networkpassword"`\
   \
   **Type everything in without the quotation marks.**\
   The **`-ssid`** parameter is the name of your network.\
   The **`-encr`** is the encryption type - usually, this will be WPA2 (do not type out the full "WPA2-PSK", just "WPA2") - you can confirm what encryption type your router is using for your network by going into your router settings. The Lattice supports **WEP, WPA** and **WPA2.**\
   The **`-password`** is obviously your network's password. Case sensitive.\
   Here's an example of how this command could look like:\
   \
   `wifisetup add -ssid Verizon-135898 -encr wpa2 -password MikesWiFi69`

**And there you go, all done. Your Lattice should now be connected!**&#x20;

{% hint style="info" %}
If you can't connect even though all the info you're typing in is correct, please go through all the steps in our [**WiFi Troubleshooting**](https://docs.gridplus.io/lattice1-guides/lattice1-wifi-troubleshooting) doc. Feel free to reach out if you get stuck.
{% endhint %}


# Disable Wifi When Connected via Ethernet Using SSH

### Introduction

The **WiFi module** of your Lattice is active at all times by default, even when connected via Ethernet. If you will be using your Lattice1 with cable connection only and don't want the device to emit additional RF radiation, you can manually disable the WiFi module **through SSH**.

{% hint style="danger" %}
Please make 100% sure you are **connected via Ethernet** first as the only way to revert this if you can't communicate with the Lattice1 through cable is by **resetting the device's router**.
{% endhint %}

Turning the WiFi module off requires you to **SSH into your Lattice1** - if you're new to this, here's a guide:

{% embed url="<https://docs.gridplus.io/lattice1-guides/how-to-communicate-with-your-lattice1-via-ssh>" %}

### Step-by-Step Guide

1. **SSH** into your Lattice1.&#x20;
2. Type in the following **commands**:
   1. `uci set wireless.radio0.disabled='1'`&#x20;
   2. `uci commit wireless`&#x20;
   3. `wifi`
3. **Done!**
4. If you want to turn the **WiFi back on** in the future, you will use the same commands (just set the wireless.radio0.disabled bool back to '0'):
   1. `uci set wireless.radio0.disabled='0'`&#x20;
   2. `uci commit wireless`&#x20;
   3. `wifi`


# Managing ETH Validator Keys

{% hint style="warning" %}
Validator key management is an advanced feature set. It is relatively new and may be missing functionality. Please read the docs carefully and use with caution!
{% endhint %}

{% hint style="success" %}
Lattice firmware v0.17.0 or greater is required for managing validator keys.
{% endhint %}

If you are interested in [**staking on Ethereum**](https://ethereum.org/staking), you can now manage validator keys using your Lattice1 device with the **Lattice CLI**.

Please [**download**](https://github.com/GridPlus/lattice-cli/releases) the Lattice CLI and connect to your Lattice before continuing. Read the [**documentation**](https://github.com/GridPlus/lattice-cli#-connecting-to-a-lattice) if you are having issues connecting.

## Actions

* [**Creating New Validator(s)**](https://docs.gridplus.io/lattice1-guides/managing-eth-validator-keys#creating-new-validator-s)
* [**Upgrading Withdrawal Credentials (BLS->ETH1)**](https://docs.gridplus.io/lattice1-guides/managing-eth-validator-keys#upgrading-withdrawal-credentials-bls-greater-than-eth1)
* [**Withdrawing from a Validator**](https://docs.gridplus.io/lattice1-guides/managing-eth-validator-keys#withdrawing-from-a-validator)
* [**Exiting a Validator**](https://docs.gridplus.io/lattice1-guides/managing-eth-validator-keys#exiting-a-validator)

## Creating New Validator(s)

{% hint style="warning" %}
Your Lattice **cannot** perform your validator duties - it can only serve as a **key management system**. In order to participate in the daily activities of Ethereum staking, you must set up a separate [staking machine](https://ethereum.org/en/staking/).
{% endhint %}

If you would like to create one or more validators, you will need following for *each one*:

1. An encrypted BLS private key (a.k.a. "keystore"), which must be imported into your [**consensus client**](https://ethereum.org/en/developers/docs/nodes-and-clients/#consensus-clients) so that it can make signatures for attestations/proposals using your new validator.
2. An on-chain deposit to the [**Ethereum Deposit Contract**](https://etherscan.io/address/0x00000000219ab540356cbb839cbe05303d7705fa#code). This transaction must include information about your new validator and sufficient ether to fund it.

Both types of data can be generated with the [Lattice CLI](https://github.com/GridPlus/lattice-cli) using the `Export ETH2 Deposit Data` command. The user flow for running that command will now be detailed.

### 1. Defining Export Options

When you run the `Export ETH2 Deposit Data` command, you will be asked several setup questions:

#### 1. Select Withdrawal Key Type

{% hint style="info" %}
It is **highly** **recommended** you use the default **ETH1** option; if you choose to use BLS withdrawal credentials, you will need to update those credentials (for each validator) prior to making any withdrawals, as it is not possible to withdraw ether to a BLS public key on the execution layer.
{% endhint %}

You will first be asked what type of withdrawal key you would like to use: **BLS** or **ETH1:**

* The default option is to use an ETH1 address; if you select this, the CLI will ask you for a (properly formatted) Ethereum address. *Please make sure you have access to the associated private key.*
* If you choose BLS-style credentials, the CLI will automatically derive the withdrawal key for each validator according to [**EIP2334**](https://eips.ethereum.org/EIPS/eip-2334).

#### 2. Set Deposit Amount

You will now be asked to set a deposit amount. By default this is **32 ETH**, which is what you should stick with unless you have a good reason to use a different amount.

#### 3. Set a Starting Validator Index

Finally, you will be asked for a validator index at which to start generating data. Note that this index is the `i` value in the [**EIP2334**](https://eips.ethereum.org/EIPS/eip-2334) derivation path. If you have not created any validators with this wallet, you should probably start at the `0` index. If you are coming back to create more, start from where you left off.

#### 4. Select Export Data Type

Now you will be asked about what format of data you want to export. There are two options:

* **JSON file for Ethereum Launchpad** - This is the default option and is what you should choose if you are using the [**Launchpad**](https://launchpad.ethereum.org/). The output data will include a JSON file that you can drop directly into your browser. This is recommended for most users.
* **Raw transaction calldata** - If you want to create your own deposit transactions and send them to the [**deposit contract**](https://etherscan.io/address/0x00000000219ab540356cbb839cbe05303d7705fa#code) yourself, you should choose this option. The output will be a calldata string for each validator, which you can include in a transaction whose `msg.value` matches the deposit amount you specified in step 2. This is a more advanced option and isn't recommended for most users.

### 2. Generating Validator Deposit Data

Now that you have defined your parameters, the CLI will start generating data for your first validator. The CLI will run through the following operations for *each* validator you want to create:

1. Export the encrypted validator keystore. This is the BLS12-381 private key of your validator, encrypted and serialized according to [**EIP2335**](https://eips.ethereum.org/EIPS/eip-2335). This is done automatically. *Note that this step takes about 30 seconds for each keystore.*
2. If you selected BLS withdrawal credentials, fetch the withdrawal public key from the Lattice. This is done automatically.
3. Build some initial deposit data and ask for a signature from the validator's private key. **You will need to authorize this signature on your Lattice.**
4. Ask if you want to generate data (i.e. repeat steps 1-3) for the **next** validator. For example, if you just generated data for validator at index `0`, it would ask if you want to now generate data for validator at index `1`, and so on until you decline.

### 3. Exporting Deposit Data

Now that all data has been generated, the CLI will ask you where to save that data on your filesystem. By default, it will be saved to a local directory `./deposit-data`. The contents of this directory will include:

* `deposit-X-{timestamp}.json` (where `X` is either `-data-` or `-calldata`, depending on selected export type)
* *For each validator index (`i)`*: `keystore-m_12381_3600_{i}_0_0-{timestamp}.json`

### Activating your Validator(s)

Now that you have the data in hand, you can start your new validator(s)!

1. Import all keystore(s) (`validator-{i}-{pubkey}-{timestamp}.json`) into your[ **consensus client**](https://ethereum.org/en/developers/docs/nodes-and-clients/#consensus-clients) on your validator machine. If you are unsure how to do this, please read the docs for your specific [**client**](https://ethereum.org/en/developers/docs/nodes-and-clients/#consensus-clients). Once keystore(s) are imported you should expect to see new validators on your client which are marked as inactive -- this is because you haven't deposited to them yet!
2. Now you can make your on-chain deposit(s). If you are using the [**Launchpad**](https://launchpad.ethereum.org), take your `deposit-data-{timestamp}.json` file and drop it into the browser application. You will be prompted to make one deposit transaction per validator using e.g. [**MetaMask**](https://metamask.io). If you are instead using raw calldata, form your own transaction(s) and broadcast to the execution layer.
3. Ensure your deposit transaction(s) succeeded and wait for your new validator(s) to become active (\~16-24 hours, usually). Your staking machine should automatically start attesting and, if you're lucky, proposing!

## Upgrading Withdrawal Credentials (BLS->ETH1)

{% hint style="success" %}
Coming soon!
{% endhint %}

## Withdrawing from a Validator

{% hint style="success" %}
Coming soon!
{% endhint %}

## Exiting a Validator

If you would like to stop performing duties for a validator, you can perform a [**voluntary exit**](https://lighthouse-book.sigmaprime.io/voluntary-exit.html). Note that this is *not* the same as a withdrawal.&#x20;

Unlike the other key management options, voluntary exits are made by your **consensus client** and do not involve your Lattice. Recall that your consensus client has a keystore for each validator you have added, so it can sign messages with the validator key (but **not** the withdrawal key).

To perform a voluntary exit, please see your own consensus client's documentation. Here are the related pages for some of the clients:

* [**Lighthouse**](https://lighthouse-book.sigmaprime.io/voluntary-exit.html)
* [**Prysm**](https://docs.prylabs.network/docs/wallet/exiting-a-validator#:~:text=To%20voluntarily%20exit%20your%20validator,s\)%20that%20should%20be%20exited.)
* [**Teku**](https://docs.teku.consensys.io/how-to/voluntarily-exit)


# Introduction to SafeCards

<figure><img src="/files/bJhUZrQ7CPyNpbmuAlUX" alt=""><figcaption></figcaption></figure>

**GridPlus SafeCards** were created as a portable and cryptographically secure backup solution for your blockchain wallet's seed - each SafeCard can hold one unique wallet with all its addresses and can be used with any Lattice1 device (and also a USB card reader). SafeCards are the exact same size as a credit card and use the same [**PUF chips**](https://en.wikipedia.org/wiki/Physical_unclonable_function), which have been proven to be a secure and robust solution for protecting private data for decades at this point.

{% hint style="info" %}
When you buy a **Lattice1**, you will receive **one SafeCard** in a bundle with the device.
{% endhint %}

### Why SafeCards

#### Wallet security

We believe you should take all precautions to protect your funds and prevent someone from getting their hands on your [**private keys**](https://docs.gridplus.io/blockchain-basics/a-brief-introduction-to-private-keys) - and one form of an attack that's not talked about often is what we call the **"sock drawer" attack**, i.e. when someone leaves their written seed phrase in the bottom of their sock drawer and someone else finds it. People inadvertently introduce risk with **how they store their seed phrase** - cloud storage is a big problem in this area.

This is why we decided to use the **PIN protected SafeCards** to store/backup your wallets - if someone finds your backup, they still can't use it without the PIN, which adds another layer of security on top of everything else.

The card PIN itself **can't be brute-forced** as you only have 3 attempts at unlocking the card before it permanently bricks itself and deletes all private data.

{% hint style="success" %}
You can use SafeCards as your only backup method, but in this case make sure to have multiple copies of each wallet you wish to store this way, distributed across different locations, in case something happens to your cards. [**Read this if you'd like to learn more!**](https://docs.gridplus.io/lattice1-guides/how-to-manage-your-seed-phrase)
{% endhint %}

#### **Managing multiple wallets**

Another reason why SafeCards are extremely useful and unparalleled in the hardware wallet space is that they allow you to use an unlimited number of wallets with just one Lattice1 device - all you have to do in order to work with a wallet that's different from the wallet stored on the built-in Lattice wallet chip is inserting a SafeCard and unlocking it.&#x20;

And thanks to the way our integration with apps such as [**MetaMask** ](https://docs.gridplus.io/apps-and-integrations/metamask)or [**Rabby** ](https://docs.gridplus.io/apps-and-integrations/rabby)is designed, you don't need to re-connect to the app every time you switch the wallet, you just connect your SafeCard wallet to the app once and then just insert/remove the cards when you wish to approve transactions from different wallets. So, how does this unlimited wallets magic work?

### How SafeCards Work

#### SafeCard PIN safety

SafeCards are standard-size smart cards with a **PIN-protected** secure chip that holds your blockchain's wallet private info that allows you to sign transaction requests. This info cannot be exported out of the card in any way without unlocking the card with its PIN.

The cards are programmed to allow **three PIN unlock attempts** - after three consecutive **incorrect PIN entries,** **the card will brick** to prevent brute-force attacks and delete all info stored on it (the Lattice1 will show you how many attempts you have left on the screen). Once the card is bricked, it cannot be reinitiated in any way at all - unless you have a backup, funds are gonu.

{% hint style="danger" %}
The PIN entry counter is programmed directly into the SafeCard applet itself, so reinserting the card into the Lattice1 or a card reader will **NOT have an impact** on how many tries you have left - there's no way to reset the counter, so make sure you **remember your PIN**!

**Never** write the PIN down directly on your SafeCards - just like you wouldn't write down your credit card PIN on your credit card.
{% endhint %}

#### Signing transactions with SafeCards

When inserted into the Lattice1 and **unlocked with its PIN**, the SafeCard wallet becomes the active wallet on the device.

{% hint style="info" %}
Note that this doesn't erase the wallet that's currently stored on Lattice device itself - this wallet is still there and still 100% safe.
{% endhint %}

But of course, this means that any signatures generated while the card is inserted are done so with the keys held **in the SafeCard** - because it is the active wallet at the time. When **removed**, the device’s built-in Lattice1 wallet (the chip of this wallet is exactly the same as a SafeCard chip) becomes the active wallet again and you can then sign transaction with its keys.

#### What's actually stored on the cards

The SafeCards essentially stores three things:

* **The GridPlus certificate** - this lets the Lattice authenticate the validity of the SafeCard to prevent any possible attacks, more on this below
* **Your seed phrase** - the 12/18/24 words that can grant access to your blockchain wallet (you can view this on the device, this feature is, of course, PIN-protected)
* **The seed hash** - a hexadecimal string that's directly generated from your seed phrase, which is then used in deriving your wallet's addresses (and the corresponding private keys)

{% hint style="danger" %}
**SafeCards purchased prior to 2023 can only store the seed hash, NOT the seed phrase.**

Also, please note that if you use a **passphrase** when creating a wallet on your SafeCard, the seed hash will be different from the seed hash generated from the seed phrase that's also stored on the card - this is because the passphrase acts like a 25th word of the seed phrase.

**The passphrase is NOT stored on the SafeCard and only has impact on the seed hash generated during wallet creation, which then IS stored on the card.**
{% endhint %}

#### Card slot attack vector?

**SafeCard security** is ensured by an **authenticity certificate** that only GridPlus can provide - if the cert is **not detected** on an inserted card, the Lattice1 will simply refuse to communicate with the card and give you a bad read/unsupported card error (feel free to try it with your credit card).&#x20;

The certificate is a combination of entropy from the card's PUF chip and GridPlus-held private keys, so it can only be created and flashed onto the cards in our factory.

{% hint style="success" %}
And since only valid SafeCards with a GridPlus certificate can be used with the device, there is no way to attack the device through the card slot.&#x20;
{% endhint %}

### How to Take Care of Your SafeCards

#### Working conditions

The card chip should be able to work even when slightly scratched, but of course we recommend you focus on **not scratching the card's chip** when you have crypto stored on the card.

The chip's working temperature range is from **-13°F to +185°F/-25°C to +85°C** - don't microwave your SafeCards and you can learn to stop worrying and love the cards.

{% hint style="success" %}
The card will last for around **2000 inserts** - if you know you will be using your SafeCard more often, it's always good to have a **backup one**.
{% endhint %}

#### Storing SafeCards

The best way to store SafeCards is in a **card case** made to withstand extreme temperatures like a house fire as well as magnetic and **RFID protection** - these are quite expensive, so for most users, a standard card case or a card holder with RFID protection will most likely be enough.&#x20;

Also, if you have multiple backups of the same wallet, consider storing some of the cards in a **different location**, or ideally locations. **Distributed backups** are a much more robust solution to seed phrase safety than keeping everything in one place. Read more here:

{% embed url="<https://docs.gridplus.io/lattice1-guides/how-to-manage-your-seed-phrase>" %}

{% hint style="success" %}
**If you just received your Lattice1 and you're setting up your new SafeCard(s) for the first time, check out this article for more information ↓**
{% endhint %}

{% embed url="<https://docs.gridplus.io/safecards/setting-up-a-new-safecard>" %}


# Setting up a New SafeCard

<figure><img src="/files/8P46KXvmNBRJIHQeC0QJ" alt=""><figcaption></figcaption></figure>

**New SafeCard? Simply unlock your Lattice1 and insert the card - here's what to do next!**

{% embed url="<https://www.youtube.com/watch?v=0W8WdFEQEgc>" %}

## PIN Setup

Once you insert a new SafeCard into an unlocked Lattice1, you will be prompted to set a new, **six digit PIN**. This will be needed to unlock your SafeCard in the future. You may change it whenever you like using the **Change SafeCard PIN** option in the **Manage Wallets** menu.

{% hint style="success" %}
Please note that once your SafeCard has a PIN, you don't necessarily have to choose between one of the two options listed below - these are for generating a brand new wallet or using an existing seed phrase to restore a wallet.

But you can also use other SafeCards or even the Lattice1 device itself to import a wallet on an unused SafeCard and create a backup this way - for more information, check out [**SafeCard Operations**](https://docs.gridplus.io/safecards/safecard-operations).
{% endhint %}

## SafeCard Wallet Setup

After setting up a PIN, you will be presented with two options for setting up a wallet on your new card:

* [**Generate Wallet**](#generate-wallet)
* [**Restore from Seed Phrase**](#restore-from-seed-phrase)

### Generate Wallet

If you choose to generate a new wallet, your SafeCard will use its physical entropy to create a new, 24 word mnemonic phrase (we call this the seed phrase). Your card uses [**true random number generation (TRNG)**](https://docs.gridplus.io/lattice1/security-features/lattice1-random-number-generation) with a high entropy source, so the seed is safe to use for any purpose.

Once your SafeCard generates a mnemonic, it will be shown on your Lattice's screen. It is recommended you write this down before proceeding (the paper backup can be then destroyed, but only in case you've got a [**proper system to manage your seed phrase**](https://docs.gridplus.io/lattice1-guides/how-to-manage-your-seed-phrase)).&#x20;

You will then have the option to create a **passphrase** - click [**here** ](https://docs.gridplus.io/safecards/setting-up-a-new-safecard#adding-a-passphrase)to skip the next section about restoring from an existing seed phrase so you can read all about what the passphrase does.

{% hint style="info" %}
By default, you will be **required** to confirm all newly generated mnemonic phrases after they are displayed. If you don't want to do this, remove your SafeCard, go to **System Preferences → System Settings → Confirm Mnemonics** and switch from **Required** to **Not Required** (see [**this page**](https://docs.gridplus.io/lattice1/lattice1-firmware-reference) for a description of all Lattice menu options). Once this setting is updated, you can re-insert your new SafeCard and generate a new seed without having to confirm it.
{% endhint %}

### Restore from Seed Phrase

If you have an existing wallet you would like to import onto your new SafeCard, you may do so by typing in the seed phrase - your Lattice and SafeCards support standard 12/18/24-word seed phrases. After you type in the words of your seed phrase, you will have the option to set up a **passphrase** - read the next section carefully and decide if you need to do that (you only need to do this

{% hint style="danger" %}
**WARNING:** Your seed phrase is only as safe as the **least** safe place it has ever been in.&#x20;

Seed phrases may be used to import your accounts into any piece of wallet software, including Lattice firmware. But beware: **anyone who knows your seed phrase can import it into their own wallet and spend your funds.** You should **never** put your phrase into a web browser or expose it publicly in any way or you can lose funds!

Please read this to understand the risks and get some inspiration for your own system for managing your seed phrase(s): [**How to Manage Your Seed Phrase**](https://docs.gridplus.io/lattice1-guides/how-to-manage-your-seed-phrase)
{% endhint %}

## Adding a Passphrase

After you generate or import your seed phrase, you will be asked if you want to add an additional **passphrase**. This is an **optional**, extra source of entropy for your wallet - it basically acts like a 13th/18th/25th word of the seed phrase itself and changes the seed hash generated from the seed phrase and also the derived addresses.

{% hint style="info" %}
**This means that if you're restoring a wallet from the seed phrase, you need to figure out if you created a passphrase when you originally created your wallet.**&#x20;

**If you have**, you need to create it on the Lattice/SafeCard too in order to be granted access to your wallet and its addresses (also, it has to be 100% identical to the original passphrase) - **if you haven'**&#x74;, you cannot use the passphrase as it would change the derived addresses and you wouldn't end up with the addresses you wanted to import and work with.
{% endhint %}


# SafeCard Operations

There are several additional options for managing SafeCards and the wallets on them, all of which can be accessed in the **Manage Wallets** menu on your Lattice1.&#x20;

{% embed url="<https://www.youtube.com/watch?v=akbob8CozfI>" %}

{% hint style="success" %}
Please see the [**Firmware Reference**](https://docs.gridplus.io/lattice1/lattice1-firmware-reference) article for up-to-date information about all Lattice menus, submenus and menu options.
{% endhint %}

Let's have a look at what you can do with your SafeCards:

* **Restore from SafeCard**
* **Backup to SafeCard**
* **Copy SafeCard**
* **Change SafeCard PIN**
* **Reset SafeCard Wallet**
* (Change Lattice PIN)\*
* (Reset Lattice Wallet)\*

{% hint style="info" %}
\*Your Lattice stores the wallet you have on it on the same chip that's used in SafeCards - we use the terms "**built-in Lattice wallet**" and "**SafeCard wallet**" to differentiate between the two, but technically, the Lattice wallet acts just like a SafeCard wallet.&#x20;

We didn't highlight the Lattice-related options from the ops list because this article is focused on SafeCards, but of course they will work **the exact same** as their SafeCard counterparts, but for the Lattice wallet.

**You always need to have the PIN code in order to perform these operations!**
{% endhint %}

### Restore from SafeCard

{% hint style="info" %}
This operation will **erase** the wallet you have on the built-in Lattice wallet and **replace it with the wallet** that's on an inserted and unlocked SafeCard.
{% endhint %}

You may find this useful if you need to reset your Lattice system for whatever reason (which erases the built-in Lattice wallet) and then just want to restore it again without using the seed phrase.

### Backup to SafeCard

{% hint style="info" %}
This operation will **copy** the wallet stored on the **built-in Lattice wallet** onto a SafeCard.&#x20;
{% endhint %}

**The SafeCard has to be empty** - there cannot be an existing wallet on the card in order for this operation to perform successfully. If you have a SafeCard with a wallet on it and you'd prefer to use this SafeCard for another backup of your Lattice wallet, you can remove the wallet on this card with the **Reset SafeCard Wallet** option prior to initiating the backup process.

### Copy SafeCard

{% hint style="info" %}
This operation will **copy** the wallet from **one SafeCard to another** via the Lattice's card reader. The built-in Lattice wallet is not used in this op or impacted by it in any way.
{% endhint %}

Useful for creating backups of wallets you only have on SafeCards. The SafeCard you wish to copy has to be inserted and unlocked prior to initializing this process, and the SafeCard you wish to copy the wallet onto has to be empty. Just like with the Backup to SafeCard option, you can use the **Reset SafeCard Wallet** operation to clear a SafeCard with an already existing wallet if you want to use this card for backup.

{% hint style="danger" %}
If your Lattice and/or SafeCards were purchased prior to 2023, the chips on them will not be able to store the **seed phrase**, only the **seed hash**. If you e.g. backup an older Lattice wallet to a newer SafeCard via the Backup to SafeCard operation, **only** the seed hash will be copied, but not the seed phrase (because it's not there!), even though the new chip applet supports storing the seed phrase.

[**More in this article**](https://docs.gridplus.io/lattice1-guides/how-to-view-the-seed-phrase-on-your-lattice-and-safecard).
{% endhint %}

### Change SafeCard PIN

{% hint style="info" %}
This operation will change the six-digit **PIN** of your SafeCard. Requires the card to be inserted into the Lattice and unlocked to perform. You will need to input the new PIN twice - once to create it and then to confirm it.

The **Change Lattice PIN** operation works the same way, but for the Lattice device PIN.
{% endhint %}

### Reset SafeCard Wallet

{% hint style="info" %}
This operation will **reset** the wallet that's currently stored on an inserted and unlocked SafeCard. This will result in a **SafeCard with no wallet**. No impact on the card PIN.

The **Reset Lattice Wallet** operation works the same way, but for the built-in Lattice wallet.
{% endhint %}


# Lattice1 Doesn't Recognize the Inserted SafeCard

If you run into the "**Bad read or unsupported card. Please try again**" error with any of your SafeCards, please try again a couple of times. Maybe clean the SafeCard chip gently with a cloth.

{% hint style="danger" %}
If you encounter this error with a fresh-out-of-the-box new **GridPlus SafeCard** and trying again does nothing, please [**create a ticket**](https://gridplus.io/pages/form)!
{% endhint %}

If you remove a SafeCard from the Lattice1's card reader while it is **syncing addresses or actively performing another operation**, your Lattice1 will no longer to prompt you with the PIN screen to unlock the loaded card and you will not be able to access the SafeCard.

The solution is to reset the card reader driver by **power cycling** your device - simply remove the cord from the back of the unit and reinsert.

**Done!**


# SafeCard CLI

The SafeCard CLI is a free **open-source application** which ensures that you’ll always be able to recover critical backups stored on GridPlus SafeCards even if you no longer have access to a Lattice1.&#x20;

### What You Can Do With the SafeCard CLI

1. **Export Mnemonic (Seed Phrase)**\
   \&#xNAN;*(only for cards with applet v2.4+, this means cards purchased in 2023 and on!)*\
   This allows you to export the **12/18/24-word mnemonic seed phrase** for unlocking your wallet. Please note this is different from the option below - the seed hash itself. Most wallet providers only support importing the seed phrase, not the seed hash.
2. **Export Seed**

   This function allows you to export your SafeCard wallet's **binary seed** (a hash of the more commonly used seed phrase). With the master seed, you have everything you need to derive any keys needed to gain access to your funds on another device.&#x20;
3. **Export Private Keys**

   This lets you export the individual **private keys** from your wallet directly. You will have to specify the starting export path.
4. **Delete Seed**

   This completely **erases your wallet seed** from the SafeCard. Useful for both making sure no additional record of your wallet secrets exists and clearing the SafeCard before creating a new wallet. You can also **delete the SafeCard seed directly on the Lattice1** by going to **Manage Wallets** and selecting **Reset SafeCard Wallet** when the SafeCard is inserted and unlocked.
5. **Change PIN**\
   You can also use the CLI to change your SafeCard's PIN if you don't have access to a Lattice device. If you do, it's way faster to do this via the Change SafeCard PIN option in the [**Manage Wallets**](https://docs.gridplus.io/safecards/safecard-operations) menu on the Lattice.

{% hint style="warning" %}
All SafeCard CLI operations are **protected by your SafeCard's PIN**. Just like with any other SafeCard operations, you always have only **three attempts** to unlock the card before the SafeCard bricks - once it bricks, it's gone forever and can't be reinstated.
{% endhint %}

{% hint style="danger" %}
NOTE: If you set up your SafeCard before Lattice1 HSM software version **0.12.1** (released late October 2021), you also had the possibility to select the SafeCard wallet to be **non-exportable** (this would make the SafeCard wallet impossible to copy in any way). **If you have a non-exportable SafeCard wallet, please don't use it with STARK-based crypto!**

If you're not sure if your SafeCard seed was set to exportable or non-exportable when created, you can go to [**zk.money**](https://zk.money) and try creating an account. If the account creation **fails**, your seed is non-exportable.

You can make it exportable by **resetting the SafeCard wallet** and importing this seed on it again (from a seedphrase or by [**copying another Lattice/SafeCard wallet**](/safecards/safecard-operations)).
{% endhint %}

### What You Need to Manage Your SafeCards With the CLI

1. One or more **GridPlus SafeCards**.
2. A **computer** (MacOS or Windows, but you can also build from source on Linux).
3. A **generic card reader.** We use and recommend [**this model**](https://www.hidglobal.com/products/readers/omnikey/3121).
4. The **SafeCard CLI binary**. You can get it in the user guide!
5. The **SafeCard CLI user guide**. You can find everything below:

{% embed url="<https://github.com/GridPlus/safecard-cli>" %}


# Lattice Manager

<figure><img src="/files/1uYK680m1o2yydkUYnKQ" alt=""><figcaption></figcaption></figure>

The [**Lattice Manager**](https://lattice.gridplus.io) is a **GridPlus web tool** which provides an interface for managing your Lattice. You can also use it to send simple Bitcoin transactions (as well as receive BTC) - for Ethereum operations, we recommend using the Lattice with [**MetaMask**](https://docs.gridplus.io/apps-and-integrations/metamask)**,** [**Frame**](https://docs.gridplus.io/apps-and-integrations/frame)**,** [**Rabby** ](https://docs.gridplus.io/apps-and-integrations/rabby)or [**Eidoo** ](https://docs.gridplus.io/apps-and-integrations/eidoo-app-mobile)(on mobile).

### Features

So, what can you actually do with the Lattice Manager?

<figure><img src="/files/JbRqQMOyEOHKBwdPN811" alt=""><figcaption></figcaption></figure>

**Address Tags**

Address Tags allow you to set a **custom display name** to any address that will be displayed on your Lattice screen instead of the standard 0xabc address format when approving transactions - this is very useful as it makes confirming that you're sending to the correct address much quicker, easier and with less room for error. Very powerful security feature, especially when combined with the [**automatic ABI decoding**](https://docs.gridplus.io/lattice1/how-the-lattice1-makes-transactions-readable-with-abi-decoding) that works on the Lattice. **Read more here:**

{% embed url="<https://docs.gridplus.io/apps-and-integrations/lattice-manager/address-tags>" %}

**Wallet Explorer**

The Wallet Explorer is a simple tool designed for exploring all the addresses derived from your wallet's seed phrase - using multiple and even custom derivation paths. You can also create custom address tags for each address directly in the Wallet Explorer interface. **More here:**

{% embed url="<https://docs.gridplus.io/apps-and-integrations/lattice-manager/using-the-wallet-explorer>" %}

**Bitcoin Wallet**

The Lattice Manager also comes with a simple BTC wallet interface that allows you to **send and receive** BTC transactions - all three commonly used **address formats** (1, 3, bc1) are supported.

{% hint style="info" %}
The BTC Wallet is **hidden by default**, you have to switch to the address format you want to use it with in **Settings** if you're a first-time user. We recommend using [**NuFi**](https://docs.gridplus.io/apps-and-integrations/nufi/connecting-to-nufi) for your Bitcoin. The Lattice Manager BTC wallet works just fine, but might be retired in the future.
{% endhint %}

**You can find more information about the BTC interface here:**

{% embed url="<https://docs.gridplus.io/apps-and-integrations/lattice-manager/managing-your-bitcoin-wallet>" %}

**Settings**

Here you can manage connections to 3rd party apps (do not confuse this with the **Permissions** you can find on your Lattice), change the BTC wallet address format and also setup **your own message routing infrastructure** if you don't want to use ours - see **the article below for a guide!**

{% embed url="<https://docs.gridplus.io/apps-and-integrations/lattice-manager/connecting-your-lattice-to-your-own-private-endpoint>" %}

### Connecting to the Lattice Manager

1\. Go to the **Lattice Manager website:**

{% embed url="<https://lattice.gridplus.io>" %}

2\. Enter your **device ID**, which can be found on your Lattice1 by going to the Device ID page from your main menu. Enter any **password** you like. Press **Connect**.

![](/files/jc9jgniDT0cnRLGkIS1a)

3\. This will take you to the next step - you will see a new screen asking you to enter **a secret**, which should be now displayed on your Lattice screen. After you type in the correct secret, **the Lattice Manager will be paired to your Lattice1**. This will also create a new Lattice Manager **permission** on your device.

{% hint style="success" %}
If you **forget your password**, you can always remove the Lattice Manager permission on your Lattice by going to **Permissions → Lattice Manager → Delete** and re-connect by going through these steps again.
{% endhint %}

**And you're done with the setup!**&#x20;


# Managing Your Bitcoin Wallet

<figure><img src="/files/pT8IDhdnTc646bQn8yy4" alt=""><figcaption></figcaption></figure>

{% hint style="success" %}
Y**ou can also use** [**NuFi**](https://docs.gridplus.io/apps-and-integrations/nufi/connecting-to-nufi) **for managing your Bitcoin (recommended).**
{% endhint %}

The Lattice1 supports Bitcoin either via NuFi via our own simple BTC wallet app you can find on the [**Lattice Manager**](https://lattice.gridplus.io/). You can also view your BTC addresses directly on the Lattice screen if you're just receiving BTC - go to Lattice/SafeCard Addresses → Bitcoin on the home screen.

{% hint style="info" %}
The **Bitcoin wallet** on the Lattice is derived from the **same seed** as the Ethereum wallet, which means that your **seed phrase** which unlocks your ETH address will also unlock your Bitcoin (and if you create a **SafeCard backup** of your Lattice wallet, both BTC and ETH, along with all your EVM-based digital assets, will be there).
{% endhint %}

### BTC Wallet Setup

Navigate to the **Lattice Manager** and log in with your **Device ID** and **password:**

{% embed url="<https://lattice.gridplus.io/>" %}

After you have successfully logged in, click on **Bitcoin Wallet** and you will be taken to **Settings.**

<figure><img src="/files/6fQbo2Y9dNgslYjJ57O2" alt=""><figcaption></figcaption></figure>

The Bitcoin wallet is **hidden by default**, so you will now need to select the **address format** you wish to use.&#x20;

**Not sure which one you should use?**&#x20;

{% hint style="info" %}
Each address format handles transaction generation differently, but they all are **interoperable** with each other on protocol level.&#x20;

* **Legacy** Bitcoin addresses start with a '**1**' and are the original Bitcoin address type.
* **Segwit** addresses begin with '**bc1'.** This standard was developed to have lower tx fees than Legacy transactions. This is the default BTC address format as viewed on the Lattice1 under Lattice/SafeCard Wallet→Bitcoin Addresses, but can be switched to **Wrapped Segwit** in **System Settings** by **disabling** the bech32 option.&#x20;
* **Wrapped Segwit** addresses begin with a '**3'** and are standard for most modern BTC wallets. This standard added basic scripting functionality to BTC addresses.
  {% endhint %}

<figure><img src="/files/aD4VOr5WBH1JXybJcHi0" alt=""><figcaption></figcaption></figure>

After you select the Bitcoin wallet derivation type, the BTC Wallet tab will appear in the menu on the left. If this is your first time using the Lattice Manager BTC wallet, you will need to load your addresses from your Lattice1, so press "**Start**" to load the addresses.&#x20;

<figure><img src="/files/cHM3UQ1bH9AQjaYDLwr0" alt=""><figcaption></figcaption></figure>

After the addresses are loaded, you can see your **balance** and the **value** of your Bitcoin in USD.

<figure><img src="/files/pPEzOCg8FL8707RzKuEr" alt=""><figcaption></figcaption></figure>

{% hint style="warning" %}
If you **don't see your balance**, try going through the different address format and reload your addresses. If you still can't see your balance, feel free to [**reach out to us**](https://docs.gridplus.io/support/contact-us-support)!
{% endhint %}

### Sending Bitcoin

To **send BTC,** click on the **Bitcoin Wallet tab** and then the **send tab**. Enter a receiving address and an amount then click 'Send'. **You will need to approve the transaction on your Lattice1 screen**.

<figure><img src="/files/OMSomv32z5ouDraliqBB" alt=""><figcaption></figcaption></figure>

In the **BTC Wallet → History tab**, you can now see a pending tx notice with a link to monitor the transaction's progress on the blockchain. BTC transfers can take around **10 minutes** to confirm and reflect in your BTC wallet.

{% hint style="info" %}
BTC uses the [**Unspent Transaction Output (UTXO)**](https://docs.gridplus.io/blockchain-basics/utxo-vs.-account-model) model which acts quite differently than the **Account** model Ethereum uses to keep track of wallet balances.
{% endhint %}

### Receiving Bitcoin

For **receiving BTC** you have two options, either scan the QR code directly from the Lattice1 screen or go to the receive tab in the [**Lattice Manager**](https://lattice.gridplus.io) and grab the address(es) displayed there.

<figure><img src="/files/8qjL0ETMafxXrs7dm5HN" alt=""><figcaption></figcaption></figure>

{% hint style="info" %}
Note that every time you receive BTC, **a new address is generated** within your wallet and your wallet sums all the BTC in each address to display your total BTC balance in the history tab. Read more in the **article explaining UTXO** we linked above.
{% endhint %}


# Creating Custom Address Tags

Address tags are a neat accessory to the [**automatic contract ABI definitions**](https://docs.gridplus.io/lattice1/how-the-lattice1-makes-transactions-readable-with-abi-decoding) as they allow your Lattice1 to **display a custom name** on the screen for any address - this address can be anything from your second wallet to a smart contract address and when you're signing a transaction, you will see the custom name under the **\[Contract]** parameter on your Lattice screen.

Let's have a look at how this works in practice - let's say you want to transfer **Dai to a friend's address**. Compare the two screenshots below.

<figure><img src="/files/ndUdsUmdXHxjrQ1tMcE7" alt=""><figcaption></figcaption></figure>

{% hint style="success" %}
You can see a set of parameters about the transaction request - this is the result of the **auto ABI functions** loading as normally the transaction payload is just a long hex string.&#x20;

* **On the left**, you can clearly see the smart **contract address** being called - in the standard 0x ETH address format. You can also see the recipient's address on the bottom (under \[dst]).
* **On the right**, both the contract address and your friend's address are now displayed with a custom **address tag** which makes confirming if you're interacting with or sending to the correct address very easy.
  {% endhint %}

Using the Lattice1 with ABI function definitions and address tags really **unlocks the full potential of the device** and when you set them up, you get unrivaled security. It's practically impossible to send your funds to a malicious contract by mistake when you set them up. So, let's do that now.

### Creating and Deleting Address Tags

In the [**Lattice Manager**](https://lattice.gridplus.io), navigate to the menu on the left and select **Address Tags**. In this section, you can see the list of all saved address tags - both the contract address and the display name. Yours will be empty, but it's very easy to get started.

<figure><img src="/files/F1JaNJLGpMQ5VXDWh0W6" alt=""><figcaption></figcaption></figure>

1\. First, click on **Add**.

<figure><img src="/files/RVznMXoADHQ67jwrbCgN" alt=""><figcaption></figcaption></figure>

2\. You can now **paste the address** you want to create a tag for and then type in the display name - we highly recommend you use [**Etherscan**](https://etherscan.io/) for exploring contracts - make sure to get the right ones!

<figure><img src="/files/jPFnuIh2SqHCsskpu20D" alt=""><figcaption></figcaption></figure>

3\. When you click on **Add**, you will have to **confirm** the new tag on your Lattice screen (because the tags are saved on the device).

**4. And you're done!**

5\. In case you want to delete any tags, just select the ones you want to get rid of and click on **Remove Selected.**&#x20;

<figure><img src="/files/oT1a6GBkNVk12ePPneWR" alt=""><figcaption></figcaption></figure>

### Exporting and Importing Address Tags

You **don't** have to create the address tags **one by one**, you can also **import them from a .csv file**.\
In order to do this your .csv file will need to have this format:

<figure><img src="/files/OpAQXSSZ4Mgd0NVsAcoi" alt=""><figcaption></figcaption></figure>

{% hint style="success" %}
As address tags are **deleted** when you **reset the system**, it's always good to keep a **backup file** and import all the tags into the device again after the reset in one action.
{% endhint %}

Just select the tags you want to export and click on **export**. If you then want to import the tags, click on **import**, select the file and the tags will be copied to your Lattice.

<figure><img src="/files/74llAK3jETwpbu4sxi5Q" alt=""><figcaption></figcaption></figure>


# Using the Wallet Explorer

Using multiple addresses is safer than only using one, and using multiple wallets with different seeds is even safer. When using many addresses and wallets, it can be tough to keep track of which address is which - and the **Wallet Explorer** on the Lattice Manager was designed to help.

To use the Wallet Explorer, you must first connect with the [**Lattice Manager**](broken://pages/-Mf5JlTwr7TOTep_v1g0). Once you're connected, you should see the **Explorer** tab in the sidebar.&#x20;

<figure><img src="/files/XDIWqr9E4s4KXZDQ6WHQ" alt=""><figcaption></figcaption></figure>

### Overview

<figure><img src="/files/pYbqQR98GWnZ7FxRvnoQ" alt=""><figcaption></figcaption></figure>

The Wallet Explorer allows you to explore addresses derived from your wallet using **both standard and non-standard** (even completely custom) derivation paths.

{% hint style="info" %}
A **derivation path** is a piece of information you combine with your seed phrase to generate a set of addresses. There's an infinite amount of addresses generated with a single derivation path.

Of course, using **different** derivation paths will result in **different** sets of addresses.

[**If you want to read about this in more depth, check this article out!**](https://docs.gridplus.io/blockchain-basics/wallets)
{% endhint %}

In the Wallet Explorer, we've supplied the Ethereum (standard), Bitcoin and Solana derivation paths. More standard paths will be added over time. Most chains use the **Ethereum standard path**.&#x20;

{% hint style="danger" %}
The Lattice Manager will only show you 10 addresses total, so if you want to browser addresses number 11+, you will need to adjust the offset from zero value. This is the last bit of the derivation path. So, if you wanted to see and/or tag addresses number 21-30, you'd type in 21 here:
{% endhint %}

<figure><img src="/files/infcML2EcryQiEOtDr47" alt=""><figcaption></figcaption></figure>

### Tagging Addresses

A major security feature of the Lattice1 is using **address tags** to verify that you're interacting with the addresses that you expect, without needing to remember complex strings of letters and numbers. To make it easy for you to tag your own addresses, you can tag them directly in the Wallet Explorer.

When viewing addresses, you can click on the **address tag button** next to the address to tag it:

<figure><img src="/files/xP1kF5RNp1rOrC2CZ1Ba" alt=""><figcaption></figcaption></figure>

Input your desired address name and click on the **Save** button:

<figure><img src="/files/acVjHNDMjVGVhPFwrY11" alt=""><figcaption></figcaption></figure>

Once you click **Save**, you should be prompted to approve the address tag on your Lattice1 screen. Tapping approve on your Lattice1 saves the address for all future requests.

{% hint style="info" %}
You can also create address tags manually in the [**Address Tags**](https://docs.gridplus.io/lattice-manager/address-tags) tab!
{% endhint %}


# Connecting Your Lattice to Your Own Private Endpoint

By default, your Lattice1 connects to and routes tx requests via our own GridPlus cloud infrastructure. Any messages sent to and from your device are always end-to-end encrypted and remain completely secure; however, we believe that Lattice1 owners should always have the option to manage this service themselves, should they choose to do so.

<figure><img src="/files/eSBIsG1HMpqmiE9aNNn7" alt=""><figcaption></figcaption></figure>

And for this reason, we created a basic service you can run on your own network via a command line that will replace our cloud endpoint entirely, allowing you to sign with your Lattice without using any GridPlus infrastructure.

Running **Lattice Connect** yourself provides several advantages:

* Offers the fastest message routing possible for a Lattice1
* Provides the highest amount of privacy available while using a Lattice1
* Zero configuration changes required (e.g., no SSH'ing necessary)
* Setup takes less than 5 minutes!

**You can find the source code and guide here on our public Github repository:**

{% embed url="<https://github.com/GridPlus/lattice-connect-v2>" %}


# Lattice Manager Troubleshooting

{% hint style="success" %}
If you're having any issues while connecting to the Lattice Manager or even after you've connected, this article will help you resolve them. You should be able to find a solution for ALL connection-related issues, but if nothing here works, please [**contact us**](https://gridplus.io/contact/).
{% endhint %}

#### Common Issues

* The Lattice Manager tab is stuck endlessly spinning on the "Loading - Connecting..." screen
* "**Failed to pair**" error is shown on the Lattice Manager login page and a **"Failed to Connect"** error is shown on the Lattice screen
* Nothing shows up on the Lattice screen when you initiate a Bitcoin transaction or try to add some new address tags on the Lattice Manager

<figure><img src="/files/6MVHeXjhqDhcRjJfhzgs" alt=""><figcaption></figcaption></figure>

### A. The Basics

#### 1. Internet Connection

If you're stuck on the spinning wheel screen when connecting or nothing is showing up on your Lattice screen when you try to send a BTC transaction or add a new address tag, the first step is to check whether both your computer and your Lattice are connected to the internet.

{% hint style="info" %}
You don't have to be connected to the same network, but both devices do have to be **online**. You can check your Lattice's connection status directly on the screen in the upper right corner (see the [**firmware reference article**](https://docs.gridplus.io/lattice1/lattice1-firmware-reference) to know what icons to look for).
{% endhint %}

If you're sure you're online, move on to step 2.

#### 2. Check Your Lattice Firmware Version

The latest Lattice firmware version can always be found in [**this article**](https://docs.gridplus.io/lattice1/lattice1-firmware-reference). If you're not on the latest, just go to **System Preferences → Software Update**. If you cannot see an update available here, make sure your Lattice is [**online**](https://docs.gridplus.io/support/lattice1-wifi-troubleshooting). If your Lattice is online, then try powercycling the device - unplug it and then plug it back in.

#### 3. Incorrect Device ID And/Or Password

Make sure that you're typing in the **correct device ID** if you see the spinning wheel on the "Loading - Connecting..." screen (this might also be caused by your Lattice being offline, but this part was written with the assumption that you made sure your Lattice is online as per step 1).

{% hint style="success" %}
You get a new device ID every time you reset the Lattice network module, but you can always **find your active device ID** in the last menu item on the Lattice homescreen.
{% endhint %}

If you've connected to the Lattice Manager before, you will have a Lattice Manager permission on your device. This means that every time you try to connect to the app again, you will need to use the **same password** you used when you connected for the first time. If you forgot the password, you can move on to step 4 and attempt re-connecting.

### B. Resetting the Connection

#### **4. Remove the Lattice Manager Permission and Try Re-Connecting**

If your Lattice is online and you're sure you're typing in the correct device ID and password combination, but you're still having issues, it's time to try removing the old connection and re-connecting to get a fresh one.

Go to **Permissions** on your Lattice and if you see a Lattice Manager permission there, delete it.

Then, try connecting to the Lattice Manager again - just make sure to use the correct device ID and a password you will remember!

{% hint style="danger" %}
If you cannot access **Permissions** on your Lattice (the button will only visually react to being tapped on, but will not show you the Permissions menu), please [**reach out to us** ](https://gridplus.io/contact)before attempting anything else!\
\
This is extremely rare and you shouldn't ever see it, but if you do, get in touch.
{% endhint %}

#### 5. Reset App State on the Lattice Manager

**Resetting the app state** on the Lattice Manager clears the LM cache, which can resolve some less common connection issues. We're writing this with the assumption that you cannot log into the Lattice Manager - the good news is that you can reset the app state without being logged into the app, and here's how:

1. Go to the [**Lattice Manager**](https://lattice.gridplus.io/) website URL
2. Open **Settings** at the bottom of the login screen
3. Scroll down and click on **Reset App State** and then **Update and Reload**

<figure><img src="/files/PdKKcXT7MKKlO7xfqeoU" alt=""><figcaption></figcaption></figure>

#### 6. Delete Local Storage for the Lattice Manager

{% hint style="success" %}
Local storage on the Lattice Manager will most likely be empty after resetting the app state, but it's always good to double check.
{% endhint %}

When on the Lattice Manager URL ([**https://lattice.gridplus.io/**](https://lattice.gridplus.io/)), do this:

* **Chrome**: Press F12 on Windows and Linux, Fn + F12 on Mac (opens Developer Tools) → Application tab → Local Storage under the storage tab → lattice.gridplus.io → Clear all <img src="/files/B0iyX1ZpVkrD6n8K3uKh" alt="" data-size="line">

<figure><img src="/files/V4z6cA2nTisaKDyo4s6O" alt=""><figcaption></figcaption></figure>

* **Firefox**: Press F12 on Windows and Linux, Fn + F12 on Mac (opens Developer Tools) → Storage → Local Storage → Right click the *lattice.gridplus.io* item → Delete All

  <figure><img src="/files/RKWThPoLbT2Roc5SAW02" alt=""><figcaption></figcaption></figure>

You should then be able to go through the [**pairing process**](https://docs.gridplus.io/apps-and-integrations/lattice-manager#connecting-to-the-lattice-manager) without any issues.

### C. Nuclear Option

#### 7. Reset Device ID

If you still cannot connect even after going through all the steps above, it's time to try connecting with a **new device ID**.

To get a new device ID, you will need to manually reset your device's router - which can be done in **System Preferences → Security & Privacy → Reset Router**. This may take a couple of minutes. After this reset is done, you will then need to **re-connect to your WiFi** **network** to have internet access (if you're using WiFi).

{% hint style="info" %}
It's possible to encounter a rare situation in which the **device ID will not be changed** after you reset the router. If this happens to you, powercycle your Lattice (unplug, plug back in), and try again. Confirm that your GCE version is 0.49.0. If you still can't get a new ID after updating the router and powercycling the device, [**please reach out to us**](https://gridplus.io/contact/).
{% endhint %}

After the device ID is reset, **DO NOT ATTEMPT TO RE-CONNECT** right away! First, you need to reset the app state on the Lattice Manager and delete local storage as described in steps 6 and 7. Then, try connecting again.

{% hint style="success" %}
If you still can't get this to work after going through all these steps, please [**create a ticket**](https://gridplus.io/contact/) or reach out to us [**on our Discord server**](https://discord.gg/gridplus) and we'll help you figure this out.
{% endhint %}


# How to View the XPUB of Your Bitcoin Wallet

### What Is an XPUB?

An **XPUB (Extended Public Key)** is a special kind of key in the Bitcoin protocol that allows you to view/generate all of your wallet's public keys (addresses) without revealing any private keys. This is particularly useful if you want to see e.g. all incoming/outgoing transactions for tax purposes.

{% hint style="success" %}
Public and private keys exist in what we call a **keypair** - for each public key, there exists a corresponding private key. The public key is the public receiving address and the private key is what allows you to send funds OUT of that address, similar to how everyone can send you an email, but only you can send an email from your email account.

The XPUB is a master public key that will reveal all possible public keys but none of the private keys. **This means that the XPUB cannot be used to steal your funds in any way.**
{% endhint %}

### How to View Your XPUB

{% hint style="info" %}
This feature is only available on **firmware version 0.18.6** or higher.
{% endhint %}

You can view your XPUB on both the Lattice and the Lattice Manager app.

**On the Lattice, just go to Lattice/SafeCard Wallet → Bitcoin Addresses → Bitcoin XPUBs.**

**On the Lattice Manager, go to BTC Wallet and select the XPUB option.** Please note you have to have an address type selected in **Settings** before you can do this, as the BTC Wallet is hidden by default.

<figure><img src="/files/LjjLSSN56WX65TsnsafF" alt=""><figcaption></figcaption></figure>

And there you go!


# MetaMask

<figure><img src="/files/3yAPMhWll5WbpR0y6S16" alt=""><figcaption></figcaption></figure>

The **MetaMask browser extension** is the most popular crypto app today - and we're proud to have become the third hardware wallet manufacturer whose devices can be connected to the extension via a direct integration.

Using MetaMask with the Lattice1 is **almost the same** as using the app without a hardware wallet - but when you connect your hardware to the extension, all transaction requests will now have to be signed on the Lattice1 and you will get to approve all of them on the device screen.

**This also means that whatever you can do with MetaMask, you can do with the Lattice1.\***

{% hint style="info" %}
\*Please note that as of now, you can use the Lattice1 with the **desktop** browser extension only, we currently do not support connecting to MetaMask on mobile.

The MetaMask extension only supports Ethereum when using the Lattice. Solana is not supported asof October 2025, however, this might change in the future

If you want to use Solana with your Lattice, please use [**NuFi**](https://docs.gridplus.io/apps-and-integrations/nufi).
{% endhint %}

### MetaMask and Your Lattice

MetaMask uses what they call **Accounts** - each account is basically an interface from which you control a **single EVM address** (public key). When you connect your Lattice to MetaMask, you can select the addresses from the wallet **stored on your Lattice** to be imported and each will then create a new MetaMask account.&#x20;

These accounts will be grouped under the Lattice group in the **list of accounts**, this means that they are separate from the MetaMask hot wallet. Like this:

<figure><img src="/files/l9myOPtNosLeTRZf1XEY" alt=""><figcaption></figcaption></figure>

What's important to note is that each address that would create a account on MetaMask can only be added to the extension **once** and after a standalone account is created from it, you won't be able to add the address again via any means (such as importing it from its private key).&#x20;

{% hint style="info" %}
You can also create multiple accounts by linking multiple addresses from multiple crypto wallets with just **one** Lattice hardware wallet to MetaMask using **SafeCards**.
{% endhint %}

### Signing Transactions

Signing transactions is done in a similar way you're used to with MetaMask hot wallets - you will approve the transaction on MetaMask - but, unlike with a hot wallet, you will then also have to approve the transaction **directly on the Lattice screen** for it to go through (this is because your private keys are on the Lattice and not stored on MetaMask as it is with hot wallets).

When you connect your Lattice to MetaMask, your private keys remain safely stored on the hardware wallet, which means signing transactions will require approval on both MetaMask and then the Lattice screen.

<figure><img src="/files/okLXyPHlcPJTCo3wFbU9" alt=""><figcaption></figcaption></figure>


# Installing MetaMask

{% hint style="success" %}
This guide is primarily intended for first time MetaMask and Lattice users, but you might find it useful even if you're not new to the app and you want to make sure you're doing everything right when installing a MetaMask instance on a new computer or re-installing.
{% endhint %}

1\. Download and install **the extension** - make sure to get the browser one!

{% embed url="<https://metamask.io/download/>" %}

2\. **Pin the extension in your browser** so you can access it with a single click:

<figure><img src="/files/1EsxmL2d4Nmp3yRX0dS4" alt=""><figcaption></figcaption></figure>

3\. Open the extension and then click on **Create a new wallet\*.**

<figure><img src="/files/Lgi4glyuSziDw2AD0dGw" alt=""><figcaption></figcaption></figure>

{% hint style="success" %}
**\*Why create a wallet and not import your existing one?**

This is because MetaMask has to have a default hot wallet (Account 1), which cannot be a hardware wallet. You've already imported your wallet to the Lattice1 (or created a new one) during the initial device setup and now you just need to **establish a connection** between your hardware wallet and MetaMask - we'll get there soon!

If you want to use the Lattice along with hot wallets, you should instead select **I have an existing wallet** and import your hot wallet seed phrase on the next step.

Remember that you do NOT need to import your Lattice seed phrase into MetaMask to set this up.
{% endhint %}

4\. On the next step, select **Use Secret Recovery Phrase** and then create your **MetaMask password**. This password is only used to access the browser extension - if you forget it, you can re-install the extension and set a new one. **Check the box** and click on **Create password**.

<figure><img src="/files/DSivxy8wIXQ3iFrDL0f3" alt=""><figcaption></figcaption></figure>

5. Then, you can confirm the hot wallet seed phrase, but if you do not intend to use the hot wallet on MetaMask, you can just skip this step by clicking on **Remind me later**. Then, select what kind of user data you want the app to collect and on the next step, click on **Done**.

<figure><img src="/files/k7hpeSkBaWZz7ggNEA7h" alt=""><figcaption></figcaption></figure>

You should now see the MetaMask homescreen and you can now move on to **connecting your Lattice hardware wallet to the extension**. See the next article to find out how to do that.

<figure><img src="/files/5nN4RORopq4UYN0bgmkK" alt=""><figcaption></figcaption></figure>


# Connecting to MetaMask

If you're new to MetaMask, this guide will teach you all you need to know about establishing a connection to the app with your Lattice and using it in the most secure way possible.

{% hint style="danger" %}
If you're already using MetaMask (most new Lattice owners are), make sure the wallet you have on MetaMask is **different** from the wallet you have on the Lattice.

MetaMask will import **each address** you want it to as a standalone **account**, and each new MetaMask account has to have a unique address. This means that if you have the same wallet on Metamask as you do on the Lattice, MM won't let you import any addresses that already exist as accounts on the extension.

The same goes for **other hardware wallet accounts** already linked to MetaMask - if you imported your Trezor/Ledger seed to the Lattice, you won't be able to import any addresses from which MetaMask hardware-linked accounts are already created.
{% endhint %}

### Step-By-Step Guide <a href="#step-by-step-guide" id="step-by-step-guide"></a>

1. You can start by opening the Account 1 detai&#x6C;**.** When it opens, click on **Add wallet** at the bottom of the window. \
   You will be then asked what kind of wallet you'd like to add - select **Connect a hardware wallet**.

{% hint style="info" %}
Connecting your Lattice to MetaMask does **NOT** mean **importing your Lattice wallet** to the extension - it means establishing a MetaMask ↔ Lattice connection that allows you to use MetaMask as a UX interface for your hardware wallet.

All transactions still have to be signed **on the Lattice screen**, because that's where your seed and private keys remain safely stored. More on this in [**this** ](https://docs.gridplus.io/metamask/introduction-to-metamask)[**article**](https://docs.gridplus.io/metamask/introduction-to-metamask).
{% endhint %}

<figure><img src="/files/eV48nqpX1TIcyqQrX5vu" alt=""><figcaption></figcaption></figure>

2. On the next step, select the **Lattice1 box** and click on **Continue**.

<figure><img src="/files/nfSSEgQEureVzSDa1HTe" alt=""><figcaption></figcaption></figure>

3. This will open a new browser tab with the **secure GridPlus Lattice Connector module** (the domain needs to be [**https://lattice.gridplus.io**](https://lattice.gridplus.io)). The Lattice Connector is an interface you will use to create and log into 3rd party app connections - the process is the same for all apps that have a Lattice integration built into them. You will need to enter your **device ID and a password** on this page. Your device ID is unique to your device and is used to establish a connection with our servers - you can find it on your Lattice's homescreen as **Device ID**.\
   \
   Enter **any password** you like - this can be later reset. Press **Connect**.

<figure><img src="/files/4CoOOZwgENHmKqg3JkcL" alt=""><figcaption></figcaption></figure>

3. This will take you to the next step - you should see a new screen asking you to enter **a secret**, which will now be displayed on your Lattice1 screen. Once you type in the secret correctly, **your MetaMask app will be paired to your Lattice1**. This will also create a new MetaMask **permission** on your device, and also a **3rd party connection** on the **Lattice Manager**.

{% hint style="warning" %}
On this step, you may possibly encounter two errors:

* An error that will pop up directly in MetaMask and will say **Failed to get accounts.**
* The Lattice Connector will just **spin endlessly** without sending you to the screen you would normally after this step.

To get past these errors, please visit the [**`MetaMask Troubleshooting Guide`**](https://docs.gridplus.io/metamask/metamask-troubleshooting).
{% endhint %}

<figure><img src="/files/LfMwwj5QbJ3W7salTw1u" alt=""><figcaption></figcaption></figure>

4. You will be taken back to MetaMask to the **Select an account** screen. Here you will select all the **addresses from your wallet** on the Lattice that you want to **import** to MetaMask. \
   \
   Each address will create a **new standalone MetaMask account** (the first address will be imported as a Lattice 1 account, the second as Lattice 2 etc.) - these new imported accounts will be linked to your Lattice. All transaction requests initiated from these accounts will also require your approval on the device screen, in addition to clicking Approve on MetaMask.\
   \
   If your wallet was created on a Ledger device, see the box below for what to do. If not, you don't have to adjust the derivation path in any way.

{% hint style="warning" %}
**When should you change the HD path?**

You should change the HD path if the wallet you imported on the Lattice1 was originally created on a Ledger device. All other wallets (Trezor wallets, MetaMask wallets etc.) use standard derivation paths.

**Ledger Live or Ledger Legacy?**

If you bought your Ledger device before July 2018, **Legacy**. If you bought it after, **Live**.
{% endhint %}

If you're unsure whether you'll need more than one account, selecting just the first address is fine - you can always get back to the Select an account screen by going through the steps outlined above again. When you've selected all the addresses you wish to use, click on **Unlock**.

{% hint style="info" %}
On this step, you might encounter an error that won't let you select the address or addresses you want to import - the addresses might be **greyed out**.

This happens when you already have that particular address imported to MetaMask and there's an existing MetaMask account linked to it as mentioned at the top of this article.

* If this account is the **default MetaMask hot wallet**, you will have to re-install MetaMask from scratch. Make sure to save all addresses that may have been imported from a private key as these are from a different wallet than what you have on the Lattice and you would lose them! \
  When you install MetaMask again and you click on Get Started, make sure to select **Create a Wallet** - **DO NOT** import your seed to MetaMask!
* If this account was imported from a private key or from another hardware wallet, all you have to do is remove it from MetaMask - click on the three dots next to the account in the list of accounts, select **Account details** and then **Remove Account**.
  {% endhint %}

<figure><img src="/files/6eXoEpXHgWkSHp3JYmJD" alt=""><figcaption></figcaption></figure>

**And there you go, all set now!** You should now see all the addresses you imported as separate accounts under the Lattice group in the list of accounts on MetaMask - **like this:**

<figure><img src="/files/xhxSC3f7Rc1e01sLBKIb" alt=""><figcaption></figcaption></figure>

You can now do **everything you're used to doing** with MetaMask: sending crypto, swaps, DeFi, minting NFTs, you name it. Everything that has to be signed with your private keys will now have to be approved on the screen of your Lattice1.

{% hint style="info" %}
Remember that you can have **addresses from multiple wallets** (different seeds) on the same MetaMask instance! All MetaMask accounts created with addresses from the Lattice will hbe grouped under the Lattice group in the list of accounts on MetaMask.

To connect more addresses (either from the same wallet on the Lattice or from a different wallet on a SafeCard), just go through these steps again. If you're importing more addresses from a SafeCard, the card has to be inserted and unlocked before you start the process.
{% endhint %}


# MetaMask Troubleshooting

{% hint style="success" %}
If you're having any issues while connecting to MetaMask or even after you've connected, this article will help you resolve them. You should be able to find a solution for ALL MetaMask-related issues, but if nothing in this article works, please [**contact us**](https://gridplus.io/contact/).
{% endhint %}

#### **Common Issues**

* Transaction requests approved on Metamask no longer pop up on the Lattice screen
* Stuck at the "Looking for your Lattice..." screen on MetaMask
* "**Failed to get accounts. Please forget the device and try again. Make sure you do not have a locked SafeCard inserted.**" error is shown on MetaMask
* The screen is stuck spinning on the "Loading - Connecting..." Lattice Connector page

<figure><img src="/files/utIoegjGQD7s7RjlxsvZ" alt=""><figcaption></figcaption></figure>

### Step-By-Step Guide For Troubleshooting MetaMask

Going through all these steps won't be necessary for most MetaMask issues as most should be fixed by re-connecting - the guide tells you explicitly when to try connecting to MetaMask again.

### A. The Basics

#### 1. Internet Connection

If you can't get transaction requests to pop up on your Lattice screen despite approving them in MetaMask, the first thing to check is whether both your computer and your Lattice are connected to the internet. This can also be the cause of getting stuck on the **"Loading - Connecting..." page** on the Lattice Connector.

{% hint style="info" %}
You don't have to be connected to the same network, but both devices do have to be **online**. You can check your Lattice's connection status directly on the screen in the upper right corner (see the [**firmware reference article**](https://docs.gridplus.io/lattice1/lattice1-firmware-reference) to know what icons to look for).
{% endhint %}

If you're sure you're online, move on to step 2.

#### 2. Check Your MetaMask and Lattice Firmware Versions

The latest Lattice firmware version can always be found in [**this article**](https://docs.gridplus.io/lattice1/lattice1-firmware-reference). If you're not on the latest, just go to **System Preferences → Software Update**. If you cannot see an update available here, make sure your Lattice is [**online**](https://docs.gridplus.io/support/lattice1-wifi-troubleshooting).

To update your MetaMask extension, follow the guides below:

* **Chromium:** right-click on the MetaMask icon and select **Manage Extension**. Then enable **Developer mode** in the top right corner and after that, just click on **Update.**

<figure><img src="/files/sE2QygSbgQXZMgZGAGeC" alt=""><figcaption></figcaption></figure>

* **Firefox:** right-click on the MetaMask icon and select **Manage Extension**. In the gear icon menu in the top right, click on **Check for Updates**. If there are any updates available, install them.

<figure><img src="/files/YqEAC2X0C4Ej8Hy74awn" alt=""><figcaption></figcaption></figure>

#### 3. Unlock Your SafeCard

If you're trying to connect a SafeCard wallet to MetaMask, the inserted SafeCard has to be **unlocked** prior to initiating the connection - MetaMask cannot import addresses from a locked card.

Trying to connect with the locked card will result in the **"Failed to get accounts" error**. Unlock your card and try again. If you're not connecting with a card or your card is unlocked, move on to step 4.

#### 4. Incorrect Device ID And/Or Password

Make sure that you're typing in the **correct device ID** if you see the spinning wheel on the Lattice Connector page (this might also be caused by your Lattice being offline, but this part was written with the assumption that you made sure your Lattice indeed is online as per step 1.

{% hint style="success" %}
You get a new device ID every time you reset the Lattice network module, but you can always **find your active device ID** in the last menu item on the Lattice homescreen.
{% endhint %}

If you've already connected to MetaMask with your Lattice and you want to e.g. connect a SafeCard wallet or import more addresses from your Lattice wallet, you need to use the **same password** you've used when this connection was created. If you forgot the password, you can move on to step 5 and attempt re-connecting.

### B. Resetting the Connection

{% hint style="success" %}
**Make sure you go through steps 5, 6 and 7 in order before you try connecting again!**
{% endhint %}

#### 5. Re-Connect With Metamask

If your Lattice is online, your inserted SafeCard is unlocked (if you're using one) and you're sure you're typing in the correct device ID and password combination but you're still having issues, it's time to try removing the old connection and re-connecting to get a fresh one.

**5.1 Remove the MetaMask Permission**

Go to **Permissions** on your Lattice and if you see a MetaMask permission there, delete it.&#x20;

{% hint style="danger" %}
If you cannot access **Permissions** on your Lattice (the button will only visually react to being tapped on, but will not show you the Permissions menu), please [**reach out to us** ](https://gridplus.io/contact)before attempting anything else!\
\
This is extremely rare and you shouldn't ever see it, but if you do, get in touch.
{% endhint %}

**5.2 Remove Previously Linked Lattice Accounts from MetaMask**

Next, remove all accounts under the **Lattice group** in the list of accounts on MetaMask. You can do this by opening the accounts list, navigating to the Lattice group of accounts and then clicking on the **three dots** next to that account. Then you need to click on **Account details** and finally **Remove account**.

You need to do this for ALL Lattice accounts stored on MetaMask in order to reset the connection.

<figure><img src="/files/W34qqqUAq9fDetYI5fiA" alt=""><figcaption></figcaption></figure>

**5.3 Delete MetaMask Cache**

{% hint style="info" %}
If you're using a Chromium-based browser such as Chrome, Brave etc., you can delete only **hosted app data** without deleting your cookies or browser cache. On Firefox, you'd have to clear all cookies and cache, so we only recommend this step for Chromium users and we suggest Firefox users try the next steps of this guide **before** clearing cookies and cache.
{% endhint %}

* **Chrome** - copy this and paste it into the URL bar: `chrome://settings/clearBrowserData` And then select Advanced, All time in the Time range and only select Hosted App Data.
* **Brave** - the same, but the URL is slightly different: `brave://settings/clearBrowserData`
* **Firefox** - paste this into the URL bar: `about:preferences#privacy`\
  And then click on Clear Data under Cookies and Site Data.

#### 6. Reset Lattice Manager App State

Here's how:

* Go to the [**Lattice Manager**](https://lattice.gridplus.io/) URL and scroll down
* Click on **Settings** and scroll down
* Click on **Reset App State** and then **Update and Reload**

<figure><img src="/files/GFh9mDHXNFNuRSJhdZYc" alt=""><figcaption></figcaption></figure>

#### 7. Delete Local Storage on the Lattice Manager

{% hint style="info" %}
It's possible local storage will be empty after resetting the app state, so skip this if that's the case. But make sure to double-check this before you try reconnecting with MetaMask.
{% endhint %}

Before you delete local storage from your browser, make sure you have no MetaMask and Lattice Manager permissions on your Lattice.

Then, go to the Lattice Manager URL ([**https://lattice.gridplus.io/**](https://lattice.gridplus.io/)) and when there, do this:

* **Chrome**: Press F12 on Windows/Linux or Fn + F12 on Mac (opens Developer tools) → Application tab → Local Storage under the storage tab → lattice.gridplus.io → Clear all <img src="/files/B0iyX1ZpVkrD6n8K3uKh" alt="" data-size="line"><br>

  <figure><img src="/files/al6WeQK4TrOcsPYRGIQ0" alt=""><figcaption></figcaption></figure>
* **Firefox**: Press F12 on Windows/Linux or Fn + F12 on Mac (opens Developer tools) → Storage → Local Storage → Right click the lattice.gridplus.io item → Delete All

  <figure><img src="/files/RKWThPoLbT2Roc5SAW02" alt=""><figcaption></figcaption></figure>

You should then be able to go through the [**pairing process**](https://docs.gridplus.io/apps-and-integrations/metamask/metamask-troubleshooting) without any issues.

### C. Nuclear Options

#### 8. Reset Device ID

If you still cannot connect even after you delete all Lattice-linked accounts from MetaMask, remove the MetaMask permission from the Lattice and reset app state on the Lattice Manager, it's time to try connecting with a **new device ID**.

To get a new device ID, you will need to manually reset your device's router - which can be done in **System Preferences → Security & Privacy → Reset Router**. This can take a couple of minutes. After this reset is done, you will then need to **re-connect to your WiFi** **network** to have internet access (if you're using WiFi).

{% hint style="info" %}
It's possible to encounter a rare situation in which the **device ID will not be changed** after you reset the router. If this happens to you, powercycle your Lattice (unplug, plug back in), and try again. Confirm that your GCE version is 0.49.0. If you still can't get a new ID after updating the router and powercycling the device, [**please reach out to us**](https://gridplus.io/contact/).
{% endhint %}

After the device ID is reset, **DO NOT ATTEMPT TO RE-CONNECT** right away! First, you need to reset the app state and clear local storage on the Lattice Manager as described in steps 6 and 7 - then you can try connecting again.

#### 9. Reinstall MetaMask

If everything else fails and you still somehow get stuck on a particular error, there's also the "nuclear" option of getting a completely fresh MetaMask instance installed before attempting to connect again. You will first have to remove the old MetaMask from your browser completely.

{% hint style="danger" %}
You will **LOSE** all accounts/addresses that are not backed on hardware. This means the default MetaMask hot wallet Account 1 will get erased, as well as any hot accounts you imported from a private key.

Because of this, you should make sure that removing MetaMask will not result in any unwanted consequences very carefully!
{% endhint %}

Removing MetaMask is fairly simple - just right click the extension and select **"Remove from Chrome" or "Remove extension"** on Firefox. Before installing MetaMask again, make sure you removed the MetaMask permission from your Lattice and you can also reset app state and delete local storage on the Lattice Manager again - just to be sure.

After you're ready to connect, install MetaMask again:

{% embed url="<https://docs.gridplus.io/metamask/installing-metamask>" %}

And then obviously go through the [**connecting process**](https://docs.gridplus.io/metamask/connecting-to-metamask) again.

{% hint style="success" %}
If you still can't get this to work after going through all these steps, please [**create a ticket**](https://gridplus.io/contact/) or reach out to us [**on our Discord server**](https://discord.gg/gridplus) and we'll help you figure this out.
{% endhint %}


# NuFi

<figure><img src="/files/MklU59fWrFP8WY5jIQCQ" alt=""><figcaption></figcaption></figure>

**NuFi wallet** is a multi-chain, multi-purpose Web3 wallet that offers a range of interesting features from sending, staking and swapping tokens to managing NFTs across multiple Layer 1 and Layer 2 blockchains. You can use NuFi as a hot wallet or connect it to your hardware wallet (read: your GridPlus Lattice1), but what sets NuFi apart from competition is that you can also choose to create a non-custodial wallet with NuFi using your Google/Twitter/other account and manage your assets via that login alone without having to self-custody your seed phrase.

You can use NuFi connected to your GridPlus Lattice1 to manage assets on **Solana, Bitcoin** and **Ethereum**, along with the EVM-based Layer 2 networks **Polygon, Optimism and Arbitrum**. **On Solana**, NuFi can also be **injected** into the Phantom wallet, but has plenty of direct integrations with dApps on SOL you can use without doing this.

#### **Get NuFi here:**

{% embed url="<https://nu.fi/>" %}

### Features Overview

* **Multi-chain portfolio tracker**\
  You can manage your entire portfolio across multiple chains with live updated prices and all on-chain assets including NFTs.
* **Multi-chain staking**\
  You can stake assets directly on NuFi to earn low-risk yield.
* **Multi-chain NFT gallery**\
  View all your NFTs on different blockchains in one place.
* **Both self-custodial and non-custodial wallet options**\
  You’re most likely going to use NuFi with your Lattice1, but if you know someone who’s interested in getting into cryptocurrency, they can use NuFi to play around without the risk of losing their seed phrase.
* **Support for all dApps**\
  NuFi can be used directly with popular dApps such as Uniswap or Jupiter, but you can also inject it into other wallets and use them for dApps that do not have direct support for NuFi yet. This essentially allows you to use NuFi for every single dApp you can think of.
* **Integrated swaps**\
  Swap crypto directly on NuFi and/or buy it with your credit card.

### NuFi and Your Lattice

When you connect your Lattice to NuFi, you will allow the app to import addresses from your wallet from which individual accounts on NuFi will be created. This does NOT mean that NuFi will have full access to your funds - you will only give it permission to read your wallet addresses and request signatures when there's something you need to sign, like a token swap for example.

{% hint style="info" %}
You will only import your addresses (public keys) and create a communication channel between NuFi and your device, your private keys remain safely stored on the Lattice (or SafeCard).
{% endhint %}

<figure><img src="/files/nILlhjjePxput1P0AXZm" alt=""><figcaption></figcaption></figure>


# Connecting to NuFi

We will assume you're new to NuFi  - if not, you can skip steps 1, 2, 3 and 4 and start from step 5.&#x20;

### Step-By-Step Guide <a href="#step-by-step-guide" id="step-by-step-guide"></a>

1. Install **NuFi** from the [Chrome webstore](https://nu.fi/). Open the app.
2. Select the **Pair Hardware Wallet** button.

{% hint style="info" %}
You don't have to create a hot wallet or an account on NuFi before connecting your Lattice to it. If you're already a NuFi user and want to add your Lattice accounts to NuFi, you can skip steps 1 and 2 and go to **Accounts → Add Account → GridPlus** and follow the process.
{% endhint %}

<figure><img src="/files/dsAxDaYSQyngjmrFroT3" alt=""><figcaption></figcaption></figure>

3. Click through the notice and name your wallet on the next screen. Accept the Terms & Conditions and select a password on the next screen. This is a password used to login to NuFi every time you want to use app, so make sure you pick something you won't forget.

<figure><img src="/files/OSCsUnGa5LotUhlWZjAi" alt=""><figcaption></figcaption></figure>

4. Create a **NuFi recovery phrase** - on this step, you have the option to create a **hot wallet** from a seed phrase generated directly on NuFi - only do this if you're planning on using a hot wallet along with your Lattice accounts with NuFi. This step is **optional**. In this guide, we will skip this.

<figure><img src="/files/c1jc8y1O7LacWJYztOpK" alt=""><figcaption></figcaption></figure>

5. And there you go! You've gone through basic setup and now it's time to create a secure communication channel between NuFi and your Lattice by connecting your device. You can either click on the **pop-up notice NuFi shows you** to start this process or you can click on the **Add Account** button and then **Add new HW accounts** if you already have other NuFi accounts.

{% hint style="info" %}
If you ever want to add **more** Lattice/SafeCard accounts in the future, this is the button you will use again. You can also use this to add other accounts from a different hardware wallet, the NuFi seed phrase or import from a private key directly.
{% endhint %}

<figure><img src="/files/GPq6I7hhndSQenvtgmgZ" alt=""><figcaption></figcaption></figure>

6. First, select the blockchain you want to use and hit continue. We will go with **Solana**, but you can also use NuFi for **Bitcoin** or **EVM chains** with your Lattice. Select the GridPlus Lattice1 on the next screen and you will be taken to the **Lattice Connector** module (the domain needs to be [**https://lattice.gridplus.io**](https://lattice.gridplus.io/)).

<figure><img src="/files/5xpQ212lvzNMvLP9Th5s" alt=""><figcaption></figcaption></figure>

7. The Lattice Connector is an interface you will use to create and log into 3rd party app connections - the process is the same for all apps that have a Lattice integration built into them. You will need to enter your **device ID and a password** on this page. Your device ID is unique to your device and is used to establish a connection with our servers - you can find it on your Lattice's homescreen as **Device ID**. Enter **any password** you like - this can be later reset. Press **Connect**.

{% hint style="info" %}
Even though the password **can** be easily reset, it's better if you type in something you will remember or save it to a password manager, because if you'll want to add new accounts in the future using the same Lattice (more addresses from your Lattice wallet or addresses from a SafeCard wallet), you'll have to go through this process again - and the password **needs to be the same** if you don't want to re-connect from scratch.
{% endhint %}

<figure><img src="/files/HmnBPqe0vEZmumXt9v8Y" alt=""><figcaption></figcaption></figure>

8. Next, select the **derivation path** and accounts you'd like to use. Each address will create one standalone account on NuFi. You can also give each account a custom display name on the next step. When you're done, click on Continue to finish the connection process.

{% hint style="info" %}
If you're connecting to NuFi to use it with **Bitcoin**, you will see the option to use either **Native Segwit/Wrapped Segwit** or **Native Segwit (Sparrow)/Wrapped Segwit (Sparrow)** derivation paths. You need to select either of the **first two options**, unless your Bitcoin wallet was originally created on the Sparrow wallet, which is unlikely.

Here are the differences between the two address types:

* **Native Segwit** addresses begin with '**bc1'.** This standard was developed to have lower tx fees than Legacy transactions. This is the default BTC address format as viewed on the Lattice1 under Lattice/SafeCard Wallet→Bitcoin Addresses, but can be switched to **Wrapped Segwit** in **System Settings** by **disabling** the bech32 option.
* **Wrapped Segwit** addresses begin with a '**3'** and are standard for most modern BTC wallets. This standard added basic scripting functionality to BTC addresses.
  {% endhint %}

<figure><img src="/files/5phHqzxCpJ5baantcWNt" alt=""><figcaption></figcaption></figure>

9. And you're done! You can now use your Lattice1 with NuFi on Solana.

<figure><img src="/files/quTptkeLrSen3YaJVJoF" alt=""><figcaption></figcaption></figure>


# NuFi Troubleshooting

{% hint style="success" %}
If you're having any issues while connecting to NuFi or even after you've connected, this article will help you resolve them. If you can't find a solution to your issue in this guide, please [**contact us**](https://gridplus.io/contact/).
{% endhint %}

#### **Common Issues**

* Transaction requests approved on NuFi no longer pop up on the Lattice screen
* The Lattice Connector window showing a **"Device Locked" error** while NuFi is stuck endlessly spinning when loading your accounts
* The screen is stuck spinning on the **"Loading - Connecting..."** Lattice Connector page

<div align="center"><figure><img src="/files/sRIvc49rOODDeZqVqCTp" alt=""><figcaption></figcaption></figure></div>

#### Step-By-Step Guide For Troubleshooting NuFi <a href="#step-by-step-guide-for-troubleshooting-rabby" id="step-by-step-guide-for-troubleshooting-rabby"></a>

Going through all these steps won't be necessary for most NuFi issues as most should be fixed by re-connecting - the guide tells you explicitly when to try connecting to NuFi again.

### A. The Basics <a href="#a.-the-basics" id="a.-the-basics"></a>

#### **1. Internet Connection**

If you can't get transaction requests to pop up on your Lattice screen despite approving them in NuFi or you cannot connect your Lattice to the app at all, the first thing to check is whether both your computer and your Lattice are connected to the internet. This can also be the cause of getting stuck on the **"Loading - Connecting..." page** on the Lattice Connector.

{% hint style="info" %}
You don't have to be connected to the same network, but both devices do have to be **online**. You can check your Lattice's connection status directly on the screen in the upper right corner (see the [**firmware reference article**](https://docs.gridplus.io/lattice1/lattice1-firmware-reference) to know what icons to look for).
{% endhint %}

If you're sure you're online, move on to step 2.

#### **2. Check Your NuFi and Lattice Firmware Versions**

The latest Lattice firmware version can always be found in [**this article**](https://docs.gridplus.io/lattice1/lattice1-firmware-reference). If you're not on the latest, just go to **System Preferences → Software Update**. If you cannot see an update available here, make sure your Lattice is [**online**](https://docs.gridplus.io/support/lattice1-wifi-troubleshooting).

To update your NuFi extension, right-click on the **NuFi** icon and select **Manage Extension**. Then enable **Developer mode** in the top right corner and after that, just click on **Update.**

<figure><img src="/files/POXbOiHP39PBDKBZ2JEY" alt=""><figcaption></figcaption></figure>

#### **3. Unlock Your SafeCard**

If you're trying to connect a SafeCard wallet to NuFi, the inserted SafeCard has to be **unlocked** prior to initiating the connection - NuFi cannot view or import addresses from a locked card.

Trying to connect with the locked card will result in the **"Failed to get accounts" error**. Unlock your card and try again. If you're not connecting with a card or your card is unlocked, move on to step 4.

#### **4. Incorrect Device ID And/Or Password**

Make sure that you're typing in the **correct device ID** if you see the spinning wheel on the Lattice Connector page (this might also be caused by your Lattice being offline, but this part was written with the assumption that you made sure your Lattice indeed is online as per step 1.

You get a new device ID every time you reset the Lattice network module, but you can always **find your active device ID** in the last menu item on the Lattice homescreen.

### B. Resetting the Connection <a href="#b.-resetting-the-connection" id="b.-resetting-the-connection"></a>

{% hint style="success" %}
**Make sure you go through steps 5, 6 and 7 in order before you try connecting again!**
{% endhint %}

#### **5. Re-Connect With NuFi**

If your Lattice is online, your inserted SafeCard is unlocked (if you're using one) and you're sure you're typing in the correct device ID and password combination but you're still having issues, it's time to try removing the old connection and all cached data and re-connecting to get a fresh one.

**5.1 Remove the NuFi Permission**

Go to **Permissions** on your Lattice and if you see a NuFi permission there, delete it.

{% hint style="danger" %}
If you cannot access **Permissions** on your Lattice (the button will only visually react to being tapped on, but will not show you the Permissions menu), please [**reach out to us** ](https://gridplus.io/contact)before attempting anything else! This is extremely rare and you shouldn't ever see it, but if you do, get in touch.
{% endhint %}

**5.2 Remove Previously Linked Lattice Accounts from NuFi**

On NuFi, go to the **Accounts** tab and then click on **Manage & details** and then **Forget account.** Do this for all addresses/accounts that have the GridPlus logo next to them.

<figure><img src="/files/8F4TX6obcF7GQADekofw" alt=""><figcaption></figcaption></figure>

**5.3 Delete NuFi Cache**

On Chrome, copy this to your URL bar: `chrome://settings/clearBrowserData`

**And select Advanced, All time in the Time range and only select Hosted App Data.**

#### **6. Reset App State on the Lattice Manager**

Here's how:

1. Go to the [**Lattice Manager**](https://lattice.gridplus.io/) URL and scroll down
2. Click to **Settings** and scroll down
3. Click on **Reset App State** and then **Update and Reload**

<figure><img src="https://docs.gridplus.io/~gitbook/image?url=https%3A%2F%2F268056579-files.gitbook.io%2F%7E%2Ffiles%2Fv0%2Fb%2Fgitbook-x-prod.appspot.com%2Fo%2Fspaces%252F-MZJQypB4fk8YIsDKCl_%252Fuploads%252FFcYayMVKvInrBCVrFG0g%252Flmdebug.png%3Falt%3Dmedia%26token%3Dfbefbced-4074-4223-afd0-a6ed5782e810&#x26;width=768&#x26;dpr=4&#x26;quality=100&#x26;sign=c2165e1d&#x26;sv=2" alt=""><figcaption></figcaption></figure>

#### **7. Delete Local Storage on the Lattice Manager**

{% hint style="info" %}
It's possible local storage will be empty after resetting the app state, so skip this if that's the case. But make sure to double-check this before you try reconnecting with NuFi.
{% endhint %}

Then, go to the Lattice Manager URL ([**https://lattice.gridplus.io/**](https://lattice.gridplus.io/)) and when there, do this:

Press F12 on Windows/Linux or Fn + F12 on Mac (opens Developer tools) → Application tab → Local Storage under the storage tab → lattice.gridplus.io → Clear all <img src="https://docs.gridplus.io/~gitbook/image?url=https%3A%2F%2F268056579-files.gitbook.io%2F%7E%2Ffiles%2Fv0%2Fb%2Fgitbook-x-prod.appspot.com%2Fo%2Fspaces%252F-MZJQypB4fk8YIsDKCl_%252Fuploads%252Fmr8l1ahRwm9FewuIFYrq%252Fno_entry-removebg-preview.png%3Falt%3Dmedia%26token%3Dfcfc3e03-86e1-4a8e-bc25-e08921dcd809&#x26;width=40&#x26;dpr=4&#x26;quality=100&#x26;sign=567a3ea4&#x26;sv=2" alt="" data-size="line">

<figure><img src="/files/FqIsT044R6ymrS0EpMOr" alt=""><figcaption></figcaption></figure>

You should then be able to go through the [**pairing process**](https://docs.gridplus.io/apps-and-integrations/nufi/connecting-to-nufi) without any issues.

### C. Nuclear Option <a href="#c.-nuclear-option" id="c.-nuclear-option"></a>

#### **8. Reset Device ID**

If you still cannot connect after going through all the steps above, it's time for the "nuclear option" - connecting with a **new device ID**.

To get a new device ID, you will need to manually **reset your device's router** - which can be done in **System Preferences → Security & Privacy → Reset Router**. This can take a couple of minutes. After this reset is done, you will then need to **re-connect to your WiFi** **network** to have internet access (if you're using WiFi).

{% hint style="info" %}
It was possible to encounter a rare situation in which the **device ID wouldn't change** after you reset the router. If this happens to you, powercycle your Lattice (unplug, plug back in), and try again. Confirm that your GCE version is 0.49.0. If you still can't get a new ID after updating the router and powercycling the device, [**please reach out to us**](https://gridplus.io/contact/).
{% endhint %}

After the device ID is reset, **DO NOT ATTEMPT TO RE-CONNECT** right away! First, you need to reset the app state and delete local storage on the Lattice Manager as described in steps 6 and 7. Then try connecting again.

#### **9. Reinstall NuFi**

If everything else fails and you still somehow get stuck on a particular error, there's also the possibility of getting a completely fresh NuFi instance installed before attempting to connect again. You will first have to remove the old NuFi from your browser/computer completely.

{% hint style="danger" %}
You will **LOSE** all hot accounts/addresses on this **NuFi** instance that are not backed on hardware! Only do this if you have backups for them.
{% endhint %}

Removing NuFi is fairly simple - just right-click the extension and select **"Remove from Chrome"**. Before installing NuFi again, make sure you removed the NuFi permission from your Lattice and you can also reset app state on the Lattice Manager again - just to be sure.

After you're ready to connect, [**install NuFi again**](https://chromewebstore.google.com/detail/nufi/gpnihlnnodeiiaakbikldcihojploeca) and connect to it and everything should be fine.

{% hint style="success" %}
If you still can't get this to work after going through all these steps, please [**create a ticket**](https://gridplus.io/contact/) or reach out to us [**on our Discord server**](https://discord.gg/gridplus) and we'll help you figure this out.
{% endhint %}


# Frame

<figure><img src="https://files.gitbook.com/v0/b/gitbook-x-prod.appspot.com/o/spaces%2F-McGIm-145WxRIIEKoLZ%2Fuploads%2FbiNQx8M2tKU8MD4wMR6P%2FFrameLogoTextCropped.png?alt=media&#x26;token=d4b5c7c1-a739-46be-b9aa-635fbba78223" alt=""><figcaption></figcaption></figure>

**Frame** is a privacy-focused Ethereum wallet that runs as a native desktop application on MacOS, Windows and Linux. It is a capable alternative to MetaMask which can manage all of your accounts, tokens and items and allows you to seamlessly and securely connect them to any dApp.

Frame connects to the Lattice1 hardware wallet via a custom integration with which you can use Frame's innovative UI with the safety of the Lattice - when connected to Frame, all transaction requests have to be approved on the device screen.

{% hint style="success" %}
This also means that **everything** you can do with Frame (this includes all chains and EVM Layer 2 apps supported by Frame), you can also do with the Lattice1 connected to it.
{% endhint %}

#### Frame and Your Lattice <a href="#frame-and-your-lattice" id="frame-and-your-lattice"></a>

Frame uses what they call **Accounts** - each account is basically an interface from which you control a single EVM **address** (public key) - exactly like MetaMask. When you connect your Lattice to Frame, you can select the addresses from the wallet stored on your Lattice to be imported and each will then create a new Frame account.

Signing transactions is done the same way you're used to with Frame hot wallets: you will approve the transaction on Frame - but, unlike using a hot wallet, you will then also have to approve the transaction on the Lattice screen for it to go through (this is because your private keys are on the Lattice and not stored on Frame as it is with hot wallets).

When you connect your Lattice to Frame, your private keys remain safely stored on the hardware wallet, which means signing transactions will require approval on both Frame and then the Lattice screen.

{% hint style="info" %}
Unlike MetaMask, if you have the **same address (public key) on multiple hardware signers**, you can **use either hardware signer** to sign transactions for that account in a single instance of the Frame application. More on that in **Advanced Frame Setup**.

Another important difference between Frame and MetaMask is that in Frame, having a default "hot" account is not a condition for connecting to a hardware wallet - You can connect your Lattice as the **only account** in Frame.
{% endhint %}

<figure><img src="/files/ZW6LFjWZqxkMUBsVamus" alt=""><figcaption></figcaption></figure>


# Installing Frame

Frame is composed of two parts, the **Frame desktop application,** where hot wallets and hardware wallet connections exist, and the **Frame companion** browser extension that injects into dApps just like MetaMask does. It even has a compatibility mode for dApps only suited to MetaMask and can inject "as MetaMask" on these sites, even if there's no native support for Frame.\
\
Installing Frame is quite straight-forward, go to Frame's website and install the desktop app:

{% embed url="<https://frame.sh>" %}

<figure><img src="/files/IhEI0NfJKOZDoCnAmPlM" alt=""><figcaption></figcaption></figure>

When you're done with that, scroll down a little on the Frame website and click on the Firefox or  Chrome icon to install the **Frame Companion** browser extension.

<figure><img src="/files/m4lhjTvXFqsVbanXkgzc" alt=""><figcaption></figcaption></figure>

Frame will appear as a system widget on the right side of your screen and can be summoned and hidden using the  `option+/` keyboard shortcut on Mac or `alt+-` on Win (can be customized in Settings). The Frame companion extension allows you to quickly switch between networks and toggle the MetaMask compatibility mode.

You are not required to use a hot wallet in Frame, so no further setup is necessary if you plan on only using your Lattice via Frame, you can just move on to the **Connecting to Frame** guide ↓


# Connecting to Frame

{% hint style="info" %}
This guide will walk you through the process of connecting your Lattice1 to the Frame desktop wallet - we're obviously assuming you've already installed Frame at this point.

If you haven't, check out the [**Installing Frame**](https://docs.gridplus.io/apps-and-integrations/frame/installing-frame) article.
{% endhint %}

### Step-By-Step-Guide

1. If you have a fresh install of Frame, you will obviously have no accounts on it and the only thing you will see on the homescreen of the app is a big button to add them. So, click on it and select **GridPlus Lattice1.** You can name the device however you wish.

<figure><img src="/files/P9bzZ6CRIwm0tlWETr1Z" alt=""><figcaption></figcaption></figure>

2. You will be asked to enter your **device ID** on the next step. You can find that as the last menu item on the Lattice homescreen. Type it in and click on **Create**.

<figure><img src="/files/BbVNncXku4a1k0hvuYYj" alt=""><figcaption></figcaption></figure>

3. On the next step, you will see a new screen on Frame asking you to enter **a pairing code** (we call this the **secret**), which will now be displayed on your Lattice1 screen. Once you type in the secret correctly, you can click on **Pair** and **the connection will be created** - your Lattice will be added as a new Frame **signer**. You will also see a "Successfully connected!" message on your Lattice screen. This will also create a new Frame **permission** on your Lattice.

<figure><img src="/files/M7CPsMHv2dyxm7EkpwYk" alt=""><figcaption></figcaption></figure>

4. Now all you have to do is just select the addresses you wish to add to Frame. And you're done!

<figure><img src="/files/4lljje3EIydNdRp8K8Sy" alt=""><figcaption></figcaption></figure>

Note: You will only see 5 addresses by default. If you would like to add more addresses, go to **Settings → Lattice Accounts** and adjust the value as needed:

<figure><img src="/files/pRdPPJ9uAAiaXR4B1z8E" alt=""><figcaption></figcaption></figure>

{% hint style="warning" %}
If the derived addresses you see on the left panel do not look familiar, it's possible you may need to change the **derivation path!** \
This is only for ex-Ledger users as Frame uses the standard deriv path by default.
{% endhint %}

### A Note on Derivation Paths

A common issue hardware wallet users run into is using the wrong [**derivation path**](https://docs.gridplus.io/blockchain-basics/wallets#derivation-paths) for their seed when connecting to wallet management apps such as Frame. The derivation path isn't objectively wrong, the trouble lies in where the seed was generated and which path they used when using all their addresses. **Ledger devices** use a different derivation path than what is now considered the **standard path**.&#x20;

{% hint style="info" %}
If you are using a seed that was created on a Ledger device and then imported into your Lattice, you will need to set Frame to generate addresses from your seed along the **Ledger Legacy or Ledger Live** derivation paths.

Use Ledger Legacy if your Ledger device was bought before **July 2018** and Ledger Live if after. If you're not sure, just try both and you will find your addresses with one of them.
{% endhint %}

Here's how:

1. Access the Settings menu
2. Scroll down until you reach the "Lattice Derivation" option and choose the appropriate derivation path for your situation

<figure><img src="/files/y35ON76P5BjTfTOIMGXE" alt=""><figcaption></figcaption></figure>

{% hint style="success" %}
If you'd like to read something a bit more **technical** on derivation paths, you can check out our section on this topic in the [**Wallets** ](https://docs.gridplus.io/blockchain-basics/wallets#derivation-paths)article from our **Blockchain Basics** series.
{% endhint %}

### Adding SafeCard Wallets to Frame and Switching the Active Signer

Adding more addresses from a SafeCard is easy in Frame as you already have the Lattice added as a signer in the app:

1. Insert and unlock your SafeCard
2. Click on the <img src="/files/qtG8FoPtcEkO2LT3zee6" alt="" data-size="line"> button in the top left corner of Frame
3. Open your connected Lattice signer account (the default name for it is GridPlus)
4. Open account details with the<img src="/files/faeLr57lo37MxpMaJLEj" alt="" data-size="line">button
5. Then just click on **Reload Signer**, let the app load, and select the addresses you want to import as standalone Frame accounts/wallets

<figure><img src="/files/GgfaR5hAWKNJuhk10nwo" alt=""><figcaption></figcaption></figure>

{% hint style="info" %}
Frame makes it easy to quickly switch your **active hardware signer**, whether it is to another device type or simply from a SafeCard address to Lattice wallet address and vice versa. To switch signers, follow the **same instructions** as above. If the address you want to switch to is on a **SafeCard**, the card needs to be **inserted and unlocked**.
{% endhint %}


# Advanced Frame Setup

Frame puts the power of customizability back into the hands of the user and makes it simple. Don't want all your signed transactions routed via Infura? Change your RPC provider, even to a self-hosted full node! Want your Lattice transactions to be routed directly from your self-hosted Lattice transaction router? Enter the URL! And more...

### Adding More Chains/Layer 2s and Changing the RPC Provider

Adding chains and L2s to Frame is a couple of clicks away. Simply open the menu with the <img src="/files/sWtbFD9gXyQ9WesnkERf" alt="" data-size="line"> button and select the chains you would like to use under **Chains**.

<figure><img src="/files/L9vIOHYLTgem8KRrkZgt" alt=""><figcaption></figcaption></figure>

{% hint style="success" %}
Other EVM-compatible chains can be added by clicking the **Add New Chain** button which you can find by scrolling to the bottom of the chain selection page.
{% endhint %}

You can also **change the RPC provider** for each chain in this menu, just click Pylon (which is Frame's own default RPC) and select either **Local** or **Custom** and fill in the details if needed.

<figure><img src="/files/xt48Du6225Uab0Uupp41" alt=""><figcaption></figcaption></figure>

### Transaction Routing

The Lattice1, by default, routes transaction requests via **GridPlus infrastructure** in a fully secure, encrypted way. We cannot see the details of your transaction - nobody can.

However, we do offer [**an open source tool**](https://docs.gridplus.io/lattice1-guides/connect-your-lattice-to-your-own-private-endpoint) that anyone can run that will route your tx requests locally. To use that tool to route your tx requests, you'll need to tell Frame how to route them.

**Here's how:** open the **Settings** menu by clicking on the menu button icon <img src="/files/pwtnvLKJqZBRVNTTK7GB" alt="" data-size="line"> and scroll down to **Lattice Relay** and switch it to your custom relay URL.

<figure><img src="/files/V8GTx6Qt1N6FSizTrm4b" alt=""><figcaption></figcaption></figure>

### Adding Custom Tokens

Frame will auto detect most ERC-20 tokens on its own, however - if you hold some nascent or unknown tokens, you can add them simply by clicking **More** at the bottom of your token list, then clicking **Add Token** and then filling in the relevant details for your custom tokens.

<figure><img src="/files/GEE5FvqIIaIwXHUS9KJM" alt=""><figcaption></figcaption></figure>

### Using Multiple Hardware Signers

{% hint style="info" %}
Let's say you have the same seed backed up on multiple hardware wallets - it's easy to switch between them and continue using your connected accounts without having to re-connect your hardware wallets!
{% endhint %}

Just go through the connection process you can starts in **Accounts→Add New Account** and select your addresses when you're done. If you're adding a Ledger wallet, make sure to have the correct deriv path for Ledger selected in Settings.

### Other Customizations

Frame is a powerful wallet with many more features - this list was just a short overview. Check out the other options in the **Settings menu**!

{% hint style="info" %}
If you have any specific questions, you can reach out to the [**Frame team**](https://discord.com/invite/UH7NGqY) on **Discord**.
{% endhint %}


# Frame Troubleshooting

{% hint style="success" %}
If you're having any issues while connecting to Frame or even after you've connected, this article will help you resolve them. If you can't find a solution to your issue in this guide, please [**contact us**](https://gridplus.io/contact/).
{% endhint %}

#### **Common Issues**

* Transaction requests approved on Frame no longer pop up on the Lattice screen
* **"Unable to connect to Hardware Wallet. Please try to re-connect"** error on Frame
* The screen is stuck spinning on the **"Loading - Connecting..."** Lattice Connector page

**Step-By-Step Guide For Troubleshooting Frame**

Going through all these steps won't be necessary for most Frame issues as most should be fixed by re-connecting - the guide tells you explicitly when to try connecting to Frame again.

### A. The Basics <a href="#a.-the-basics" id="a.-the-basics"></a>

#### **1. Internet Connection**

If you can't get transaction requests to pop up on your Lattice screen despite approving them in Frame or you cannot connect your Lattice to the app at all, the first thing to check is whether both your computer and your Lattice are connected to the internet. This can also be the cause of getting stuck on the **"Loading - Connecting..." page** on the Lattice Connector.

{% hint style="info" %}
You don't have to be connected to the same network, but both devices do have to be **online**. You can check your Lattice's connection status directly on the screen in the upper right corner (see the [**firmware reference article**](https://docs.gridplus.io/lattice1/lattice1-firmware-reference) to know what icons to look for).
{% endhint %}

If you're sure you're online, move on to step 2.

#### **2. Check Your Frame and Lattice Firmware Versions**

The latest Lattice firmware version can always be found in [**this article**](https://docs.gridplus.io/lattice1/lattice1-firmware-reference). If you're not on the latest, just go to **System Preferences → Software Update**. If you cannot see an update available here, make sure your Lattice is [**online**](https://docs.gridplus.io/support/lattice1-wifi-troubleshooting).

To update your Frame extension, right-click on the **Frame** icon and select **Manage Extension**. Then enable **Developer mode** in the top right corner and after that, just click on **Update.**

<figure><img src="/files/DIf6QNShZuPaFuGKXNFW" alt=""><figcaption></figcaption></figure>

#### **3. Unlock Your SafeCard**

If you're trying to connect a SafeCard wallet to Frame, the inserted SafeCard has to be **unlocked** prior to initiating the connection - Frame cannot view or import addresses from a locked card.

Trying to connect with the locked card will result in the **"Failed to get accounts" error**. Unlock your card and try again. If you're not connecting with a card or your card is unlocked, move on to step 4.

#### **4. Incorrect Device ID And/Or Password**

Make sure that you're typing in the **correct device ID** if you see the spinning wheel on the Lattice Connector page (this might also be caused by your Lattice being offline, but this part was written with the assumption that you made sure your Lattice indeed is online as per step 1.

You get a new device ID every time you reset the Lattice network module, but you can always **find your active device ID** in the last menu item on the Lattice homescreen.

### B. Resetting the Connection <a href="#b.-resetting-the-connection" id="b.-resetting-the-connection"></a>

{% hint style="success" %}
**Make sure you go through steps 5, 6 and 7 in order before you try connecting again!**
{% endhint %}

#### **5. Re-Connect With Frame**

If your Lattice is online, your inserted SafeCard is unlocked (if you're using one) and you're sure you're typing in the correct device ID and password combination but you're still having issues, it's time to try removing the old connection and all cached data and re-connecting to get a fresh one.

**5.1 Remove the Frame Permission**

Go to **Permissions** on your Lattice and if you see a Frame permission there, delete it.

If you cannot access **Permissions** on your Lattice (the button will only visually react to being tapped on, but will not show you the Permissions menu), please [**reach out to us** ](https://gridplus.io/contact)before attempting anything else! This is extremely rare and you shouldn't ever see it, but if you do, get in touch.

**5.2 Remove Previously Linked Lattice Accounts from Frame**

On Frame, go to **Manage Addresses**, click on the **bin** icon and then **Confirm Delete**.

#### **6. Reset App State on the Lattice Manager**

Here's how:

1. Go to the [**Lattice Manager**](https://lattice.gridplus.io/) URL and scroll down
2. Click to **Settings** and scroll down
3. Click on **Reset App State** and then **Update and Reload**

<figure><img src="https://docs.gridplus.io/~gitbook/image?url=https%3A%2F%2F268056579-files.gitbook.io%2F%7E%2Ffiles%2Fv0%2Fb%2Fgitbook-x-prod.appspot.com%2Fo%2Fspaces%252F-MZJQypB4fk8YIsDKCl_%252Fuploads%252FFcYayMVKvInrBCVrFG0g%252Flmdebug.png%3Falt%3Dmedia%26token%3Dfbefbced-4074-4223-afd0-a6ed5782e810&#x26;width=768&#x26;dpr=4&#x26;quality=100&#x26;sign=c2165e1d&#x26;sv=2" alt=""><figcaption></figcaption></figure>

#### **7. Delete Local Storage on the Lattice Manager**

{% hint style="info" %}
It's possible local storage will be empty after resetting the app state, so skip this if that's the case. But make sure to double-check this before you try reconnecting with Rabby.
{% endhint %}

Before you delete local storage from your browser, make sure you have no Frame and Lattice Manager permissions on your Lattice - go through steps 5 and 6 again.

Then, go to the Lattice Manager URL ([**https://lattice.gridplus.io/**](https://lattice.gridplus.io/)) and when there, do this:

**Chrome**: Press F12 on Windows/Linux or Fn + F12 on Mac (opens Developer tools) → Application tab → Local Storage under the storage tab → lattice.gridplus.io → Clear all <img src="https://docs.gridplus.io/~gitbook/image?url=https%3A%2F%2F268056579-files.gitbook.io%2F%7E%2Ffiles%2Fv0%2Fb%2Fgitbook-x-prod.appspot.com%2Fo%2Fspaces%252F-MZJQypB4fk8YIsDKCl_%252Fuploads%252Fmr8l1ahRwm9FewuIFYrq%252Fno_entry-removebg-preview.png%3Falt%3Dmedia%26token%3Dfcfc3e03-86e1-4a8e-bc25-e08921dcd809&#x26;width=40&#x26;dpr=4&#x26;quality=100&#x26;sign=567a3ea4&#x26;sv=2" alt="" data-size="line">

<figure><img src="/files/ssIbkW1u1L1wFAqIuSgq" alt=""><figcaption></figcaption></figure>

You should then be able to go through the [**pairing process**](https://docs.gridplus.io/apps-and-integrations/frame/connecting-to-frame) without any issues.

### C. Nuclear Option <a href="#c.-nuclear-option" id="c.-nuclear-option"></a>

#### **8. Reset Device ID**

If you still cannot connect after going through all the steps above, it's time for the "nuclear option" - connecting with a **new device ID**.

To get a new device ID, you will need to manually **reset your device's router** - which can be done in **System Preferences → Security & Privacy → Reset Router**. This can take a couple of minutes. After this reset is done, you will then need to **re-connect to your WiFi** **network** to have internet access (if you're using WiFi).

{% hint style="info" %}
It was possible to encounter a rare situation in which the **device ID wouldn't change** after you reset the router. If this happens to you, powercycle your Lattice (unplug, plug back in), and try again. Confirm that your GCE version is 0.49.0. If you still can't get a new ID after updating the router and powercycling the device, [**please reach out to us**](https://gridplus.io/contact/).
{% endhint %}

After the device ID is reset, **DO NOT ATTEMPT TO RE-CONNECT** right away! First, you need to reset the app state and delete local storage on the Lattice Manager as described in steps 6 and 7. Then try connecting again.

#### **9. Reinstall Frame**

If everything else fails and you still somehow get stuck on a particular error, there's also the possibility of getting a completely fresh Frame instance installed before attempting to connect again. You will first have to remove the old Frame from your computer completely.

To remove Frame from your computer, search for it in the list of installed programs and uninstall it.

{% hint style="danger" %}
You will **LOSE** all hot accounts/addresses on this **Frame** instance that are not backed on hardware! Only do this if you have backups for them.
{% endhint %}

After you're ready to connect, [**install Frame again**](https://docs.gridplus.io/apps-and-integrations/frame/installing-frame) and connect to it and everything should be fine.


# Rabby

<figure><img src="/files/ZLJC2wGkDR6sBovVmEGC" alt=""><figcaption></figcaption></figure>

Rabby wallet is a popular software wallet that comes both as a Chromium-based browser extension and also as a desktop app. You can connect your Lattice directly to Rabby without having to create a hot wallet first, so you can have just your Lattice addresses on the app just like with Frame, no need to use a hot address as 'account 1' as in MetaMask.\
\
Using Rabby with the Lattice1 is **almost the same** as using the wallet app without a hardware wallet - but when you connect your hardware to the extension, all transaction requests will now have to be signed on the Lattice1 and you will get to approve all of them on the device screen.

{% hint style="success" %}
This also means that whatever you can do with Rabby (this includes all chains other than Ethereum that are supported by the extension too!), **you can do with the Lattice1**.
{% endhint %}

**You can get Rabby here:**

{% embed url="<https://rabby.io/>" %}

### Rabby and Your Lattice

Rabby uses addresses **connected via your Lattice**. When you connect your Lattice to Rabby, you can select the addresses from the wallet stored on your Lattice to be imported and each will then create a **new Rabby account**.&#x20;

{% hint style="info" %}
You will only import your **addresses (public keys)** and create a communication channel between Rabby and your device, your **private keys** remain stored on the Lattice.&#x20;

This means that all transaction requests have to approved on Rabby like you're used to when using hot wallets, but then you will also have to confirm the transaction request approval **on the Lattice screen**.
{% endhint %}

<figure><img src="/files/0a001k6mPuJgjQoCOJhs" alt=""><figcaption></figcaption></figure>


# Connecting to Rabby

## A. Browser Extension

In order to connect your Lattice to Rabby, you will first need to install the **Rabby browser extension** - you can do so below. Make sure to pin the extension once installed for easy access.

{% embed url="<https://rabby.io/>" %}

<figure><img src="/files/okVk7XSiVFQHpnDjtEEW" alt=""><figcaption></figcaption></figure>

When you're done with that, you can start the process of connecting Rabby to your Lattice.

### Step-By-Step-Guide

1. On the starting screen, select **I already have an address** **→ Hardware Wallet → GridPlus**.\
   You could import a hot wallet or connect other hardware wallets too, but this is not the purpose of this article. You can do that later when you're done with the setup.

<figure><img src="/files/eqD4nam97cO6LEkIJ6JK" alt=""><figcaption></figcaption></figure>

1. You will then create a **password** for unlocking Rabby. When you're done, check the Terms of Use box, click on **Next** and on the next step, click on **Connect GridPlus**.

{% hint style="info" %}
This password **only unlocks Rabby** - it doesn't grant access to any of your funds as you still have to approve all transaction requests on the Lattice screen for them to go through, so your Lattice also need to be unlocked. \
\
This password will unlock any hot wallets you will add to Rabby though, so make sure it's robust if you plan on doing that.
{% endhint %}

<figure><img src="/files/hCBnYMjsMp3F5u2nlK48" alt=""><figcaption></figcaption></figure>

4. A new tab will open on your browser, with the URL *<https://lattice.gridplus.io>* - this is the **Lattice Connector**, a tool for connecting with apps that's part of the Lattice Manager app. \
   \
   On this page, you will need to input your **device ID** and create a **password** in order to create a Rabby permission on the Lattice. If your Lattice is locked, please unlock it first before proceeding.\
   \
   You can find your **device ID** as the last item on the Lattice homescreen. Choose any **password** you like - the password can be reset by removing the permission from Lattice and then re-creating the connection with Rabby. Then click on **Connect**.

<figure><img src="/files/ywiRJGK3IxGtLe8uwDbD" alt=""><figcaption></figcaption></figure>

5. This will take you to the next step - you should see a new screen asking you to enter **a secret**, which will now be displayed on your Lattice1 screen. Once you type in the secret correctly, **Rabby will be paired to your Lattice1**. This will also create a new Rabby **permission** on your device, and also a **3rd party connection** on the **Lattice Manager**.

<figure><img src="/files/XA28aF8RWtUasRlG6LyO" alt=""><figcaption></figcaption></figure>

6. The Lattice Connector window will close after you type in the secret and you will be taken back to Rabby, where the first address of your wallet will now be imported. If you want to import **more addresses** or switch the derivation path **(necessary for ex-Ledger users!)**, click on **Add more addresses from GridPlus** at the bottom of the page.\
   \
   If you don't need to switch the deriv path or don't wish to import more addresses, you can finish the process by clicking on **Get Started** (no need to go through the next steps).

<figure><img src="/files/ks67xdt6qvTMwiQ7kKEi" alt=""><figcaption></figcaption></figure>

7. If you wish to import more addresses, you will be taken to the next screen, where you'll need to **select the addresses** you wish to use with Rabby (it's possible you may need to wait for a short bit before all the addresses load). When the addresses load, just select the ones you want added and click on **Done**. And you're done!

<figure><img src="/files/5dFFznCuTDi4uOmlusUQ" alt=""><figcaption></figcaption></figure>

{% hint style="success" %}
Ledger user? If the seed on your Lattice was originally created on a **Ledger device**, you will need to switch the derivation path to see your addresses. You can do that by clicking on **Advanced Settings** in the top right corner and selecting **Ledger Live** (if your seed was created after July 2018) or **Ledger Legacy** (if your seed was created before July 2018).
{% endhint %}

<figure><img src="/files/HCtSm5rRh4wm7ZgrtuXH" alt=""><figcaption></figcaption></figure>

## B. Desktop App

You can get the desktop app directly on Rabby's website, just select desktop:

{% embed url="<https://rabby.io/>" %}

<figure><img src="/files/oFMNtXjH2UMlQWoz15zg" alt=""><figcaption></figcaption></figure>

Once downloaded, just run the executable and wait until the installation is finished. Rabby will then automatically open and you can start the connection process.

### Step-By-Step-Guide

1. You can start by clicking on **Get started**. On the next step, select **GridPlus**.

<figure><img src="/files/N5dWStPuWImRgy6ts6ij" alt=""><figcaption></figcaption></figure>

2. Rabby will open a Lattice Connector window. Input your device ID and select a password.

{% hint style="info" %}
If you've connected to the Rabby browser extension before, this step will be skipped and you will be sent directly to address selection.
{% endhint %}

<figure><img src="/files/xhzswHwP0dFuXkBtz8FD" alt=""><figcaption></figcaption></figure>

3. Select the addresses you want to use on the next steps and then click on **Enter Rabby**.

<figure><img src="/files/qLbge0CokuAN6ZIGnV5a" alt=""><figcaption></figcaption></figure>

And you're done!


# Rabby Troubleshooting

If you're having any issues while connecting to Rabby or even after you've connected, this article will help you resolve them. If you can't find a solution to your issue in this guide, please [**contact us**](https://gridplus.io/contact/).

#### **Common Issues**

* Transaction requests approved on Rabby no longer pop up on the Lattice screen
* **"Unable to connect to Hardware Wallet. Please try to re-connect"** error on Rabby
* **"Failed to get accounts. Please forget the device and try again. Make sure you do not have a locked SafeCard inserted."** error on Rabby
* The screen is stuck spinning on the **"Loading - Connecting..."** Lattice Connector page

<figure><img src="/files/VTZeWcJN6LDTYNJHuuri" alt=""><figcaption></figcaption></figure>

### Step-By-Step Guide For Troubleshooting Rabby

Going through all these steps won't be necessary for most Rabby issues as most should be fixed by re-connecting - the guide tells you explicitly when to try connecting to Rabby again.

### A. The Basics

#### 1. Internet Connection

If you can't get transaction requests to pop up on your Lattice screen despite approving them in Rabby or you cannot connect your Lattice to the wallet at all, the first thing to check is whether both your computer and your Lattice are connected to the internet. This can also be the cause of getting stuck on the **"Loading - Connecting..." page** on the Lattice Connector.

{% hint style="info" %}
You don't have to be connected to the same network, but both devices do have to be **online**. You can check your Lattice's connection status directly on the screen in the upper right corner (see the [**firmware reference article**](https://docs.gridplus.io/lattice1/lattice1-firmware-reference) to know what icons to look for).
{% endhint %}

If you're sure you're online, move on to step 2.

#### 2. Check Your Rabby and Lattice Firmware Versions

The latest Lattice firmware version can always be found in [**this article**](https://docs.gridplus.io/lattice1/lattice1-firmware-reference). If you're not on the latest, just go to **System Preferences → Software Update**. If you cannot see an update available here, make sure your Lattice is [**online**](https://docs.gridplus.io/support/lattice1-wifi-troubleshooting).

To update your Rabby extension, right-click on the **Rabby** icon and select **Manage Extension**. Then enable **Developer mode** in the top right corner and after that, just click on **Update.**

<figure><img src="/files/KziyMFebFRQkLrsKkAHa" alt=""><figcaption></figcaption></figure>

#### 3. Unlock Your SafeCard

If you're trying to connect a SafeCard wallet to Rabby, the inserted SafeCard has to be **unlocked** prior to initiating the connection - Rabby cannot view or import addresses from a locked card.

Trying to connect with the locked card will result in the **"Failed to get accounts" error**. Unlock your card and try again. If you're not connecting with a card or your card is unlocked, move on to step 4.

#### 4. Incorrect Device ID And/Or Password

Make sure that you're typing in the **correct device ID** if you see the spinning wheel on the Lattice Connector page (this might also be caused by your Lattice being offline, but this part was written with the assumption that you made sure your Lattice indeed is online as per step 1.

{% hint style="success" %}
You get a new device ID every time you reset the Lattice network module, but you can always **find your active device ID** in the last menu item on the Lattice homescreen.
{% endhint %}

### B. Resetting the Connection

{% hint style="success" %}
**Make sure you go through steps 5, 6 and 7 in order before you try connecting again!**
{% endhint %}

#### 5. Re-Connect With Rabby

If your Lattice is online, your inserted SafeCard is unlocked (if you're using one) and you're sure you're typing in the correct device ID and password combination but you're still having issues, it's time to try removing the old connection and all cached data and re-connecting to get a fresh one.

**5.1 Remove the Rabby Permission**

Go to **Permissions** on your Lattice and if you see a Rabby permission there, delete it.&#x20;

{% hint style="danger" %}
If you cannot access **Permissions** on your Lattice (the button will only visually react to being tapped on, but will not show you the Permissions menu), please [**reach out to us** ](https://gridplus.io/contact)before attempting anything else!\
\
This is extremely rare and you shouldn't ever see it, but if you do, get in touch.
{% endhint %}

**5.2 Remove Previously Linked Lattice Accounts from Rabby**

On Rabby, go to **Manage Addresses**, click on the **bin** icon and then **Confirm Delete**.

<figure><img src="/files/h7M12Wn3anX126Xgd4dF" alt=""><figcaption></figcaption></figure>

**5.3 Delete Rabby Cache**

On Chrome, copy this to your URL bar: `chrome://settings/clearBrowserData`

**And select Advanced, All time in the Time range and only select Hosted App Data.**

{% hint style="info" %}
This step is for the browser extension only.
{% endhint %}

#### 6. Reset App State on the Lattice Manager

Here's how:

1. Go to the [**Lattice Manager**](https://lattice.gridplus.io/) URL and scroll down
2. Click to **Settings** and scroll down
3. Click on **Reset App State** and then **Update and Reload**

<figure><img src="/files/Qvp3rWHMvDG8AO1cAs61" alt=""><figcaption></figcaption></figure>

#### 7. Delete Local Storage on the Lattice Manager

{% hint style="info" %}
It's possible local storage will be empty after resetting the app state, so skip this if that's the case. But make sure to double-check this before you try reconnecting with Rabby.
{% endhint %}

Before you delete local storage from your browser, make sure you have no Rabby and Lattice Manager permissions on your Lattice.

Then, go to the Lattice Manager URL ([**https://lattice.gridplus.io/**](https://lattice.gridplus.io/)) and when there, do this:

Press F12 on Windows/Linux or Fn + F12 on Mac (opens Developer tools) → Application tab → Local Storage under the storage tab → lattice.gridplus.io → Clear all <img src="/files/B0iyX1ZpVkrD6n8K3uKh" alt="" data-size="line">

<figure><img src="/files/51QPyBN1MB2d9bFoUWeU" alt=""><figcaption></figcaption></figure>

You should then be able to go through the [**pairing process**](/apps-and-integrations/rabby/connecting-to-rabby) without any issues.

### C. Nuclear Option

#### 8. Reset Device ID

If you still cannot connect after going through all the steps above, it's time for the "nuclear option" - connecting with a **new device ID**.

To get a new device ID, you will need to manually **reset your device's router** - which can be done in **System Preferences → Security & Privacy → Reset Router**. This can take a couple of minutes. After this reset is done, you will then need to **re-connect to your WiFi** **network** to have internet access (if you're using WiFi - if you're connected via LAN, just wait for the router to load).

{% hint style="info" %}
It's possible to encounter a rare situation in which the **device ID will not be changed** after you reset the router. If this happens to you, powercycle your Lattice (unplug, plug back in), and try again. Confirm that your GCE version is 0.49.0. If you still can't get a new ID after updating the router and powercycling the device, [**please reach out to us**](https://gridplus.io/contact/).
{% endhint %}

After the device ID is reset, **DO NOT ATTEMPT TO RE-CONNECT** right away! First, you need to reset the app state and delete local storage on the Lattice Manager as described in steps 6 and 7. \
Then try connecting again.

#### 9. Reinstall Rabby

If everything else fails and you still somehow get stuck on a particular error, there's also the possibility of getting a completely fresh Rabby instance installed before attempting to connect again. You will first have to remove the old Rabby from your browser/computer completely.

{% hint style="danger" %}
You will **LOSE** all hot accounts/addresses on this Rabby instancethat are not backed on hardware! Only do this if you have backups for them.
{% endhint %}

Removing Rabby is fairly simple - just right-click the extension and select **"Remove from Chrome"**. Before installing Rabby again, make sure you removed the Rabby permission from your Lattice and you can also reset app state on the Lattice Manager again - just to be sure.

If you use the **desktop version**, you'll have to find it under apps and uninstall it manually.

After you're ready to connect, [**install Rabby again**](https://chrome.google.com/webstore/detail/rabby-wallet/acmacodkjbdgmoleebolmdjonilkdbch) and connect to it and everything should be fine.


# ShapeShift

<figure><img src="/files/QrrLncn43lid0UmyIxD2" alt=""><figcaption></figcaption></figure>

**ShapeShift** is a multichain, multipurpose app that allows you to bridge, trade and stake crypto and also buy blockchain-based stocks - and now you can use it with a direct Lattice1 integration.

Unlike MetaMask, Rabby, NuFi and other browser extension wallet apps we have integrations with, ShapeShift is a browser-based platform you open in a webpage, similar to [**MyCrypto**](https://docs.gridplus.io/apps-and-integrations/mycrypto) for example.&#x20;

{% embed url="<https://shapeshift.com/>" %}

{% hint style="warning" %}
ShapeShift also has a **mobile app** you can download and install on your device, but please note that version of the app does **NOT** have support for the Lattice as of now (there's no support for any hardware wallets on the mobile ShapeShift app).
{% endhint %}

Let's have a quick look at what the app offers and why you should consider checking it out.

### Features Overview <a href="#features-overview" id="features-overview"></a>

<figure><img src="/files/84D6hqvfjRoa33DrO8nP" alt=""><figcaption></figcaption></figure>

* **Multichain + Cosmos support**\
  Some chains available on ShapeShift are not available with the Lattice integration yet (Zcash for example), but the good news is that **you can now buy/sell assets on Cosmos!**
* **Trade** \
  This tab lets you perform simple trading operations with your crypto - **buy, sell, swap across multiple chains** - and you can also set up **limit orders** for trading when away.
* **Explore**

  Here you can see a list of all available digital assets on ShapeShift and under Markets, you can top assets sorted by daily volume, market cap and other metrics.
* **Earn**&#x20;

  This tab lets you access available **THORChain DeFi pools** ($RUNE pairs). To buy DeFi protocol coins on other chains, use the Trade tab.
* **Ecosystem** \
  Here you can participate in DAO governance of the ShapeShift project with its native $FOX token (ERC-20 based). You can also farm or stake the token on this tab.
* **WalletConnect**\
  You can connect ShapeShift to any existing 3rd party (or your own) app that supports WalletConnect and use the wallet imported on ShapeShift to sign any tx requests.
* And more. Explore the app!

### ShapeShift and Your Lattice <a href="#mycrypto-and-your-lattice" id="mycrypto-and-your-lattice"></a>

When you connect your Lattice to ShapeShift, you will allow the app to import addresses from your wallet, which you can then manage and use on the app. This does NOT mean that ShapeShift will have full access to your funds - you will only give it permission to see your wallet addresses and request signatures when there's something you need to sign, like a token swap for example.

You will only import your **addresses (public keys)** and create a communication channel between MyCrypto and your device, your **private keys** remain stored on the Lattice.

This means that all transaction requests have to be approved **on the Lattice screen**.

<figure><img src="/files/oSYUCqiwNQnZvkJCLWMC" alt=""><figcaption></figcaption></figure>


# MyCrypto

MyCrypto is an Ethereum wallet manager app that has a lot of useful tools for ETH users, including but not limited to buying, sending and swapping crypto, signing test messages, deploying smart contracts and many others, as well as a direct integration with the Lattice.

Unlike most other apps we have an integration with, MyCrypto is a **browser-based online app** and not a browser extension - you can check it out here (you can have a look at MyCrypto's features without connecting it to your Lattice or importing a wallet when you select **View Demo Mode**):

{% embed url="<https://app.mycrypto.com/dashboard>" %}

{% hint style="warning" %}
MyCrypto also has a **desktop app** you can download and install on your device, but please note that version of the app does **NOT** have support for the Lattice as of now.

The desktop app allows you to import a wallet via the seed phrase and supports custom **passphrases** as well, which is uncommon and can be very useful in situations in which you need immediate access to your wallet (in case your Lattice gets stolen or damaged).
{% endhint %}

### Features Overview

<figure><img src="/files/cpZh80yIvCgGp97Y60GR" alt=""><figcaption></figcaption></figure>

* **Wallet management & analysis**\
  The MyCrypto dashboard allows you to manage and analyze the contents of your wallet and also visualize activity on any wallet or smart contract address in the Ethereum network.
* **Sending and requesting crypto transactions and swaps**\
  You can use the built-in send/request feature to send any EVM-based token that you have or request a specific amount, which will generate a QR code you can then send to someone. You can also swap assets directly in the app.
* **Buying crypto**\
  You can buy crypto with fiat directly in MyCrypto using MoonPay.
* **MyCrypto tools**\
  In this tab, you can find some tools that are useful not only for web3 devs, but also when troubleshooting connection issues and generally playing around with Ethereum, such as generating an offline signing request, deploying a smart contract, acquiring test tokens via testnet faucets as well as showing your NFTs on a clean dashboard (and others).

### MyCrypto and Your Lattice

When you connect your Lattice to MyCrypto, you will allow the app to import addresses from your wallet, which you can then analyze and manage. This does NOT mean that MyCrypto will have full access to your funds - you will only give it permission to visualize your wallet addresses and request signatures when there's something you need to sign, like a token swap for example.

{% hint style="info" %}
You will only import your **addresses (public keys)** and create a communication channel between MyCrypto and your device, your **private keys** remain stored on the Lattice.&#x20;

This means that all transaction requests have to be approved **on the Lattice screen**.
{% endhint %}

<figure><img src="/files/24Cz2nLyJKoukw75LIL1" alt=""><figcaption></figcaption></figure>


# Connecting to MyCrypto

If you'd like to try **MyCrypto** out and see all the features the dashboard app has to offer, connecting your Lattice to it is very easy and will take just a minute or two.

### Step-By-Step Guide

1. In the MyCrypto app, go to the **Add** tab on the left or [**this link**](https://app.mycrypto.com/add-account/:walletId) and select **GridPlus**. On the next screen, select the chain you want to use and hit **Next.**

<figure><img src="/files/ej66G2XL1vyI3ChjjRg0" alt=""><figcaption></figcaption></figure>

2. Make sure your Lattice is online and unlocked and on the next step, simply click on **Connect to GridPlus** to initiate the pairing process.

<figure><img src="/files/tZxOqIWGKvGVJtu6lkg7" alt=""><figcaption></figcaption></figure>

3. You will be taken to the **Lattice Connector** module, where you will need to input your **device ID** and create a password. You can find your device ID as the last item on the Lattice homescreen. \
   \
   The **password** can be anything and it is saved in the permission this pairing process will create on your device. To reset the password, you can delete the MyCrypto permission from your Lattice under permission, but please note you'll then have to re-connect to the app.\
   \
   After you type both of these in, click on **Connect**.

<figure><img src="/files/pkZwod8JtB1Jr8FQ97W7" alt=""><figcaption></figcaption></figure>

4. A secret code will then be generated on your Lattice screen, which you will have to type in the Lattice Manager window in order to connect your Lattice to MyCrypto.

<figure><img src="/files/EGFxhSBkn2VFFDGQH24c" alt=""><figcaption></figcaption></figure>

5. If you type in the code correctly, your Lattice will show a successfully connected message and you will be taken back to MyCrypto to the **Select an Account** screen.\
   \
   Here you can rename the **newly connected accounts** you're importing to MyCrypto (but you can also do that later).\
   \
   If the wallet you have on the Lattice or an active SafeCard was created on a Ledger device, you will not see your balance and the addresses will be different from the ones you're used to using, this is because Ledger uses non-standard [**derivation paths**](https://docs.gridplus.io/blockchain-basics/wallets).\
   \
   In order to fix this, you will have to switch the derivation path to a custom one by clicking on **add a custom derivation path**. You can find an explanation of Ledger's derivation paths [**here**](https://blog.ledger.com/understanding-crypto-addresses-and-derivation-paths/).\
   \
   Then just click on **Add x Accounts** and you're done!

<figure><img src="/files/D3rRT5Wt19n478ju5z73" alt=""><figcaption></figcaption></figure>


# MyCrypto Troubleshooting

{% hint style="success" %}
If you're having any issues while connecting to MyCrypto or even after you've connected, this article will help you resolve them. You should be able to find a solution for ALL connection-related issues, but if nothing on this page works, please [**contact us**](https://gridplus.io/contact/).
{% endhint %}

#### Common Issues

* Transaction requests sent from MyCrypto no longer pop up on the Lattice screen
* The screen is stuck spinning on the "Loading - Connecting..." Lattice Connector page when connecting your device to MyCrypto
* "**Error connecting to device. Popup closed**" error is shown on MyCrypto

{% hint style="info" %}
If you're seeing the error above, you can skip section A and start with section B - step 5.
{% endhint %}

<figure><img src="/files/TwsPAG8VUHOsHH2aqaVQ" alt=""><figcaption></figcaption></figure>

### Step-By-Step Guide For Troubleshooting MyCrypto

Going through **all** these steps won't be necessary for most MyCrypto connection issues as most should be fixed by simply re-connecting - the guide tells you explicitly when to try connecting to the app again, please follow the instructions below in the respective order.

### A. The Basics

#### 1. Internet Connection

If you can't get transaction requests to pop up on your Lattice screen despite approving them in MyCrypto or you cannot connect to the app, the first thing to check is whether both your computer and your Lattice are connected to the internet. This can also be the cause of getting stuck on the **"Loading - Connecting..." page** on the Lattice Connector.

{% hint style="info" %}
You don't have to be connected to the same network, but both devices do have to be **online**. You can check your Lattice's connection status directly on the screen in the upper right corner (see the [**firmware reference article**](https://docs.gridplus.io/lattice1/lattice1-firmware-reference) to know what icons to look for).
{% endhint %}

If you're sure you're online, move on to step 2.

#### 2. Check Your Lattice Firmware Version

The latest Lattice firmware version can always be found in [**this article**](https://docs.gridplus.io/lattice1/lattice1-firmware-reference). If you're not on the latest, just go to **System Preferences → Software Update**. If you cannot see an update available here, make sure your Lattice is [**online**](https://docs.gridplus.io/support/lattice1-wifi-troubleshooting).

**3. Unlock Your SafeCard**

If you're trying to connect a SafeCard wallet to MyCrypto, the inserted SafeCard has to be **unlocked** prior to initiating the connection - MyCrypto cannot import addresses from a locked card.

#### 4. Incorrect Device ID And/Or Password

Make sure that you're typing in the **correct device ID** if you see the spinning wheel on the Lattice Connector page (this might also be caused by your Lattice being offline, but this part was written with the assumption that you made sure your Lattice is indeed online as per step 1).

{% hint style="success" %}
You get a new device ID every time you reset the Lattice network module, but you can always **find your active device ID** in the last menu item on the Lattice homescreen.
{% endhint %}

If you've already connected to MyCrypto with your Lattice and you want to e.g. connect a SafeCard wallet or import more addresses from your Lattice wallet, you need to use the **same password** you've used when this connection was created. If you forgot the password, you can move on to step 5 and attempt re-connecting.

### B. Resetting the Connection

{% hint style="success" %}
**Make sure you go through steps 5, 6 and 7 in order before you try connecting again!**
{% endhint %}

#### 5. Re-Connect With MyCrypto

If your Lattice is online, your inserted SafeCard is unlocked (if you're using one) and you're sure you're typing in the correct device ID and password combination, but you're still having issues, it's time to try removing the old connection and re-connecting to get a fresh one.

**5.1 Remove the MyCrypto Permission**

Go to **Permissions** on your Lattice and if you see a MyCrypto permission there, delete it.&#x20;

{% hint style="danger" %}
If you cannot access **Permissions** on your Lattice (the button will only visually react to being tapped on, but will not show you the Permissions menu), please [**reach out to us** ](https://gridplus.io/contact)before attempting anything else!\
\
This is extremely rare and you shouldn't ever see it, but if you do, get in touch.
{% endhint %}

**5.2 Remove Previously Linked Lattice Accounts from MyCrypto**

Next, go to Settings on MyCrypto and remove all accounts with the **GridPlus tag** in the list of accounts on the app. Just click on the remove button and confirm your choice. Then, hard-refresh the MyCrypto website with Ctrl+F5 on Win/Linux or Cmd+Shift+R on Mac.

#### 6. Reset Lattice Manager App State

Here's how:

* Go to the [**Lattice Manager**](https://lattice.gridplus.io/) URL and scroll down
* Click to **Settings** and scroll down
* Click on **Reset App State** and then **Update and Reload**

<figure><img src="/files/tfG3nlUfzcgEbq8AQjl8" alt=""><figcaption></figcaption></figure>

#### 7. Delete Local Storage on the Lattice Manager

{% hint style="info" %}
It's possible local storage will be empty after resetting the app state, so skip this if that's the case. But make sure to double-check this before you try reconnecting with MyCrypto.
{% endhint %}

Before you delete local storage from your browser, make sure you have no MyCrypto and Lattice Manager permissions on your Lattice.

Then, go to the Lattice Manager URL ([**https://lattice.gridplus.io/**](https://lattice.gridplus.io/)) and when there, do this:

* **Chrome**: Press F12 on Windows/Linux or Fn + F12 on Mac (opens Developer tools) → Application tab → Local Storage under the storage tab → lattice.gridplus.io → Clear all <img src="/files/B0iyX1ZpVkrD6n8K3uKh" alt="" data-size="line">

<figure><img src="/files/xdLMLPBQ7RmNvjnvQ9RK" alt=""><figcaption></figcaption></figure>

* **Firefox**: Menu → More tools → Web Developer Tools → Storage → Local Storage → Right click the lattice.gridplus.io item → Delete All

  <figure><img src="/files/RKWThPoLbT2Roc5SAW02" alt=""><figcaption></figcaption></figure>

You should then be able to go through the [**pairing process**](https://docs.gridplus.io/apps-and-integrations/mycrypto/connecting-to-mycrypto) without any issues.

### C. Nuclear Option

#### 8. Reset Device ID

If you still cannot connect even after going through all the steps above, it's time to try connecting with a **new device ID**.

To get a new device ID, you will need to manually reset your device's router - which can be done in **System Preferences → Security & Privacy → Reset Router**. This can take a couple of minutes. After this reset is done, you will then need to **re-connect to your WiFi** **network** to have internet access (if you're using WiFi).

{% hint style="info" %}
It's possible to encounter a rare situation in which the **device ID will not be changed** after you reset the router. If this happens to you, powercycle your Lattice (unplug, plug back in), and try again. Confirm that your GCE version is 0.49.0. If you still can't get a new ID after updating the router and powercycling the device, [**please reach out to us**](https://gridplus.io/contact/).
{% endhint %}

After the device ID is reset, **DO NOT ATTEMPT TO RE-CONNECT** right away! First, you need to reset the app state and delete local on the Lattice Manager as described in steps 6 and 7. \
Then, try connecting again.

{% hint style="success" %}
If you still can't get this to work after going through all these steps, please [**create a ticket**](https://gridplus.io/contact/) or reach out to us [**on our Discord server**](https://discord.gg/gridplus) and we'll help you figure this out.
{% endhint %}


# Ambire Wallet

**Ambire Wallet** is an DeFi-focused smart account wallet app that has a lot of potentially useful tools for Lattice users, including but not limited to buying, sending and swapping crypto (cross-chain too), earning via DeFi deposits, viewing NFTs in a gallery and more - and all that with a **direct integration with the Lattice**. You can also use it to add extra security on top of your Lattice as you can use email authentication, account recovery and more via [**account abstraction**](https://www.erc4337.io/)**.**

You can check out their website here:

{% embed url="<https://www.ambire.com/>" %}

### Features Overview <a href="#features-overview" id="features-overview"></a>

<figure><img src="/files/2BR1tE7ReZs5vWnq7Qtg" alt=""><figcaption></figcaption></figure>

* **Smart accounts based on account abstraction**\
  Ambire allows you to add an extra level of security on top of your current setup as each Ambire account allows you to add additional logic to protect your account.
* **Support for multiple dApps and WalletConnect**\
  You can connect to any dApp you want to use to Ambire easily, either directly in-app or via WalletConnect. This includes most, if not all, DeFi protocols.
* **Crypto transactions and swaps**\
  You can use the built-in transfer/deposit feature to send any EVM-based token. You can also swap your tokens directly in Ambire, including cross-chain transfer/swaps.
* **Buying crypto with fiat**\
  You can buy crypto with fiat/credit card directly in Ambire and choose between multiple services to do so - MoonPay, Ramp and others.
* **Automated transaction fees**\
  Ambire allows you to fill up what they call a "gas tank" and use these funds for covering transaction fees (you can actually use stablecoins to cover ETH fees this way, for example). Transaction fees can also be lowered due to batching transactions together.
* **WALLET token**\
  Ambire has its own token as well as a DAO, and you can stake the WALLET token in the app and earn. WALLET is used to distribute rewards within the app, among other things.
* **And more...** [**Check out Ambire's knowledge base for more information!**](https://help.ambire.com/hc/en-us)

#### Ambire and Your Lattice <a href="#mycrypto-and-your-lattice" id="mycrypto-and-your-lattice"></a>

When you connect your Lattice to Ambire, you will allow the app to import addresses from your hardware wallet, which you can then analyze and manage. This does **NOT** mean that Ambire will have full access to your funds - you will only give it permission to visualize your wallet addresses and request signatures when there's something you need to sign, like a token swap for example.

{% hint style="info" %}
You will only import your **addresses (public keys)** and create a communication channel between Ambire and your device (via the Ambire Wallet permission), your **private keys** remain safely stored on the Lattice.

This means that all transaction requests have to be approved **on the Lattice screen**.
{% endhint %}

<figure><img src="/files/HdvcimyC4BcI9VtaxbNc" alt=""><figcaption></figcaption></figure>


# Connecting to Ambire

In order to connect your Lattice to Ambire, you will first need to install the **Ambire browser extension** - you can do so below. Make sure to pin the extension once installed for easy access.

<https://www.ambire.com/>

### Step-by-Step Guide

1. When the extension opens after you install it, you will have two options - create a new account and importing an existing one. Since the Lattice accounts will only be imported to Ambire but continue being stored on the Lattice, you want to select **Import an account**. Then, click **More** at the bottom of the page and select **GridPlus**.

<figure><img src="/files/vp9bI1P9OPCevTn0fWDI" alt=""><figcaption></figcaption></figure>

2. On the next step, create a **password** you will use to unlock Ambire, agree with the **Terms of Service** and click on **Confirm**.

<figure><img src="/files/zNB5kpxrdNwbdVpb3bSx" alt=""><figcaption></figcaption></figure>

3. You will be taken to the **Lattice Connector** module of the Lattice Manager. The URL on this page needs to be *<https://lattice.gridplus.io/>*! Do not proceed if you see anything else. \
   \
   Type in your **device ID** (you can find it on your device as the last item on the homescreen) and then create a **password**. This password is used to create a connection between your Lattice and the Ambire app and can be easily reset by removing the Ambire permission on the device. \
   \
   Then, click on **Connect**.

<figure><img src="/files/a8518q5X9xnJFIWlVFVx" alt=""><figcaption></figcaption></figure>

4. A **secret code** will then be generated on your Lattice screen, which you will have to type into the Lattice Manager window in order to connect your Lattice to the app.&#x20;

<div data-full-width="false"><figure><img src="/files/X21zIhwSMZ5nSDYZgRje" alt=""><figcaption></figcaption></figure></div>

{% hint style="success" %}
Once the secret is typed in, you should see a **"Successfully connected!"** message on the Lattice screen. An Ambire Wallet permission can then be found under **Permissions** on the Lattice - this is to manage the connection between the app and your Lattice.
{% endhint %}

5. You will be then taken back to Ambire, which will load the accounts you have available on the Lattice. Select the ones you want to use and then click on Import accounts.

{% hint style="success" %}
If the seed on your Lattice was originally created on a **Ledger device**, you will need to switch the derivation path to see your addresses. You can do that by clicking on **Advanced mode** in the top right corner and selecting **Ledger Live** (if your seed was created after July 2018) or **Ledger Legacy** (if your seed was created before July 2018).
{% endhint %}

<figure><img src="/files/YKMxzkCr6JjGN4LiMSJT" alt=""><figcaption></figcaption></figure>

6. And you're connected! Just finish the process by going through Complete and then Open dashboard and you can start using Ambire as a frontend app for the wallet safely stored on your Lattice.

<figure><img src="/files/QmPosAY60OyIwpflmqsE" alt=""><figcaption></figcaption></figure>


# Ambire Troubleshooting

{% hint style="success" %}
If you're having any issues while connecting to Ambire or even after you've connected, this article will help you resolve them. If you can't find a solution to your issue in this guide, please [**contact us**](https://gridplus.io/contact/).
{% endhint %}

**Common Issues**

* Transaction requests approved on Ambire no longer pop up on the Lattice screen
* **"Failed to retrieve accounts on page 1"** error on Ambire
* The screen is stuck spinning on the **"Loading - Connecting..."** Lattice Connector page

<figure><img src="/files/PA9p0OSe5j7jmqTcdasB" alt=""><figcaption></figcaption></figure>

**Step-By-Step Guide For Troubleshooting Ambire**

Going through all these steps won't be necessary for most Ambire issues as most should be fixed by reconnecting - the guide tells you explicitly when to try connecting to Ambire again.

### A. The Basics <a href="#a.-the-basics" id="a.-the-basics"></a>

#### **1. Internet Connection**

If you can't get transaction requests to pop up on your Lattice screen despite approving them in Ambire or you cannot connect your Lattice to the app at all, the first thing to check is whether both your computer and your Lattice are connected to the internet. This can also be the cause of getting stuck on the **"Loading - Connecting..." page** on the Lattice Connector.

{% hint style="info" %}
You don't have to be connected to the same network, but both devices do have to be **online**. You can check your Lattice's connection status directly on the screen in the upper right corner (see the [**firmware reference article**](https://docs.gridplus.io/lattice1/lattice1-firmware-reference) to know what icons to look for).
{% endhint %}

If you're sure you're online, move on to step 2.

#### **2. Check Your Ambire and Lattice Firmware Versions**

The latest Lattice firmware version can always be found in [**this article**](https://docs.gridplus.io/lattice1/lattice1-firmware-reference). If you're not on the latest, just go to **System Preferences → Software Update**. If you cannot see an update available here, make sure your Lattice is [**online**](https://docs.gridplus.io/support/lattice1-wifi-troubleshooting).

To update your Ambire extension, right-click on the **Ambire** icon and select **Manage Extension**. Then enable **Developer mode** in the top right corner and after that, just click on **Update.**

<figure><img src="/files/Rz8e7kpBI5h6716kMjGl" alt=""><figcaption></figcaption></figure>

#### **3. Unlock Your SafeCard**

If you're trying to connect a SafeCard wallet to Ambire, the inserted SafeCard has to be **unlocked** prior to initiating the connection - Ambire cannot view or import addresses from a locked card.

Trying to connect with the locked card will result in the **"Failed to get accounts" error**. Unlock your card and try again. If you're not connecting with a card or your card is unlocked, move on to step 4.

#### **4. Incorrect Device ID And/Or Password**

Make sure that you're typing in the **correct device ID** if you see the spinning wheel on the Lattice Connector page (this might also be caused by your Lattice being offline, but this part was written with the assumption that you made sure your Lattice indeed is online as per step 1.

{% hint style="success" %}
You get a new device ID every time you reset the Lattice network module, but you can always **find your active device ID** in the last menu item on the Lattice homescreen.
{% endhint %}

### B. Resetting the Connection <a href="#b.-resetting-the-connection" id="b.-resetting-the-connection"></a>

{% hint style="success" %}
**Make sure you go through steps 5, 6 and 7 in order before you try connecting again!**
{% endhint %}

#### **5. Re-Connect With Ambire**

If your Lattice is online, your inserted SafeCard is unlocked (if you're using one) and you're sure you're typing in the correct device ID and password combination but you're still having issues, it's time to try removing the old connection and all cached data and re-connecting to get a fresh one.

5.1 **Remove the Ambire Permission**

Go to **Permissions** on your Lattice and if you see a Ambire permission there, delete it.

{% hint style="danger" %}
If you cannot access **Permissions** on your Lattice (the button will only visually react to being tapped on, but will not show you the Permissions menu), please [**reach out to us** ](https://gridplus.io/contact)before attempting anything else! This is extremely rare and you shouldn't ever see it, but if you do, get in touch.
{% endhint %}

5.2 **Remove Previously Linked Lattice Accounts from Ambire**

On Ambire, go to **Settings**, click on Accounts, then select the **three dots** you see for each account with the GridPlus logo icon next to it and select **Remove account**.

<figure><img src="/files/koT4NvOMb1qFAig2W0rE" alt=""><figcaption></figcaption></figure>

5.3 **Delete Ambire Cache**

On Chrome, copy this to your URL bar: `chrome://settings/clearBrowserData`

And select **Advanced**, **All time** in the Time range and only select **Hosted App Data**.

#### **6. Reset App State on the Lattice Manager**

Here's how:

1. Go to the [**Lattice Manager**](https://lattice.gridplus.io/) URL and scroll down
2. Click to **Settings** and scroll down
3. Click on **Reset App State** and then **Update and Reload**

<figure><img src="https://docs.gridplus.io/~gitbook/image?url=https%3A%2F%2F268056579-files.gitbook.io%2F%7E%2Ffiles%2Fv0%2Fb%2Fgitbook-x-prod.appspot.com%2Fo%2Fspaces%252F-MZJQypB4fk8YIsDKCl_%252Fuploads%252FFcYayMVKvInrBCVrFG0g%252Flmdebug.png%3Falt%3Dmedia%26token%3Dfbefbced-4074-4223-afd0-a6ed5782e810&#x26;width=768&#x26;dpr=4&#x26;quality=100&#x26;sign=c2165e1d&#x26;sv=2" alt=""><figcaption></figcaption></figure>

#### **7. Delete Local Storage on the Lattice Manager**

{% hint style="info" %}
It's possible local storage will be empty after resetting the app state, so skip this if that's the case. But make sure to double-check this before you try reconnecting with Ambire.
{% endhint %}

Go to the Lattice Manager URL ([**https://lattice.gridplus.io/**](https://lattice.gridplus.io/)) and when there, do this:

**Chrome**: Press F12 on Windows/Linux or Fn + F12 on Mac (opens Developer tools) → Application tab → Local Storage under the storage tab → lattice.gridplus.io → Clear all <img src="https://docs.gridplus.io/~gitbook/image?url=https%3A%2F%2F268056579-files.gitbook.io%2F%7E%2Ffiles%2Fv0%2Fb%2Fgitbook-x-prod.appspot.com%2Fo%2Fspaces%252F-MZJQypB4fk8YIsDKCl_%252Fuploads%252Fmr8l1ahRwm9FewuIFYrq%252Fno_entry-removebg-preview.png%3Falt%3Dmedia%26token%3Dfcfc3e03-86e1-4a8e-bc25-e08921dcd809&#x26;width=40&#x26;dpr=4&#x26;quality=100&#x26;sign=567a3ea4&#x26;sv=2" alt="" data-size="line">

<figure><img src="/files/ml1y5Yp5tR7oPEPEa3VZ" alt=""><figcaption></figcaption></figure>

You should then be able to go through the [**pairing process**](https://docs.gridplus.io/apps-and-integrations/ambire-wallet/connecting-to-ambire) without any issues.

### C. Nuclear Option <a href="#c.-nuclear-option" id="c.-nuclear-option"></a>

#### **8. Reset Device ID**

If you still cannot connect after going through all the steps above, it's time for the "nuclear option" - connecting with a **new device ID**.

To get a new device ID, you will need to manually **reset your device's router** - which can be done in **System Preferences → Security & Privacy → Reset Router**. This can take a couple of minutes. After this reset is done, you will then need to **re-connect to your WiFi** **network** to have internet access (if you're using WiFi).

{% hint style="info" %}
It was possible to encounter a rare situation in which the **device ID wouldn't change** after you reset the router. If this happens to you, powercycle your Lattice (unplug, plug back in), and try again. Confirm that your GCE version is 0.49.0. If you still can't get a new ID after updating the router and powercycling the device, [**please reach out to us**](https://gridplus.io/contact/).
{% endhint %}

After the device ID is reset, **DO NOT ATTEMPT TO RE-CONNECT** right away! First, you need to reset the app state and delete local storage on the Lattice Manager as described in steps 6 and 7. Then try connecting again.

#### **9. Reinstall Ambire**

If everything else fails and you still somehow get stuck on a particular error, there's also the possibility of getting a completely fresh Ambire instance installed before attempting to connect again. You will first need to remove the old Ambire extension from your browser/computer completely.

{% hint style="danger" %}
You will **LOSE** all hot accounts/addresses on this Ambire instance that are not backed on hardware! Only do this if you have backups for them.
{% endhint %}

Removing Ambire is fairly simple - just right-click the extension and select **"Remove from Chrome"**. Before installing Ambire again, make sure you removed the Ambire permission from your Lattice and you can also reset app state on the Lattice Manager again - just to be sure.

After you're ready to connect, [**install Ambire again**](https://www.ambire.com/) and connect to it and everything should be fine.


# Payment, Shipping, Delivery

**The only place to buy the Lattice1 and SafeCards is our eshop:**

{% embed url="<https://gridplus.io/products/grid-lattice1>" %}

### Payment methods

You can pay in **both fiat and crypto** during checkout on your eshop. The payment is processed via **Coinbase Commerce** and your order can be paid in different cryptocurrencies.

{% hint style="info" %}
If you wish to pay with **cryptocurrency**, please pay with your **personal wallet**, not an exchange wallet. If you wish to pay with and **EVM-based coin**, use the **Ethereum mainnet**, not BSC or other EVM chains.&#x20;
{% endhint %}

### Shipping services

We ship our devices with **UPS, FedEx or DHL (rarely other services)**. You can choose multiple shipping methods - the shipping cost will be calculated automatically in your cart.

{% hint style="success" %}
We dispatch all orders **within 3 business days,** unless a temporary e-shop banner indicates otherwise (e.g. during holidays).
{% endhint %}

### Shipping restrictions

{% hint style="danger" %}
We currently do not ship to

* **OFAC-sanctioned countries**
* **Mainland China**
* **Russia**
* **Vietnam**
  {% endhint %}

### **Tracking number**

Your order will be confirmed by an **automated email** and you will receive your tracking number in your email inbox once the order has been dispatched as well.

### **Packaging**

If you buy **one** Lattice1, it will come in a **225x225x225 mm cardboard box** with protective inserts that weighs in at **1800 grams/4 lbs**. Inside this package you will find a **custom branded paper box** with the hardware wallet itself - this paper box weighs **1250 g/2.75 lbs** and the dimensions of the box are 175x140x170 mm. If you buy multiple wallets, the packaging will depend on the number of Lattices.

### **Import duties**

The Lattice1 and SafeCards are dispatched from the **United States of America**. Based on your location, the package(s) may be subject to import duties - these will be your responsibility.\
\
**If you need it, the barcode of the Lattice1 is 860001395108.**

{% hint style="success" %}
If you’re based in the **European Union**, you can find the regulations [**right here**](https://ec.europa.eu/taxation_customs/individuals/buying-goods-services-online-personal-use/buying-goods/buying-goods-online-coming-from-a-noneu-union-country_en)**.**
{% endhint %}


# Developer Resources

### GridPlus SDK

The GridPlus SDK lets any application **establish a connection and interact with** a GridPlus Lattice1 device as a **remote signer**. With the Lattice1 as an extremely secure, connected keystore with signing capabilities, this SDK gives users the following functionality:

* **Connect** to a Lattice1 device over the internet
* **Pair** with a Lattice1 by exchanging keys and deriving a secret using an out-of-band secret displayed on the Lattice1. A pairing acts as a mechanism through which to derive shared encryption secrets for future requests
* Import **addresses** from the paired device
* Request **signatures** on ETH or BTC transactions, which the Lattice1 owner must authorize on their device's screen

{% embed url="<https://github.com/GridPlus/gridplus-sdk>" %}

#### **Full documentation for the GridPlus SDK can be found here:**

{% embed url="<https://gridplus-sdk.readthedocs.io/en/latest/>" %}

### GridPlus Lattice1 Keyring&#x20;

{% embed url="<https://github.com/GridPlus/eth-lattice-keyring>" %}

### GridPlus Lattice Connect

The Lattice1 Connect is a small **HTTP server + MQTT broker** designed to communicate with Lattice1 hardware wallets over the web.

By default, communication with all Lattices is routed through **GridPlus' centralized cloud infrastructure**. Although there is great care that goes into encrypting and securing these communication channels, we at GridPlus want your Lattice to be 100% yours, so we want to offer Lattice1 Connect as an alternative to centralized message routing.&#x20;

This module exists to **bridge connections** between target Lattices and web applications (generally, but not limited to, applications that use the GridPlus SDK). **If you are an advanced user, you can deploy this module yourself and change your Lattice's config to hook into your deployed instance.**

{% embed url="<https://github.com/GridPlus/lattice-connect>" %}


# GridPlus Brand Assets

![](/files/-McPuSgjflZR779GCMdh)

This page contains links to brand assets and usage guidelines for GridPlus and its products.

### **About GridPlus** <a href="#gridplus-brand" id="gridplus-brand"></a>

GridPlus is a manufacturer of blockchain hardware security devices. Its flagship product, the Lattice1 hardware wallet, sets the new standard for securely storing and actively using your cryptocurrency and other digital assets.

### **Brand Manual** <a href="#gridplus-brand" id="gridplus-brand"></a>

Refer to the official **Brand Manual** for guidance on logo usage, colors, avatars, typography, and more.

{% embed url="<https://github.com/GridPlus/brand-assets/blob/main/Brand%20Manual/GridPlus%20Brand%20Manual%20v1.1.pdf>" %}

### Official Logos & Other Graphic Assets

Please visit the **GridPlus Brand Assets GitHub repository** for logos in PNG, AI, PDF, and SVG formats.

{% embed url="<https://github.com/GridPlus/brand-assets>" %}


# Bug Bounty & Responsible Disclosure Policy

### &#xD;**Introduction**

User security is of paramount importance to GridPlus’ efforts. We encourage responsible disclosure of security vulnerabilities via our bug bounty program (“Bug Bounty Program”) described on this page.

The program directly serves our core mission by helping GridPlus be the most trusted hardware security option for storing and actively using digital currency.

The GridPlus Bug Bounty Program’s scope covers all hardware and software vulnerabilities in products directly offered by GridPlus, Inc.

A valid report is any in-scope report that clearly demonstrates a software or hardware vulnerability that harms GridPlus or GridPlus customers. **A report must be a valid, in scope report in order to qualify for a bounty. GridPlus will determine in its sole discretion whether a report is eligible for a reward and the amount of the award.**

### **Program Policies**

GridPlus pledges not to initiate legal action for security research conducted pursuant to all Bug Bounty Program policies, including good faith, accidental violations. We consider activities conducted consistent with this policy to constitute “authorized” conduct under the Computer Fraud and Abuse Act, the DMCA, and applicable anti-hacking laws such as Cal. Penal Code 502(c). We will not bring a DMCA claim against researchers for circumventing the technological measures we have used to protect the applications in scope of the Bug Bounty Program.

If legal action is initiated by a third party against you and you have complied with the Bug Bounty Program policy, we will take steps to make it known that your actions were conducted in compliance with this policy. Please understand that if your security research involves the networks, systems, information, applications, products, or services of another party (which is not us), that third party is not bound by our pledge and may determine whether to pursue legal action. GridPlus cannot and does not authorize security research on other entities.

Please contact the GridPlus team before engaging in conduct that may be inconsistent with or unaddressed by this policy. Your message should include a brief description of your intended conduct so that we may determine whether it is consistent with the Bug Bounty Program policy.

We believe it is critical to provide these assurances in order to allow security researchers to fully investigate potential security vulnerabilities. As such, we embrace the standardization of policy language that provides legal protection to security researchers as a part of the [**#legalbugbounty project**](https://github.com/EdOverflow/legal-bug-bounty).

**Researcher Requirements**

Complying with the Bug Bounty Program policy requires researchers to adhere to “Responsible Disclosure” which includes:

1. Reporting vulnerabilities with no conditions, demands, or ransom threats.
2. Providing GridPlus a reasonable amount of time to fix a vulnerability prior to sharing the details of the vulnerability with any other party.
3. Not profiting from or allowing any other party to profit from a vulnerability outside of Bug Bounty Program payouts from GridPlus.

GridPlus considers Social Engineering attacks against GridPlus employees to be a violation of Program Policies and will result in researchers being banned from the GridPlus Bug Bounty program. We define Social Engineering as acts that influence people to perform security-impacting actions or divulge confidential information.

### **Report Evaluation & Reward**

In order to be deemed valid, a report must demonstrate a hardware or software vulnerability in the Lattice1 hardware wallet that harms GridPlus or GridPlus customers. Reports that include a clear Proof of Concept or specific step by step instructions to replicate the vulnerability are considerably more effective at communicating a researcher’s findings and are therefore far more likely to be deemed valid.

A report must be a valid, in scope report in order to qualify for a bounty. GridPlus awards bounties based on severity of the vulnerability. We determine severity based on two factors: **Impact** and **Exploitability**.

**Impact** describes the effects of successful exploitation upon GridPlus systems or customers. We make this assessment primarily by examining the effects of exploitation on confidentiality, integrity, or availability of underlying information. Vulnerabilities that require considerable response and remediation efforts or could result in reputational damage are also considered to have greater impact. For example:

* **Critical Impact**: Attackers can read or modify Sensitive Data in a system, execute arbitrary code on the system, or exfiltrate digital or fiat currency in some way.
* **Low Impact**: Attackers can gain small amounts of unauthorized, low sensitivity information impacting a subset of users, or slightly impact accuracy and performance of a system. (Please note that Denial of Service bugs will be considered on a case-by-case basis. Denial of Service issues that don't impact availability of funds or user data will not likely be accepted as a valid report.)

**Exploitability** describes the difficulty of actively exploiting the vulnerability itself. We make this assessment primarily based on the prerequisites for exploitation, including level of access required, availability of information critical for successful exploitation, and likelihood of alignment of required factors outside the attacker's direct control such as social engineering requirements or timing requirements. For example:

* **Critical Exploitability**: Attackers can unilaterally exploit the finding without significant roadblocks or special conditions outside attacker control.
* **Low Exploitability**: Exploitation is difficult due to several requirements, such as access limitations, complicated social engineering, guessing unknown values, or alignment of unpredictable race conditions.

**Severity** is determined as a combination of Impact and Exploitability. For example:

* **Critical Severity**: a state of immediate, easily accessible threat of large-scale compromise or irreversible damage to GridPlus or GridPlus customers.
* **Low Severity**: a state of no immediate threat where an opportunity exists for an improvement that may mitigate a potential future vulnerability.

The decision to award a payment for the discovery of a valid security issue is at the sole discretion of GridPlus, Inc.

Researchers are also more likely to earn a larger reward for exceptionally clear and high-quality reports.

Some restrictions apply to bounty eligibility. The researcher must not:

* Be a resident of, or make their vulnerability submission from, a country against which the United States has issued export sanctions or other trade restrictions.
* Be employed by GridPlus, Inc. or its subsidiaries or affiliates.
* Be an immediate family member of a person employed by GridPlus, Inc. or its subsidiaries or affiliates.
* Be in violation of any national, state, or local law, or regulation.
* Be less than 18 years of age. If you are under 18 years old, or considered a minor in your place of residence, you must get your parents’ or legal guardian’s permission prior to participating in the program.

Previous bounty amounts are not considered precedent for future bounty amounts. Software is constantly changing and therefore the given security impact of the exact same vulnerability at different times in the development timeline can have drastically different security impacts.

### **Report Closure**

GridPlus reviews all findings that are reported via our Bug Bounty Program. Each report submission is reviewed and evaluated to ensure validity. If the description in the report is unclear, GridPlus will request additional information from the reporter. After all information is aggregated; the report submission goes through an internal review and scoring process. After the internal review process is complete, any bugs that are not reproducible, invalid or informative will be closed.

It is up to the researcher to provide detailed information and supporting evidence to support all reports. Failure to provide a detailed report will result in delayed triage and/or ticket closure.

### **Scope**

**Scope** includes hardware attacks on the Lattice1 or SafeCards, software attacks on the firmware of the Lattice1 or SafeCards.

**Examples of In-Scope Vulnerabilities:**

* Arbitrary code execution on the secure enclave.
* Bypass of user confirmation for signing.
* Bypass of PIN entry.

**Out-of-scope Vulnerabilities:**

* Exploits on outdated software.
* Exploits to the Lattice1 GCE not impacting the HSM and user security.
* Vulnerabilities on sites hosted by third parties.
* Denial of service attacks.

### **Legal Disclaimers**

We reserve the right to modify the Bug Bounty Program or cancel the Bug Bounty Program at any time.

This current policy described on this page is v1.0 of our Bug Bounty Program.

{% hint style="info" %}
**Parts of this program are inspired by the** [**Ethereum Foundation ETH2 Client Bug Bounties Policy**](https://ethereum.org/en/eth2/get-involved/bug-bounty/#rules)**,** [**The HackerOne Code of Conduct**](https://www.hackerone.com/policies/code-of-conduct)**,** [**The Dropbox Bug Bounty Program**](https://hackerone.com/dropbox)**,** [**The Ledger Bug Bounty Program**](https://donjon.ledger.com/bounty/)**,** [**The Trezor Responsible Disclosure Policy**](https://trezor.io/security/)**, and** [**The Coinbase Bug Bounty Policy**](https://hackerone.com/coinbase?type=team\&view_policy=true)**.**
{% endhint %}


# What Is a Blockchain?

The term "blockchain" was first introduced in [**Satoshi Nakamoto's Bitcoin whitepaper**](https://bitcoin.org/bitcoin.pdf) in 2008 and has been used to describe the technology underlying everything related to cryptocurrencies, from DeFi and NFTs to memecoins. This article aims to explain the very basic concepts of blockchain technology and also the underlying principles upon which it is constructed. Let's get started!

### Introduction

The purpose of blockchain technology is to provide a **decentralized, censorship-resistant** **network for exchanging value** (and other things we'll get to later) that places **no restrictions** on who can use the network or participate in maintaining it. The philosophy behind blockchain tech is rooted in the [**cypherpunk movement**](https://www.activism.net/cypherpunk/manifesto.html) of the early 1990s - cypherpunks advocate for privacy in a digital age and against government and corporate censorship and surveillence. **Cryptocurrencies** are a real-world implementation of the ideas outlined in the manifesto above: blockchain tech lets two strangers anywhere in the world finalize a transaction between them securely and without anyone interferring.

**You can think of Bitcoin as digital cash for the internet age.**

From a technical standpoint, **a blockchain is a decentralized database** maintained by a network of independent computers called **nodes**. The purpose of this network is to allow its users to store and exchange value without having to rely on a 3rd party provider of such a service, like a bank or PayPal.&#x20;

In crypto terms, we call this a **trustless** network - you don't have to trust anybody in order for your payment to be processed, the network functions without one central entity having complete control over what happens on the network. Read all about how that is actually achieved below.

### How a Blockchain Works

#### Ledgers

At the core of every blockchain is a **ledger**, like one an accountant might keep, that details which account holds what value and the history of all transfers between accounts. Since there's no central authority that would keep these records, the **current state of the ledger** (all accounts and their balances) is stored on **each node** within the network - every computer that runs the blockchain software keeps a local copy of the accounting book.

<figure><img src="/files/FwmlXXe5PqrIOoxKMg8f" alt="In a decentralized network all participants have a copy of the ledger so anyone can verify all transactions. Also, any one or more participants could go offline without damaging the network."><figcaption></figcaption></figure>

If you want to send some money to your friend using a blockchain, you have to submit the transaction to the blockchain and the blockchain network has to process the transaction. But since there's no central authority that would decide which transactions get processed, **how do the nodes in a blockchain network agree** on which user transactions get processed and which ledger records get altered?

#### Consensus

To make this possible, every blockchain network implements what's called a **consensus mechanism** (sometimes you can also encounter the term consensus algorithm). As the name suggests, it is a set of rules programmed into the blockchain software whose purpose is to help all nodes participating in running the blockchain network **reach consensus** on which transactions are valid and can be processed and which are not. There are two major groups of consensus mechanisms - **Proof of Work** and **Proof of Stake** (there are also others but that's beyond the scope of this article). You can read more about them in our other articles.&#x20;

#### Blocks

Nodes agreeing on every single transaction one-by-one would be unrealistic due to e.g. hardware and network limitations, so transactions (or, better said, ledger state changes) are neatly packaged together into so-called **blocks** - if the nodes reach consensus on a block, it is added to the previous block, which was added to the block before it, etc., creating a sequence, or a chain, of blocks - **a blockchain**. In addition to transactions, every block also contains the **hash\*** of the previous block - this hash is unique to each block and is generated from data that includes all transactions inside that block - attempting to alter a transaction retroactivelly (to e.g. return money to your wallet after you've paid for something) would change the entire block hash and break the chain.

{% hint style="info" %}
**\*a hash is the output of a cryptographic hashing function**. If you change the input even slightly, you will end up with a different output hash. Different hashing functions produce hashes in different formats - for example, the output of SHA256, the most commonly used hashing function today, is a 64-character long hexadecimal string like this: 2cf24dba5fb0a30e26e83b2ac5b9e29e1b161e5c1fa7425e73043362938b9824.

The string above is actually what you get from SHA256 if the input is the word "hello".
{% endhint %}

In order to get away with your little scam and have your transaction reversed, the whole network would have to agree that your version of the blockchain (where nothing was deducted from your balance) is the correct one. Every blockchain is designed in a way to make malicious behavior like this economically unfeasible, the approaches differ but preventing situations like this is the goal.

#### Wallets, Addresses and Private Keys

Let's now talk about how this works at the user level. Every blockchain network's user has to have a wallet in order to send and receive coins. What we call a wallet in this context is based on [**public-key cryptography**](https://en.wikipedia.org/wiki/Public-key_cryptography) - every address on a blockchain network is a **public key** and has its own corresponding **private key**. We call this the **key pair**. The address (public key) and its contents (token balances, NFTs, etc.) is publicly visible and other people can send coins or other digital assets to it should they choose to, but only the owner of the private key corresponding to this public key can actually manage the assets on this address (and by manage, we mean approve actions such as sending coins to a different address).

{% hint style="success" %}
**The public key is the public address of your wallet. Its corresponding private key is used to generate signatures that confirm your ownership of the address to the blockchain and allow you to move coins.**
{% endhint %}

There are two basic types of crypto wallets: **hot wallets** and **cold wallets**. The difference between them is that a hot wallet stores your private keys locally exposed to the internet and a cold wallet stores them completely offline and is much safer. Software wallets such as MetaMask, Exodus or Phantom are examples of hot wallets and **hardware wallets such as the Lattice1** fall into the cold wallet category.

The root of every user wallet on a blockchain is what we call a **seed phrase**. The seed phrase is a string of **12/18/24 words** taken from a specific list of words. This string is what the actual public and private keys we wrote about above are generated from and having access to this seed phrase allows you to recover the associated blockchain wallet. **The seed phrase of your wallet is what you need to keep safe in order to protect your funds (which is most likely why you got a GridPlus hardware wallet).**

### Open Source

Just as a blockchain's accounts, ledger and history of transactions are visible to anyone who wants to look them up, so is the client software code and rules that describe how the network will operate. There is no trust in people or companies with a sound blockchain system, only an agreement in the rules and code that govern the possibilities on the blockchain. In the software world, we refer to publicly available programs like this as **open source.** All the code can be inspected by anyone who wishes to do so and all changes to the code require nodes to agree on them before they are implemented.

And there you go, this should give you a basic idea on what a blockchain is and how it works. You can read more about blockchain tech in the next article.


# Wallets

All participants in a given blockchain network use **wallets**.&#x20;

These wallets each have a set of unique **addresses**, often referred as 'accounts', just like a bank account has an account number. A noteworthy difference between a bank account and a blockchain wallet is that the blockchain wallet's addresses are **public**, meaning anyone can find them and see their contents.This may seem strange and insecure at first, but having an address and knowing its contents will mean nothing to a stranger since they won't know **who** owns the account or be able to do anything with its contents since they lack they private key to that account. Furthermore, anyone on the network can send assets **to** an address, but only the owner of an address can send assets **from** their addres&#x73;**.**&#x20;

<figure><img src="/files/FLytW4G4u5IyI5By4Bwe" alt="Crypto Wallets have many addresses and all of them can be viewed by anyone, while banks accounts have a single account number that is private."><figcaption></figcaption></figure>

### Wallet Structure

The most common wallet structure you will see in the wild is a **seed phrase**. A seed phrase is a human-readable representation of your wallet keys which is used to create a **master seed** (which is a hash of the seed phrase) from which the **Master Private Key (MPK)** is derived (again, as a hash of the master seed). This is how MetaMask, the most common wallet extension, operates and it is basically industry standard at this point.&#x20;

<figure><img src="/files/TTHbzKFybnZ2qgK4QY72" alt="A human-readable seed phrase is hashed to create a master seed which is then hashed again to derive a master private key which then can be used to derive as many addresses as needed."><figcaption></figcaption></figure>

The **private key** is then used to create addresses/accounts. An arbitrarily large number of addresses may be derived from the private key and the same addresses are always produced in the **same order** from a specific private key. This means the method of generating addresses is deterministic. The most advanced type of deterministic wallets are **hierarchical deterministic wallets** (or **HD wallets**), where the keys are generated in a tree structure (parent keys create children keys which create grandchildren keys and so forth).

<figure><img src="/files/HXP965ZAutkcUeSEIAzY" alt="A master private key is used to derive many accounts. The process looks a bit more complicated than this diagram, but for the scope of this article it will suffice."><figcaption></figcaption></figure>

On **Ethereum**, these accounts/addresses are used just like a bank account, each address has a balance of ether and tokens/NFTs, when you send or receive tokens, the address's balance is updated on the blockchain just like you'd expect. This we call the **account model**.\
&#x20;\
On **Bitcoin**, you may have received your first incoming tx to the primary address in the wallet's address list. Now, when you send even a small amount of BTC to an external address, **all** of the BTC in your wallet is included in the transaction, so it appears that all the BTC has been transferred out of your account, but this is not so. Only the intended transacted amount is sent plus a small fee paid to a miner, the remainder is then **sent back** to your wallet **BUT to the next address** in your wallet, which was derived from your private key. We call this the **UTXO model.**

### Derivation Paths

Derivation paths are used to derive addresses from a private key. They can be seen as a way to implement addresses, and they're essential to understanding how wallet/address generation works.

An example of a derivation path:\
&#x20;`m/44'/60'/0'/0'/0` \
or more generally:\
\&#xNAN;**`m`**`/`**`purpose`**`/`**`coin_type`**`/`**`account`**`/`**`change`**`/`**`index`**

In the above example `m` is a character that helps programmers know what type of path they are looking at, it could be any letter, but 'm' lets us know that what we are seeing is a derivation path, specifically.

#### Purpose

The `44'` `(purpose)` tells us that it follows the [**bip-44 standard**](https://github.com/bitcoin/bips/blob/master/bip-0044.mediawiki).

#### Coin\_type

The `60'`  `coin_type` Is a field for specifying which coin type the address pertains to. `60'` lets us know it's an Ethereum address, another example is a Bitcoin address which would have a `0'` in this space. Each coin has a specific number.

#### Account

This field splits the key space into independent accounts so the wallet does not mix coins between different accounts. You can think of these incremental accounts as bank accounts.

#### Change

This is more useful in Bitcoin and was generally used to generate "change" accounts where unspent transaction outputs would be sent following a transaction. Not really used in Ethereum addresses.

#### Index

Another variable to generate addresses. There is no limit to how many addresses can be generated.

{% hint style="info" %}
The `'` symbol in derivation paths is used to denote that addresses private keys uses hardened derivation, meaning that if a private key from one of the generated accounts is compromised it only compromises THAT corresponding address and not all the other addresses..&#x20;
{% endhint %}


# A Brief Introduction to Private Keys

You may think of your **public** and **private key** like your **house** and **house key**. Your house is a public object with an address that anyone can find. Anyone can see your house (and it's contents if they get close enough), but they cannot enter it or change anything about its contents. Now, if someone has your house key, they could enter it and do as they please with it's contents, so you never want to give someone your house key!\
\
Your assets on a blockchain operate in a similar way. Your **public key** has an **address** and a **private key** to control the contents of that address on the blockchain. In truth your public key can derive many addresses, but we'll keep it simple for now.&#x20;

<figure><img src="/files/2GVCAgS3Wvpf7XkIl0RE" alt="House keys access houses, private keys access crypto wallets."><figcaption></figcaption></figure>

Your Lattice1 hardware wallet, and all other crypto wallets for that matter, do not store cryptocurrencies and other digital assets directly, instead it stores your **private keys** which enable you to use the assets you own on the blockchain. Anyone can send cryptocurrency **to** any address, but only the owner of the corresponding private keys can ever move assets **from** that address. If private keys are ever lost, the assets can **never** be accessed again.<br>

<figure><img src="https://files.gitbook.com/v0/b/gitbook-x-prod.appspot.com/o/spaces%2F-McGIm-145WxRIIEKoLZ%2Fuploads%2FynCMF8EUoSI0xv69sw0O%2FLatticePK.png?alt=media&#x26;token=47ce4c8d-e221-4c2b-a15f-0d0d968becf6" alt="Wallets store private keys, not digital assets. Currency, tokens, and NFTs exist on the blockchain only and are accessed via the keys stored in a wallet."><figcaption></figcaption></figure>

**Public-key Cryptography**

Public-key cryptography makes blockchain technology possible. Cryptocurrency wallets store your **public and private key pair**; your public key is used to verify your signed transactions and your private key is used to generate signatures and transactions.

Your private keys enable complete access to your holdings - it's of paramount importance that you keep your private keys **safe and secure.** That's where your Lattice1 and SafeCards come into the picture.

{% hint style="danger" %}
Never share your private keys or seed phrase with anyone. **Period.**
{% endhint %}

#### Transactions and Signatures

A user who wishes to send coins initiates a **transaction** (commonly abbreviated to "tx") which is then broadcast to everyone on the network to be validated and executed.

Users who add a transaction to the blockchain include a **signature** to the transaction that only they can produce with their **unique private key**. A transaction signed in this way shows everyone else in the network that the transaction could have only originated from the transactor's address and that they intended to create the transaction, much like how you sign a check or contract.

{% hint style="info" %}
A **digital cryptographic signature** is even more secure than an ordinary written signature, because there is no analogue for forging a digital signature. Nobody could forge a transaction from a wallet they do not own, since they cannot create the unique signature.
{% endhint %}

**What's a Seed Phrase?**

Seed phrases are a way of backing up your private keys using **12-24 English words** taken from a master list of 2048 possibilities, using the [**BIP39 standard**](https://github.com/bitcoin/bips/blob/master/bip-0039.mediawiki).

The problem with seed phrases is that their proper storage creates an additional set of security considerations, because anyone that can access this list of words can access all of your holdings.

They are a cryptocurrency wallet standard employed on the Lattice1, but we suggest users opt to use PIN-protected [**SafeCards**](/safecards/introduction-to-safecards) for the added security element.

**Is There A Risk of Two People Generating the Same Private Keys?**

The odds of generating an Ethereum private key that corresponds to someone else's is approximately 1 in 2^160.  That's approximately 1 in 1,461,501,637,330,902,918,203,684,832,716,283,019,655,932,542,976.&#x20;

{% hint style="info" %}
There are more public/private key pairs than there are atoms in the observable universe!
{% endhint %}


# Blocks & Consensus Mechanism

As the list of transactions grows, they are packaged into discreet so-called **blocks** of transactions, which are then confirmed to be legitimate by special network participants called "validators" or "miners". After being validated, these transactions are added to the tx list on public ledger and this is how you can see balance changes within the network. Most blockchain systems employ methods of transaction validation called either **proof of work (PoW)** or **proof of stake (PoS).** Different methods of validation exist (such as **proof of authority**), but you will see **PoW** and **PoS** most commonly.

<figure><img src="https://files.gitbook.com/v0/b/gitbook-x-prod.appspot.com/o/spaces%2F-McGIm-145WxRIIEKoLZ%2Fuploads%2FAs2FuWJQdBD5CiXBAfW3%2FConsensus_mining%20(1).png?alt=media&#x26;token=c43fd3de-ed23-4c2c-9913-d0fe140f0253" alt="Miners/validators compile all pending transactions, validate them and add them to the blockchain. They get to add a special transaction to the end of each block that creates a rewards for their work."><figcaption></figcaption></figure>

#### Proof of Work

In **proof of work**, special participants in the network called **miners** use computing power to solve a cryptographic puzzle which, if done before any other miner, gives them the right to produce the next block which will include all current pending transactions. Miners are rewarded for this work in the blockchain's native currency. So each time a miner produces a block they get some crypto as payment.

But what is a miner's computer doing? The miner's computers are looking for a special number, that when added to the next proposed block's list of transactions, will cause a [SHA256](https://en.wikipedia.org/wiki/SHA-2) hash of the block to have a certain number of leading zeroes (0x**00**3e5...) which satisfies the network's current mining difficulty condition to keep the block time consistent.\
\
While it may be trivial for a computer to guess which number added to a potential block will lead to a single leading zero (0x**0**e55...), finding a number which leads to a hash with many leading zeroes is exponentially more difficult and it takes tons of computing power all over the world to solve these cryptographic puzzles. While this is important work that keeps a blockchain secure it is inherently wasteful since the product of the labor is only proof that a someone has done the work to solve the puzzle and nothing else, and it takes an enormous amount of electricity for all PoW miners to validate blocks of transactions in this way.&#x20;

<figure><img src="/files/5cu90FHGxq47OdLNHrG2" alt="Tons of expensive hardware works constantly to secure the blockchain in PoW mining."><figcaption></figcaption></figure>

{% hint style="info" %}
We highly recommend watching [**this video**](https://www.youtube.com/watch?v=bBC-nXj3Ng4) for more information regarding basic blockchain technology and proof of work mining!
{% endhint %}

#### Proof of Stake <a href="#proof-of-stake" id="proof-of-stake"></a>

In **proof of stake**, instead of employing expensive, power-hungry, and dedicated computing machines to secure the network, **validators** secure the network using typical computers that meet minimum hardware requirements for running the validation software and by **staking** some amount of the native cryptocurrency.The key element to proof of stake is the validator's stake: **32 ETH** in the case of Ethereum. We refer to PoS 'miners' as **validators.** These validators are staking their coins on their promise that they will uphold the network and not behave maliciously, lest they have they stake burned. A user who wishes to validate the network and receive rewards for doing so will have to deposit their stake into a staking contract, which will either accrue rewards when they accurately and honestly secure the network, or be burned if they act dishonestly.Proof of stake has many benefits over proof of work such as:

* Much less energy usage (the Ethereum network dropped its energy usage by 99.95% when it switched from PoW to PoS).
* Reduced hardware requirements (some user's run full nodes on Raspberry pi 4 computers).
* Reduced risk of centralization.
* Lower token inflation due to less tokens being created to reward validators.
* Network attacks become much more expensive to enact.

<figure><img src="/files/HmUmMhztmKxJH8YOTNTZ" alt="Proof of stake mining is done with much less power and hardware requirements and is more sustainable overall."><figcaption></figcaption></figure>


# UTXO vs. Account Model

#### UTXO Model&#x20;

In the **UTXO model** like the one Bitcoin uses there are not accounts or balances. Instead, individual coins (UTXOs) are transferred between users, similar to cash. An **unspent transaction** is directly referring to tokens that a wallet has received and kept unspent. As an example: when a user initiates a transaction to send half of their wallet's BTC the entire amount of BTC is sent and the remaining BTC is sent back to their wallet but to the next sequential address in their wallet. To query how much Bitcoin a wallet contains, a node must query the blockchain to look for that wallet's incoming vs outgoing transaction amounts and sum them to find their **unspent** amount or "current balance".&#x20;

#### Account Model

In an **account model,** like the one Ethereum uses, each address active on the blockchain has an associated balance - similar to how a bank operates an account ledger which details which accounts/addresses hold what assets. A transaction sending a specific amount only sends that amount of funds, but also includes a small tip to the Ethereum Staker/Node Operator who includes the transaction into the next block. There is also a base fee that is entirely **burned**.\
\
Bitcoin and Ethereum are the two most popular cryptocurrencies. They are similar in some aspects but very different in others. For example, Bitcoin uses **proof of work** and Ethereum uses **proof of stake** to confirm transactions, and Bitcoin employs what is called the unspent transaction output (**UTXO**) transaction model, whereas Ethereum uses the **account** model.


# Bitcoin

<figure><img src="/files/5HzbEGpcD2qVb1S9gZbL" alt=""><figcaption></figcaption></figure>

{% hint style="info" %}

### Managing your Lattice1 BTC wallet

To manage your BTC wallet on your Lattice1 see [**this article**](/apps-and-integrations/lattice-manager/managing-your-bitcoin-wallet) which covers the fully featured BTC wallet on the **Lattice Manager** or [**this article**](https://docs.gridplus.io/apps-and-integrations/nufi/connecting-to-nufi) which covers connecting your Lattice to **NuFi**, a 3rd party wallet that you can use for Bitcoin, Solana and EVM chains (recommended).
{% endhint %}

### Creation and Distribution

Although previous attempts at creating a true peer-to-peer digital currency existed, Bitcoin was the first to gain widespread acceptance.\
\
On October 31st, 2008, Satoshi Nakamoto published a paper in a cryptography forum titled *Bitcoin: A Peer-to-Peer Electronic Cash System.* Since Satoshi Nakamoto is a pseudonym, their true identity is still unknown. The Bitcoin blockchain officially started on January 3rd, 2009 when Satoshi mined the first block receiving 50 Bitcoins as a reward for each block mined. The first BTC transactions was Satoshi sending 10 bitcoins to Hal Finney, a fellow cryptography researcher.

{% hint style="info" %}
The network is called 'Bitcoin' and the currency is most often referred to as 'BTC'.
{% endhint %}

BTC is created in a process called **mining**, wherein network participants called miners validate transactions and solve cryptographic puzzles and are rewarded with newly created BTC. The reward for validating and packaging transactions into blocks started at 50 BTC per block but has been cut in half every 210,000 blocks. The current block reward is now 6.25 BTC per block. This  geometric progression results in a hard cap to the amount of BTC that could ever exist at 21,000,000 BTC. Currently about 19,000,000 BTC have been minted and the remaining 2,000,000 will take until \~2140 before they are minted.

In the early days of Bitcoin it was fairly easy to earn BTC by setting up your computer to mine on it's CPU or GPU, but since Application Specific Integrated Circuits or ASICs were devised to mine BTC in ever increasingly efficient ways, it is no longer economically feasible for most people to mine BTC. The easiest way to get BTC now is to buy it from an exchange such as Coinbase, Gemini, or Binance.

### Design

Although a handful of side-chains do exist for highly specific use cases, BTC and the bitcoin network were created to be a peer-to-peer digital cash system and as a store of value. Those are still its main functions.

A BTC transaction must include **inputs** from accounts it is to be sent from and **outputs** which are the accounts that it will be sent to.  Each input in a user's transaction must refer to a previously unspent output on the blockchain, this prevents a user from being able to 'double spend' coins in their accounts.

Since transactions can have multiple inputs/outputs as shown in the diagram below, users can send bitcoins to multiple recipients in one transaction from more than one of their own addresses. Just like a cash transaction, the inputs (coins used to pay) can exceed the intended sum of payments. In such a case, an additional output is used, returning the change back to the sender. There is also a small transaction fee paid to a miner for including the tx in a block.

<figure><img src="/files/UbM5R14SBcTy67JerLjd" alt=""><figcaption></figcaption></figure>

{% hint style="info" %}
There are technically no decimal places on the Bitcoin blockchain, and amounts are displayed with them for the end user's sake. A single BTC is actually 100 million **Satoshis** which is the **atomic unit** of BTC which cannot be subdivided further.
{% endhint %}

#### Usage

A typical use of Bitcoin is to buy it and hold it for long term store of value. Users that do this typically use some form of **cold storage** (also referred as **cold wallets**) which keep their private keys, and control of their coins, safe from internet-based attacks.&#x20;

Using cold storage is safe and great for long-term storage for coins that are not expected to be transacted in the near-term, but what if a user wants to store and spend coins? **Hardware wallets** are a great way to store and spend BTC. Hardware wallets keep private keys offline but still allow a user to sign transactions generated by their internet-connected computer.&#x20;

Most hardware wallets make frequent transactions a frustrating experience, either because they are tiny and lack meaningful screen output to confirm txs are going where one expects. The [**Lattice1**](https://gridplus.io/products/grid-lattice1) hardware wallet provides a large touchscreen to easily confirm txs on while at the same time keeping private keys safely offline in a tamper-resistant package, allowing for the ease of use of a hot-wallet but the security of cold storage.


# Ethereum

<figure><img src="/files/pDBmqKKrIMPkpLFppJRZ" alt=""><figcaption></figcaption></figure>

### Creation

The Ethereum blockchain was proposed in late 2013 by Vitalik Buterin, a Russia-born programmer who co-founded Bitcoin Magazine in 2011. Buterin saw that bitcoin's blockchain could be used to create more than just a digital currency. He envisioned a new way for **decentralized applications** (**dapps**) to share information through a peer-to-peer network.\
\
The ongoing development of the Ethereum blockchain is managed by a worldwide team of open-source programmers. Anyone may contribute to protocol upgrades, but overall changes are voted upon by the active ethereum community.

{% hint style="info" %}
'**Ethereum**' generally refers to the blockchain network as a whole, while **ETH** and **ETHER** refer to the native currency.
{% endhint %}

### Distribution

The crowd sale distribution, commonly referred as a **pre-mine**, of Ethereum raised 31,529 BTC and ended in September 2014. The initial sale of ETH was conducted by a simple smart contract which made it possible for anyone to send BTC to the crowd sale contract address, and in exchange receive ETHER. The ETHER was then minted in the first block mined at the genesis of the Ethereum Blockchain.

While 60 million ETHER was created by people investing in the initial crowd sale, interested people could also mine ETHER using common desktop computers and graphics cards. This is an important difference between Ethereum and Bitcoin: Bitcoin has ultimately ended up being mined exclusively on **Application Specific Integrated Circuits** (**ASICs**) which have no other purpose than to mine BTC, while ETH is mined on consumer-grade hardware which can also be used for general computing purposes.

Initially, the amount of new ETH that were created via mining led to an overall inflation of 5 ETH per block mined. This was cut to 2 ETH over time but ultimately an additional 60 million ETH was mined bringing the total cap to 120 million ETH in circulation before **proof of work** was abandoned in favor of **proof of stake**. Unlike bitcoin there was no hard cap to amount of ETH that could ever exist, though Ethereum reached a total market cap of 121.3 million ETH and is now deflationary due to the fee burn mechanism introduced in EIP-1559.

**EIP-1559** (Ethereum Improvement Proposal #1559) introduced a **new fee structure** to the Ethereum blockchain which burns ETH used as a transaction fee. An additional ETH tip goes directly to the block proposer that includes the transaction into the next block. This fee burn has the effect of lowering the overall amount of ETH in the ecosystem. Since the merge to proof of stake ETH inflation has dropped from \~3.60% to near 0% with some days, depending on network activity, entering negative issuance, which many in the space refer to as "going **ultrasound**". You can track network activity and ETH burn rates at [**Ultrasound.Money**](https://ultrasound.money/).

### ETH as ultra-sound money

**Sound currencies** are those that maintain their value over time. A sound currency is usually backed by a commodity or a precious metal which has intrinsic value and can be used as a store of value. They also generally have a hard cap to the amount that can exist or otherwise be very difficult to produce. Gold is sound since it must be mined and is rare. Compare this to USD which can easily be printed by the Federal Reserve leading to near double-digit precent inflation. Many refer to Fiat currencies as "unsound-money".&#x20;

**Unsound currencies** are money that are not backed by any tangible commodity or asset. They are issued by governments and can be used to purchase goods and services in the country where it is issued. The main problem with un-sound currencies is that they can lose their value over time due to inflation.&#x20;

The meme of ETH being an [**ultrasound money** ](https://ultrasound.money)stems from the fee burn mechanism which leads to negative issuance of the currency. The more ETH that is burned the less there is in the total supply which increases the currency value over time. This means that ETH can be thought of as a yield-bearing asset. Aside from that ETH has intrinsic value as the unit of activity on the **Ethereum Virtual Machine.**


# Smart Contracts

A **smart contract** is a computer program that directly controls the transfer of digital currencies or assets between parties under certain conditions. Smart contracts are executed on the **Ethereum** **Virtual Machine** which can be thought of as a computer that runs all over the world on each ethereum node, hence you may see Ethereum referred to as the **world computer**.  Smart contracts are independent of any central authority, making them transparent and secure by design and once deployed onto the blockchain a smart contract cannot be stopped. They are also **self-executing**, which means they automatically execute when all conditions are met, so no one needs to oversee the operation after a smart contract is deployed on the blockchain. \
\
On Ethereum, smart contracts are created in a programming language called **Solidity,** which is similar in design to C++, Python and JavaScript with many object oriented features.

Smart contracts are currently used for a wide range of applications, including real estate transactions, financial derivatives, gaming and any other arbitrary program imaginable. Some notable examples are included in the image below:

<figure><img src="/files/5dR7MhcwRpQTyxLR4TmE" alt=""><figcaption></figcaption></figure>

This list of smart contracts was pulled directly from [Ultrasound.Money](https://Ultrasound.Money) which sorts them by how much network resources have been used to run them. Each of these smart contracts use gas as people call them, meaning that ETH is spent/burnt to run the programs on the Ethereum EVM.

{% hint style="info" %}
Most smart contracts are paired with a webpage front-end creating what is referred to as a **dApp** (**decentralized application**)
{% endhint %}

## Using Smart Contracts

Smart contracts have an associated address just like your accounts have addresses. The main difference is that a contract address also has what is called an **ABI (Application Binary Interface)** that can take in certain parameters and, given that the parameters are sufficient, the smart contract will then execute and perform its pre-programmed functions. For most **dApps,** this interface is neatly tucked away in the background and all the end user interacts with is a polished front-end website.

## Safety

{% hint style="danger" %}
&#x20;Anyone can create a contract on Ethereum and name it anything they like, so always be certain you are interacting with the **contract** you expect, especially if you are interacting with a **newly released contract or project.**
{% endhint %}

A good way to view a token/contract and confirm it's legitimacy is by using a blockchain explorer like [**Etherscan.io** ](https://etherscan.io/)and make sure that the token metrics match what you expect regarding the contract address, token holders, and transaction analytics. Here is an example from etherscan's page for the DAI Stablecoin contract:<br>

<figure><img src="/files/oyvscglCwaFJXybiwDvO" alt=""><figcaption></figcaption></figure>

<figure><img src="/files/LRBuntgJ1J3wALd8QcPR" alt=""><figcaption></figcaption></figure>

Notice that there are nearly **500k holders and 16 million transactions** on mainnet Ethereum with this contract. This gives a certainty that this is the correct contract address for DAI as these metrics would be extremely expensive to fake using a newer malicious contract.

Now that we can see that this is the correct DAI token, we may wish to [**add this to our Lattice1's address tags list**](https://docs.gridplus.io/lattice-manager/address-tags) making it so every time we interact with the DAI contract our Lattice1 screen displays the name DAI instead of the contract address.


# ERC-20 tokens

Since any arbitrary code may be ran on Ethereum, contracts that create tokens of all types are possible. Bitcoin in its entirety could be a contract on Ethereum as a token, in fact **Wrapped Bitcoin** is a ERC-20 contract and is funded by BTC sent to a contract address allowing Bitcoin to be used in the wider **decentralized finance,** or **DeFi,** ecosystem! This is made possible in-part by Ethereum's ERC-20 standard.\
\
The **ERC-20** (**Ethereum Request for Comment #20**) introduces a standard for **fungible tokens** which have a property that makes each token exactly the same (in type and value) as another token of the same contract. For example, an ERC-20 Token acts just like ETH, meaning that 1 token is and will always be equal to all the other tokens of the same type.&#x20;

{% hint style="info" %}
ERC-20 tokens are commonly referred as just **tokens**.
{% endhint %}

Some common examples of ERC-20 tokens are shown here in order of their total market share (Nov 2022):

<figure><img src="/files/Pzs0tut0pidouhIulEpu" alt=""><figcaption></figcaption></figure>

Tokens on Ethereum or any of it's **Layer-2s** have a **contract address** associated with the ERC-20 token that is unique to the contract that created the token. For example the [**DAI stablecoin** ](https://etherscan.io/token/0x6B175474E89094C44Da98b954EedeAC495271d0F)contract has this contract address: [**0x6B175474E89094C44Da98b954EedeAC495271d0F**](https://etherscan.io/token/0x6B175474E89094C44Da98b954EedeAC495271d0F). DAI stablecoin always has this exact contract address on mainnet.


# NFTs

<figure><img src="/files/FRWBNAm4U1M3pNfxcwDQ" alt=""><figcaption></figcaption></figure>

NFTs are digital assets similar to ERC-20 tokens, in fact they could be referred to as ERC-721/ERC-1155 tokens as they are supported by ERCs 721 and 1155 which set the standards for **non-fungible** assets on Ethereum. NFTs can be transferred and traded much like ERC-20 tokens but that is where the similarities end.&#x20;

The main difference is in the name: NFTs are **non-fungible tokens.** This means each token is unique and cannot be replaced by another token. For example, a dollar bill is a fungible asset: any other dollar bill could replace it, while a work of art by Picasso is non-fungible, it is wholly unique.

### Uses

NFTs are created using smart contracts and are stored on the blockchain, which means that anyone can see them, but only the owner can access them with the private keys that unlock the account the NFT exists in.&#x20;

Collectibles - NFTs can represent physical collectibles like art, toys, and clothing. In this case, an artist could create an NFT with their artwork on it and sell it on the blockchain for cryptocurrency.

Digital goods - Similar to collectibles, NFTs can be used to represent digital goods like games, art,  and music. Many artists and creators release NFTs created from their art to fund their creations and receive support from their communities and supporters. Many artist use NFTs in this way, as a fundraising tool or simply a way to sell their art.

Identity - Another use case is for identity management. For example, a person might have an avatar representing them on social media sites like Facebook or Reddit (which already exist). With NFTs, however, these avatars could be traded on an exchange for money or other cryptocurrencies. Many so-called **pfp** (profile-picture) NFT projects have been created and remain one of the most popular uses of NFTs\
\
Many use NFTs as a speculative asset and trade them similar to how art is traded in fine art markets. Many noteworthy NFTs such as CryptoPunks, BAYC etc. routinely trade for hundreds or thousands of ETH. While the highest priced NFTs being traded does generate headlines, non-financial uses of NFTs also exist.

A notable non-financial use of NFTs is [POAP (Proof of Attendance Protocol) ](https://poap.gallery)which is an NFT project that mints NFTs to mark memories as digital collectibles, I like to imagine them as digital merit badges for attending events of completing some requirement to earn them. They are free to mint but do exist on secondary markets.

### Storing your NFTs safely

NFTs are stored on the blockchain, and your private keys give you access to them. So the best way to keep NFTs safe is by keeping your private keys safe and the best way to keep private keys safe is by using a hardware wallet.\
\
Hardware wallets are physical devices that store your private keys offline. They do not expose your private keys to the internet like a hot wallet such as MetaMask does, so they cannot be hacked or compromised by malware or viruses. You can use them to securely store any cryptocurrency, including NFTs.

There are several options when it comes to hardware wallets, but we recommend a hardware wallet with a large touchscreen that allows you to see and verify every transaction so you can easily see transaction request data and be certain about what you are signing. Our [Lattice1 wallet](https://gridplus.io/) Is easy to use and compatible with all operating systems and offers the ease of use of a hot wallet but with the security guarantees that only a Lattice1 hardware wallet can offer!&#x20;


# Layer 2s

<figure><img src="/files/8aA5HeUsPpEXkiNm5nH0" alt=""><figcaption></figcaption></figure>

Blockchain technology has layers, just like onions.

* **Layer 0** is the humans that build the protocols
* **Layer 1** is the base blockchain layer, or protocol layer. Bitcoin and Ethereum are both examples of a Layer 1 blockchain
* **Layer 2** is essentially a blockchain built on top of blockchain that allows for scalability by rolling up many txs on the layer 2 as a single tx on Layer 1

### The Impetus for an Ethereum Layer 2

**Layer 2** (**L2**) is a term that describes Ethereum scaling solutions via various methods. A layer 2 is a **separate blockchain** that extends and **inherits the security guarantees of Ethereum.**\
\
As individual blocks on the base layer (Layer 1) of Ethereum fill up with transactions some transactions may not be included in the current block being proposed. This leads to delays in getting a transaction broadcasted and finalized. Blockchain users want their transactions to be included in a block as soon as possible and they are willing to pay more than the current gas rate to insure that it gets added to the next block, resulting in gas auctions that create high gas prices to have a tx included as soon as possible. After all, block space is a time-limited resource. So, as the cost of having a tx broadcast onto the layer 1 blockchain increases other options have been created to satisfy the insatiable demand for block space. Enter the Layer 2 of Ethereum.

### How a Layer 2 works

Layer 2's are particularly useful when there's high demand for transactions within a network, because they allow multiple transactions to take place and bundle them as a single transaction on the main chain.

There are different methods to create Layer 2 scaling solutions, each with their own set of strengths and weaknesses, but they are all designed to increase scalability and privacy while maintaining the trustless nature of public blockchains.  A common method employed by layer 2s is to 'roll up' transactions from the layer 2 as a single transaction on the base layer. Thousands of transactions on a layer 2 could be rolled up in this way saving tons of gas from being spent on the base chain.&#x20;

{% hint style="warning" %}
In general, your address on an L2 is the same as your address on mainnet and is backed up by the same seed phrase. An important distinction is with a multi-signature wallet like Gnosis Safe where your safe contract's L2 address is **different** when compared to it's mainnet counterpart. Assets sent to a Gnosis Safe address to the mainnet address **will be lost permanently**. You must set up your safe for each L2 and use the correct address for each layer 2.
{% endhint %}

### Bridges

<figure><img src="/files/GcUO7gIZorNXb0HvwwQb" alt=""><figcaption></figcaption></figure>

While centralized exchanges like Coinbase now have support for buying assets directly on the Polygon L2, **assets on mainnet that you'd like on an L2 must be bridged.**

There are layer-native bridges for [Polygon](https://wallet.polygon.technology/login?next=%2Fbridge), [Arbitrum](https://bridge.arbitrum.io/), and [Optimism](https://app.optimism.io/bridge/deposit) etc. which allow users to bridge assets to those specific L2s, but there are also cross-chain bridges like [Connext](https://bridge.connext.network/) and [Hop Protocol](https://app.hop.exchange/#/send?token=ETH) that allow users to bridge assets from an EVM compatible L2 to any other EVM compatible L2.\
\
Using a layer-native bridge to the most common Ethereum L2, Polygon, works as follows: tokens that are "bridged" to Polygon are sent to the bridge contract and locked there while the exact amount of tokens are minted on the Polygon network. When a user wants to bridge back to mainnet the polygon tokens are burned and the mainnet tokens are unlocked from the contract. There is always a 1 to 1 amount of tokens in the layer 1 contract and on the Polygon L2.

A cross-chain bridge such as Hop Protocol works by employing liquidity providers (LPs) whose main function is to hold tokens on both L2s that an end user wishes to bridge to. When a user initiates a bridge tx with Hop they send their tokens to the LP who then sends the equal amount to the end user's address on the destination L2 (or mainnet) minus a small fee for their service.

## How to start using a Layer 2

### Adding a L2 to MetaMask

Add the network of your choosing to MetaMask by clicking the networks drop-down and selecting "Add network".

<figure><img src="/files/tLyJeeLAK1iv8C7Bbbzt" alt=""><figcaption></figcaption></figure>

Now, simply select the network you are interested in using from the list.

<figure><img src="/files/8DDVksWa7O6PLaVSMDHr" alt=""><figcaption></figcaption></figure>

All of the most popular Layer 2s are listed here. If you want to add a network not listed, then click "Add a network manually" at the bottom of the list. Make sure you trust the network you are adding and get the correct values to input into the fields.

<figure><img src="/files/jhiN8KyEeKNHQ1xe8gLi" alt=""><figcaption></figcaption></figure>

To switch between networks click the networks drop-down list and select the network you would like to use.

<figure><img src="/files/aD67i4W17tRnP81w466F" alt=""><figcaption></figcaption></figure>

### Adding a L2 to Frame

Adding a Layer 2 network to Frame is extremely straight-forward. Simply click the settings sidebar and turn on the networks you wish to add.&#x20;

![](/files/pNoLW9uSumUxrNwS9YWv)        ![](/files/KbrDHkWnvLjO2ZPikp5K)

You will also need to make sure to select the correct network in the Frame Companion extension depending on which network the the dApp you are using is deployed.

<figure><img src="/files/HQdQInSRGNLwDJx1720h" alt=""><figcaption></figcaption></figure>


# Solana

<figure><img src="/files/xYRUQlhJmJ8bSI4oUt6O" alt=""><figcaption></figcaption></figure>

**Solana** is a proof-of-stake blockchain launched in 2020 by **Anatoly Yakovenko** and **Raj Gokal**, who have first published the project's whitepaper in 2017. The network's idea is based on an idea first implemented with Ethereum - to be a scalable platform for both exchanging value and also running decentralized applications within the network. On Ethereum, these dApps are called **smart contracts**, on Solana, they're called **programs**.

Even though Solana uses **Proof of Stake** as its consensus mechanism as well as the **account model** to record balances and transactions on its ledger, there are major differences between the chain's architecture when compared to **Ethereum**.&#x20;

Most of these differences come from Solana's commitment to being a **single-state, monolithic blockchain** - a blockchain without any mandatory Layer-2 networks to offload validator load and where all core node duties (consensus, data availability, execution, settlement) are handled by a single blockchain network instead of being split into multiple different chains/layers.

This essentially means that Solana's main focus is **massive transaction throughput** on its main, Layer 1, blockchain network, with the transaction speed commonly reaching 1000+ tps while Ethereum mainnet's tps is around 15 (and Bitcoin's around 7), which Ethereum aims to solve with high-performance Layer-2 networks such as Base.

The Solana Foundation calls this concept a **"web-scale blockchain" -** a blockchain able to handle a large number of concurrent users without sacrificing speed, similar to how web-based services processing requests from millions of users are architected. On a single layer, of course.

{% hint style="info" %}
Unlike Ethereum, which never halted and was only extremely slow when congested, Solana had to be completely halted and restarted a couple of times since its launch in 2020. These **outages** were mostly caused by bugs or extreme validator overload caused by sniper bot transactions. Solana aims to address the outage issue as it matures over time by protocol changes and new validator software such as Firedancer.
{% endhint %}

In addition to the network architecture philosophy outlined above, there are also other key elements that make up the Solana network and make it highly scalable and quick, notably:

* Extremely quick **block time** (400 ms or 0.4 seconds)
* **Proof of History** - essentially a universal clock for the entire network (NOT a consensus mechanism)
* **Tower BFT** - Solana's Proof of Stake consensus mechanism optimized for PoH
* **Gulf Stream** - Solana's mempool-less solution for forwarding and storing transactions before processing them (replaces a single chain-wide mempool)
* **Turbine** - Solana's block propagation protocol
* **Pipelining** - a process mimicking an optimization common in CPU design that speeds up the transaction validation process by breaking incoming data down into different stages and then processing it in parallel using different hardware components
* **Sealevel** - Solana's engine that lets programs (smart contracts) execute in parallel
* **AccountsDB and Cloudbreak** - Solana’s horizontally scaled state architecture solution
* **Firedancer** - Firedancer is a Solana validator client currently being developed by JumpCrypto. It can push the theoretical tps of 50.000 to over 1 million transactions per second as demonstrated on a live call in 2022. There are other 3rd-party validator clients in development as well, but Firedancer is currently the most talked about - ***not implemented yet***


# Proof of History

Proof of History is a core component of the Solana blockchain's architecture that functions like a **universal clock** for the network. Before we delve deeper into how it works, we need to clarify some details.

### Ticks

First, in our introduction to Solana, we wrote that Solana's **block time is 400 ms** - in reality, it's the *ideal* block time the chain is aiming for, but there's a drift window that allows both faster and slower blocks to be produced and added to the blockchain. This drift window for each **block slot** ranges from -25% to +150% of the ideal block time, so in practice a block slot can be **as short as \~300 ms or as long as \~1 s** without being rejected by the network's validators - *in human time.*

And even though there technically is a hard "human time" cap on each block slot, Proof of History isn't an actual atomic clock - it's more like the beating heart of the Solana network, where each individual heartbeat is recorded and considered to be the basic unit of time within the network. One beat of the Proof of History "heart" is called a **tick**.

**Each tick is a SHA256 hash of the previous tick\*** - creating a deterministic, cryptografically self-verifiable sequence of "timestamps" the whole network then coordinates around. Solana block data proposed to the network is voted on by validators after **64 ticks**, 64 ticks equal **one** **block slot** (one block slot is actually considered to be Solana's basic unit of time in their documentation, not one tick, but we chose to explain this from the smallest unit up).

{% hint style="info" %}
\* Each tick is actually the previous tick hashed not once, but **12.500** **times** by default with some wiggle room. Hashing each tick like this before considering the final hash to be the next tick serves as a **VDF - verifiable delay function**. The PoH idea was introduced in the Solana whitepaper in **2017**, while a function similar to it which was later called a VDF came from Stanford in June **2018** - the researchers who introduced this term argue that PoH technically isn't a VDF because Solana's approach is algorithmically slow according to their metrics (and other reasons), so it remains disputed whether PoH is a VDF or not, but they have similar roles within a blockchain system.
{% endhint %}

Let's now have a look at how blocks are proposed and what role the PoH mechanism plays.

### Epochs and Leader Schedule

In order to add a block of data to a blockchain's ledger, the block has to be first **proposed and then confirmed** by validators. The block is proposed by a single node, designated to operate as what is called a **leader** on the Solana blockchain. The leader is the only node with authority to propose new data to the current block slot, and all other nodes can then check the leader's proposal and either confirm or reject it with their vote. In theory, a node that's currently not the leader can also propose block data, but this data will certainly be rejected by validators because it will not be signed by the current leader - this ensures that there is **only one valid leader per block slot** at all times. All other nodes that aren't currently the leader are called **replica nodes** (a term from distributed systems theory).

When compared to Ethereum, where the leader node is decided by on-chain randomness seconds before a new block slot starts, the leader for each slot on Solana is decided by a pre-calculated **leader schedule rotation** which is calculated every 432.000 block slots, or every 2 days or so in practice. This 2-day period is called an **epoch**. The leader schedule is calculated **locally** on each validator using the same algorithm - they all end up with the same leader schedule "calendar".

When an epoch ends, a snapshot of the state of the blockchain ledger from its last confirmed block is taken and from this snapshot, a list of nodes that meet all conditions to function as a leader is created and **ordered by stake\*** in the network (from largest to smallest). This list is then algorithmically shuffled and new leaders are selected to fill in the 432.000 slots of a new epoch (the bigger the stake, the higher the chance for each eligible node to be assigned as leader to a slot, but randomness still plays a role).&#x20;

{% hint style="info" %}
\* Only stake considered in Solana terms to be [**effective**](https://docs.anza.xyz/consensus/stake-delegation-and-rewards#stake-warmup-cooldown-withdrawal) is counted; newly delegated stake warms up at ≤ 25 % per epoch, so a whale can’t dominate the very next schedule as soon as they stake their SOL.
{% endhint %}

There's a **one-epoch offset** for the schedule, which means that at the end of each epoch, the leader schedule is calculated not for the new epoch that just started, but for the **next one** after it.

{% hint style="info" %}
Each leader proposes blocks for **4 block slots** in the current implementation, or about 1.6 s, before another validator becomes the leader. As of April 2025, there are around **1300 active validator nodes** on the Solana blockchain, so during one epoch, a single node has a very high chance to be the leader multiple times.
{% endhint %}

### PoH Stream, Transaction Execution and Block Assembly

When a validator becomes the leader for its 4-slot turn, it takes the **last tick hash from the last block** **added to the blockchain** and runs a repeated sequence of hashing it and recording the subsequent PoH ticks (the leader generates the ticks, but all replicas are also hashing the PoH chain independently at the same time) while also **receiving user transactions** and interweaving them with the ticks as they come.

**This essentially assigns each executed transaction a PoH tick which serves as a timestamp.** The leader broadcasts the time-stamped data to the network **in real time** (and not at once as a whole block when the block slot closes) before the slot is fully completed - this is important, because this allows validators to process the received block data long **before their vote is required** to validate the transactions, which saves a lot of time. After the 64th tick closes the block slot, validators finish replaying the received data and vote to confirm the block.

The next leader will then start this process anew from the last PoH tick hash. **This makes the PoH tick sequence completely unbreakable** - if a validator in replica mode receives block data, replays it and finds out it started from a different tick than the last tick of the previous block or that it's shorter or longer than 64 ticks, it will simply cast a "no" vote.

{% hint style="success" %}
Note that the Proof of History chain itself can’t be faked or reordered, but PoH alone doesn’t stop a leader from proposing **a conflicting fork**; **Tower BFT**, Solana's PoS consensus mechanism, prevents a malicious block from being added to the blockchain in this case.
{% endhint %}

**So, in summary, Proof of History is Solana's built-in clock mechanism in the form of a chain of "ticks" that prove how much time has passed. By weaving each incoming transaction into this chain, PoH gives every validator the same tamper-proof record of transaction ordering, letting the network reach consensus and execute transactions without constant back-and-forth messaging between validators, because each node on the network is generating the PoH ticks locally.**

In a way, PoH can be thought of as a **pre-consensus mechanism** - because of it, all nodes agree on the ordering of events without having to speak to one another, which is probably the most important design choice in the Solana network that makes it so quick. But this alone isn't enough to decide if a block should be confirmed, although it makes the process easier. We'll explore **Tower BFT, Solana's Proof-of-Stake consensus mechanism**, in the next article.


# Tower BFT

{% hint style="danger" %}
This article is the second one in a series that starts with [**Proof of History**](/blockchain-basics/solana/proof-of-history). If you haven't read the previous articles, you may encounter technicals terms that aren't explained here, because they were explained before. We recommend reading this series from the start.
{% endhint %}

In the previous article, we introduced Proof of History, Solana's implementation of a network-wide universal clock mechanism in the form of an unbreakable chain of "tick" hashes the whole network coordinates around (each node client in the network is hashing their own PoH ticks and data broadcast throughout the network is shared with these tick hashes serving as timestamps). In this article, we will look into **Tower BFT, Solana's Proof-of-Stake consensus mechanism**.

Although they work in tandem, their purpose within the network is different; **Proof of History** serves as a way to **measure elapsed time** on the network, while also allowing validators to know how executed transactions should be **ordered**. The purpose of **Tower BFT** is to decide **which blocks get confirmed** and also **when they become finalized and canonical**, recorded on the blockchain forever. Proof of History says "tick tock", Tower BFT says "this block is final, lock it in" (this had to be here, sorry).

### Introduction

The idea of **Tower BFT** is heavily based on [**pBFT**](http://pmg.csail.mit.edu/papers/osdi99.pdf) (practical Byzantine Fault Tolerance) - a replication algorithm invented in 1999, a decade before the first Bitcoin block was mined. PBFT was the first implementation of the Byzantine-quorum logic described in the **Byzantine Generals Problem\*** paper (1982) that was fast enough for real-world applications.&#x20;

{% hint style="info" %}
\* The smallest unit of value on the Solana network (0.000000001 SOL) is called a **lamport** as a nod to one of the paper's original authors, Leslie Lamport.
{% endhint %}

In **pBFT**, nodes reach the final decision after **3 stages of voting**, heavily relying on time-outs (basically deadlines for something to happen). Those are dependent on the clock that's running on the node hardware, which might be slightly different on each node and is **not** synchronized - this is where the need for multiple voting rounds in order to ensure network safety comes from.

**Tower BFT** can reach confirmation after just **one round of voting** because the Proof of History hash chain provides a **synchronized clock** for each node - this massively reduces **consensus traffic** on the network compared to pBFT (the amount of vote messages that are necessary for reaching a decision goes down from *n*<sup>*2*</sup> to *n* where *n* is the number of active nodes) and improves processing speed as a direct result.&#x20;

Tower BFT isn't the first Byzantine-fault-tolerant consensus algorithm used in a production blockchain, but it is the first to successfully implement single-round voting. Earlier algorithms just adopted the 3-stage design from pBFT for use in a blockchain application (worth mentioning as an example is the **Tendermint BFT** consensus mechanism from 2014, used by Cosmos and BNB Chain).

Let's now have a look at how Tower BFT works in practice.

### Voting for Block Confirmation

As you already know, Solana measures time in Proof of History hashes called **ticks** - 64 ticks make up one **block slot**. Active validators send **one vote per slot**. In theory, validators can cast multiple votes per one slot, but that would be considered **equivocation** and the validator would risk punishment for this behavior. A validator can choose **not to vote** on a slot, usually this happens when they don't receive enough block data from the leader in time. In order to **receive staking rewards**, a validator has to vote on at least **80%** of all slots during **one epoch** (432.000 slots = 2 days or so).

But! There's a catch. Every vote does **NOT** have the same voting power, **each validator's voting power is proportional to the amount of SOL they have actively staked**. This is called **stake-weighted** voting.&#x20;

To reach consensus on a vote, you need the **supermajority** - on Solana, you need at least **⅔** of the **total effective staked SOL** to confirm each block (the ⅔ number originally comes from the Byzantine Generals Problem paper and its use in this context is common).

Votes are standard Solana transactions that travel across the network the same way user transactions do (at times, **vote transactions** can make up **70%+** of Solana's traffic) - when the ledger shows that ⅔+ of the stake-weighted votes have agreed to add a block to the blockchain, the block is **confirmed, but not finalized**. Under standard conditions, a block is confirmed within the next block slot.

If a block doesn’t receive ⅔ of the stake’s votes immediately, it remains unconfirmed. However, nodes store the block data in their memory for at least 32 slots, so it can still gather enough votes in subsequent slots to reach confirmation retroactively. In such cases, **the chain keeps producing unconfirmed slots** until the supermajority returns. Apps that rely on the "**confirmed**" status to process user transactions might stop their services (from their users' points of view) until nodes reach consensus on unconfirmed blocks because of this.

Should **⅓+ of stake** go offline or support a different fork, confirmation halts - past outages have shown this - but with the largest single validator node on Solana currently holding around 5 % of stake, a deliberate ⅓-stake attack is fairly unrealistic. Let's now have a look at how blocks reach **finality**.

### Building the Tower to Reach Block Finality

In Tower BFT, each validator maintains a **vote tower** (this is where the name for Tower BFT comes from). The tower is simply a stack of the validator's previous votes, where each vote has an associated **lockout counter** attached to it.

**A lockout is a time period measured in slots during which a validator cannot vote for a conflicting fork of a block they have already cast a vote for**. The lockout starts at 1 slot for the first vote and **doubles** with every consecutive vote on the same fork: 1, 2, 4, 8, 16, 32 and so on up to a maximum of **32 slots**.

Each new vote **confirms** the current block slot and also extends the time window during which the validator is prohibited from voting for a conflicting fork - if the validator voted for a conflicting fork during this period, it would create an on-chain proof of **equivocation** and could potentially lead to punishment (as of right now, **slashing\*** is not fully active on Solana yet, but it's already proposed and partially implemented).

{% hint style="info" %}
\* The purpose of **slashing** is to punish malicious nodes within the network - if a node keeps voting for conflicting forks, is offline on purpose or similar, **a portion or the entirety of their stake** could be confiscated by the network (=slashed).
{% endhint %}

But since validators have to lock their votes in for a certain fork for 32 slots, the main purpose of the vote tower is to create an **economic incentive** **to vote honestly** - validators will receive **full rewards** for their participation in the network only after their vote is sitting 32 slots deep. Voting for a conflicting fork during the lockout period **invalidates the current vote tower**, and in addition to the fact that rewards won’t be earned for those slots, it may also expose the validator to slashing (once enabled).

The 32-slot time period is considered to be the time necessary to reach **block finality** - after 32 slots, the cost to reverse a block becomes so high that no rational validator would risk doing so. In practice, **block confirmation** can be reached in 400-600 ms and **block finality** in 12-15 seconds. Most dApps usually consider block confirmation to be good enough for their services, block finality is useful in cases where e.g. exchanges need to move a large amount of funds - the funds aren't considered moved until after finality is reached for safety reasons.

Let's now have a look at how block data travels within the Solana network. We will explore **how a transaction travels** on Solana before it's actually confirmed and all the core services used for this.


# A Transaction's Journey on Solana

{% hint style="danger" %}
This article is the third one in a series that starts with [**Proof of History**](/blockchain-basics/solana/proof-of-history). If you haven't read the previous articles, you may encounter technicals terms that aren't explained here, because they were explained before. We recommend reading this series from the start.
{% endhint %}

In the previous article, we introduced Tower BFT, Solana's stake-weighted Proof-of-Stake consensus mechanism based on a replication algorithm called pBFT. In this article, we will delve deeper into **the journey transactions go through from being submitted to being confirmed** on the Solana blockchain - we aim to explain exactly what happens under the hood when you e.g. send someone some SOL or swap SOL for a memecoin via a dex using Phantom, Solflare or [**NuFi**](https://docs.gridplus.io/apps-and-integrations/nufi).

When you do this, the app you're using sends your transaction to the blockchain to be executed and added to the Solana ledger. The first step is to actually get the transaction into the network, so let's now have a look at how that happens.

### RPC-Full Nodes

In our previous articles, we used the term "node" in the context of a single **validator node** that's actively participating in the network **by voting** on as many slots as possible and collecting staking rewards. However, there is also another type of node on the Solana network, the so-called **"RPC-full" node**. The purpose of RPC-full (RPC stands for remote procedure call) nodes is to act as a **gateway to the blockchain network** for all Solana dApps and individual users.

{% hint style="info" %}
You can think of RPC nodes as the **first line of contact with a blockchain for the outside world** - kind of like calling the "contact us" support number of a company. When you call this number, you can ask basic questions (such as "What is the current state of the ledger?" in our case) and if you need something more specific, your request will be redirected to the appropriate department within the company. And although our example makes this sound somewhat bureacratic and slow, RPC nodes can answer your questions/redirect your requests in milliseconds (it's the 21st century and computers are quick!).
{% endhint %}

**An RPC-full node on the Solana blockchain is a node that runs exactly the same** `solana‑validator` **binary code actively voting validator nodes do, but with the voting services and everything related to them deactivated** (RPC-full nodes do not vote on slots, do not build a vote tower, do not have a stake in the network and also cannot be included in the leader schedule rotation). As of 2025, there are a little over **5.000 full nodes** on the Solana blockchain's network: roughly 1.300 are actively voting validators and about 3.700 are non‑voting RPC‑full nodes. In addition to this, a lot of incoming traffic also goes though **JSON-RPC relay proxies** that can tap into the network and forward transactions and queries where necessary, but do not run the `solana‑validator` binary.

Okay, now that we know the difference between the two node types, so let's have a look at what happens when a node receives a transaction from outside the network.

### TPU and Gulf Stream

Every node that runs the `solana‑validator` binary can serve as the **entry node** (where data from the outside first enters the network) for submitted transactions and queries. Each node is running a **TPU service** (TPU stands for **Transaction Processing Unit**), which is actively listening for incoming data packets from users, RPC relays and other nodes.

When the entry node receives a batch of incoming transactions, the node first verifies each transaction's Ed25519 signature and discards invalid txs and duplicates. These transactions are then handed over to **Gulf Stream - Solana's transaction forwarding protocol.**

#### **Gulf Stream is the first implementation of a mempool-less solution for distributing transactions in a production blockchain.**&#x20;

In most blockchains, each node has a "waiting room" for incoming transactions that are valid, but not added to a block yet. This waiting room is called a **mempool (short for memory pool)** and all nodes forward incoming transactions they have added to their own mempools to their peers, so the same transactions are replicated and waiting in the mempool of every node on the network. When it's time to add a new block to the blockchain, the current proposer (PoS) or a miner that mines the block (PoW) will execute transactions from their copy of the mempool, often **sorting them not by the order in which they arrived, but by the fee they will receive for executing the transaction to maximize profit** (this is why increasing the fee on an already submitted transaction usually speeds up the confirmation on Bitcoin and Ethereum mainnet).

Since the Proof of History hash chain on Solana serves as a universal clock for all nodes and allows the network to generate a **deterministic leader schedule** for each 2-day long epoch, the **Gulf Stream** **service** running on each node can just take all valid incoming transactions and **forward them directly to the current leader** as they come (and by default, also the next 2 upcoming leaders - in case the current leader is offline and not assembling blocks), completely eliminating the need for a global mempool. In practice, a leader often has most of the transactions **before** it's their turn to assemble a block, so block building can begin immediately without any delays, which in practice improves network speed.

Transactions wait in Gulf Stream's buffer for **16 slots** (around 6.4 seconds), if they are not confirmed within this time window, they are **dropped** and have to be resubmitted again (in blockchains with a mempool, the transaction just waits there until it's picked up, it doesn't get dropped). Spam on each leader's TPU is prevented by what Solana calls **stake-weighted Quality-of-Service**.

{% hint style="success" %}

### Stake-weighted Quality-of-Service

Since every node on the network knows who the current and future leaders are for each slot, an attacker could theoretically overwhelm the leader by spamming their open TPU port with fake transactions to overload its buffer, halting the network as a result - during periods of heightened network activity, the leader will reserve **80% of each slot for data coming from other validators with a stake in the network** (this is stake-weighted, so the more SOL a validator has staked, the more transactions they will be able to get into each block slot when the network is congested). The remaining 20% remains open to incoming transactions from non-staking RPC-full nodes. We call this 80/20 split **stake-weighted QoS, or Quality-of-Service**, and it was implemented because a validator with a stake is much less likely to risk spamming the network, because there's no incentive for them to do so and they'd also be risking their stake.

In a spam scenario, packets sent by validators with a stake are much less likely to get dropped by the leader than packets sent by IPs with no stake - since this implementation of spam protection **heavily favours traffic from validator nodes over RPC-full nodes**, it may seem counter-intuitive that there are more RPC-full nodes than validators on the network - with a ratio of around 3 to 1!

This, however, has a simple practical explanation - **there are more RPC-full nodes because most network load is read/query oriented** (e.g. "What's the current balance on this account? What's the current state of this program?" - basically questions that dApps are asking the blockchain in order to be able to provide their services to their users).

**Operators running a core voting validator** with a big SOL stake often completely firewall their node from the outside and configure their TPU port to only listen to other validators, which means that they usually do not forward a lot of incoming transactions to the leader via Gulf Stream.

**RPC-full node operators**, on the other hand, operate a fleet of multiple RPC-full nodes as a service for the public (and since they do not receive rewards for staking from any of these nodes, access to this service is usually paid) with one "edge validator" node that has a small stake in the network. The purpose of this validator isn't to maximize staking rewards (like it is for the big staker from the example above), but to **ensure service availability** in case the network is congested. If the network is overwhelmed, all incoming tx traffic from their RPC-full node fleet will be routed through this one edge validator in order to maximize exposure to the 80% of bandwidth reserved for stakers and get as many transactions confirmed as possible.
{% endhint %}

### Slot Leader's Responsibilities

When a node becomes the leader for its slot window based on the current epoch's leader schedule, it will start a process that ends with **newly assembled block data** for the current slot being sent out to all validators to be voted on.

The leader should already have a lot of the data it needs to process ahead of its turn because of Gulf Stream forwarding incoming transactions to upcoming leaders. When a node becomes the leader, it will take the last PoH tick hash from the last produced block and start hashing it, **continuing the PoH sequence**. Incoming transactions are **verified** and then **executed** (Solana uses all available hardware to perform different actions of this process and calls this **pipelining**) and new entries to the ledger are all **timestamped** with the PoH tick hashes.

It's important to note that what the leader produces is essentially a **continuous stream of executed transactions intertwined with PoH tick hashes** for exactly 64 ticks per slot (and usually 4 slots per leader rotation) - this data is sent to validators **in real time** as it's being generated and NOT only after the full data block has been assembled like it is with other blockchains. We'll come back to this in a moment when we get to what happens on validators before they vote, just make sure you keep this in mind!

### Shreds

Once transactions are executed, the leader node puts them through a process called **shredding**, along with the recorded PoH tick hashes. Shredding breaks the data down into small, easily transferrable packets called **shreds** - the MTU (maximum transmission unit, the largest possible size of one packet) of one Solana shred is around 1232 bytes, but they can of course be smaller.

Shreds are created in batches of 64 (the number of shreds in the final batch for each slot can of course be lower) and there are **two types** of shreds in each batch - **data shreds** and **encoding shreds, split 50/50**. Data shreds are the executed transactions along with PoH ticks and encoding shreds are [**Reed-Solomon parity shards**](https://en.wikipedia.org/wiki/Reed%E2%80%93Solomon_error_correction) that let each recipient validator reconstruct the whole batch as long as it receives at least half of the total 64 shreds. The leader's **Ed25519 signature** is added to each shred upon creation (validators will discard any received shreds where the signature doesn't match the signature of the current slot's leader). **Each shred is also indexed** so the validators that receive them know how to order them.

Once the block data is shredded, it is time to send it to validators so they can replay the data and vote on confirming the block. Broadcasting the shreds to validators is done via **Turbine**, Solana's block propagation protocol, which we'll have a look at next.

### Turbine and the TVU

Turbine has a **tree-based broadcasting structure** and its design is inspired by the Bittorent protocol - data is sliced into tiny bits (**shreds** in our case) and each recipient node on the network also functions as an immediate relay and uploads shreds it receives to a **deterministic subset of validators**. On Solana, this subset is called a **neighborhood**. The default number of logical peers in one neighborhood is **200** and the fan-out tree isn't static, neighborhoods are dynamically shuffled - the shuffle is **deterministic per shred** using a seed that's generated with some unique input from the data in the shred.

After the leader generates shreds, it sends them one-by-one to the peers in its neighborhood, **rotating the root peer after each shred**. This is considered the **first layer** of the broadcasting structure (remember, it's tree-based, which means that the data doesn't just travel horizontally, but also downwards in layers).

**When a validator receives a shred, it resends it both to all of the peers in its neighborhood and also to a predetermined set validators in different neighborhoods in the next lower layer**. A node will receive each shred multiple times from different nodes in different neighborhoods in the layer above and also from the peers in its own neighborhood, which keeps the load on each node fairly low and also ensures minimal data loss.

And remember, each validator only needs **50% of shreds** from each batch sent out because the Reed-Solomon encoding allows it to reconstruct the full block even if some bits are missing, but if a validator doesn't have all the shreds it needs, it can also send a **repair request** to its immediate peers and ask for the missing shards directly.

The service responsible for **reconstructing the block data** from received shreds is called the **TVU - Transaction Validation Unit**. It verifies that all executed transactions are valid and also replays the PoH ticks. Every replica validator processes this data in parallel on multiple CPU/GPU cores, so replaying block data is much quicker than the leader's livestream of execution and hashing.

Once the validator confirms that everything in the block is in order, it immediately **casts a vote on the block** and since this is just a regular Solana transaction, this vote is sent to the current leader via Gulf Stream and processed together with user transactions. If the ledger shows that ⅔+ of all effectively staked SOL voted to add this block to the blockchain, it is now **confirmed**, typically in the next few slots (under normal conditions, confirmation takes around **0.8-1.2 seconds**).

The last and final article will explain how **accounts** on Solana work and also how transactions can be executed in parallel with **Sealevel**, Solana's execution engine. We'll also introduce the **SPL** - Solana Program Library.


# Accounts, Sealevel and the SPL

{% hint style="danger" %}
This article is the last one in a series that starts with [**Proof of History**](/blockchain-basics/solana/proof-of-history). If you haven't read the previous articles, you may encounter technicals terms that aren't explained here, because they were explained before. We recommend reading this series from the start.
{% endhint %}

So far, we've written about Proof of History, the unreakable chain of tick hashes that serves as Solana's on-chain clock, Tower BFT, Solana's PoS consensus mechanism and also what happens when a user submits a transaction from start to finish. And since we now understand how blocks are assembled, we just need the final puzzle pieces to understand the core concepts behind Solana's architecture.

In this article, we will expand on all the things we've learned so far by explaining how **accounts** (yes, Solana uses the account model, not UTXOs) on Solana work and also how the **Sealevel engine** allows execution of smart contracts in parallel. And we cannot mention smart contracts - they are called **programs** on Solana - without mentioning the **Solana Program Library, or SPL**.

Let's get started!

### Blockstore, AccountsDB and Cloudbreak

All consensus-critical data on the Solana blockchain on all validator and RPC-full nodes lives in only **two places** - **raw ledger history** is stored in what Solana calls **blockstore** and the current **state of the Solana blockchain** is recorded in **AccountsDB**, which, as the name suggests, is a database of all accounts on the Solana network - you could say a "live snapshot". **Cloudbreak** is a custom database solution that handles all AccountsDB under-the-hood operations written specifically for the Solana blockchain.

#### Blockstore

**Blockstore** is a **permanent database** of received shreds (both data shreds and encoding shreds - so all executed transactions and PoH hash ticks) and records of validator votes for each slot, including some slot metadata sprinkled in.

Most validator nodes delete all non-root forks after a slot gets finalized via a process called **pruning** to minimize the size of their blockstore, but **specialized nodes** (such as infra nodes ran by block explorer services or dedicated Solana archival nodes) keep the complete ledger history, including historical forks that weren't added to the blockchain in the end. Apart from serving as the actual Solana ledger, blockstore is primarily used by the **TVU** to replay incoming shreds.

#### AccountsDB

**AccountsDB** is a **database of all accounts** on Solana. But in our case, "**accounts**" doesn't mean just user accounts and their balances, because pretty much **everything is an account on Solana**: actual accounts and balances, the state of programs, validator stakes, vote records, system configuration, etc. all use Solana accounts.

**Each account on Solana has four key fields - pubkey, lamports, owner and data.**

* `Pubkey` is the account address, a unique 32-byte identifier
* `Lamports` is the balance of an account in SOL
* `Owner` is the program ID which is allowed to change account data and move the lamports (all programs can **read** account data and **credit** lamports, but only the `owner` can **write** and **deduct** lamports)

{% hint style="success" %}
Note that the `owner` of your account in Solana terms isn't **you** exactly, it's the **program** allowed to manage this particular account. For example, user accounts are managed by the System program, validator accounts are managed by the Stake program, etc.

When you want to send someone some SOL, this action is performed by the System Program, but in order for the program to authorize the transfer, it requires a signature generated by your private key. If you want to buy or sell a memecoin, this is handled by the memecoin's `owner` program, which is handled by the token standard program above it (SPL).

Developers building on Solana can also write programs that act as account owners, the `owner` field isn't exclusively limited to programs embedded into the Solana protocol itself such as the System or Stake programs.
{% endhint %}

* `Data`  is a field whose purpose is determined by a boolean `executable` flag - if `executable=false`, the account data is **state**, if `executable=true`, the account is a **program** (a smart contract) and the `data` field contains the executable code

{% hint style="info" %}
A practical example can be a **stake account** - the `executable` value is `false`, because the stake account isn't a program. In this case, the `data` field holds **information relevant to staking**: who the staker and the withdrawer are, the pubkey of the associated vote account, the epoch the stake was activated in, etc.
{% endhint %}

#### Rent

Every account on Solana with a balance has to pay rent in SOL in order to stay on the network - this discourages network users to create a lot of accounts that wouldn't then be used and helps prevent spam bloating the blockchain state. Rent is a small number of lamports deducted from each account **every time it's used** - if an account holds **more than 2 years worth of rent**, it's exempt from paying rent and can stay on the network without being scrapped. Rent is 3.48 lamports per byte‑year - take the data field of this account, multiply the number of bytes in it by 3.48, multiply it by 2 (2 years) and you will get the final minimum amount of SOL required for this account to be rent-exempt.

#### Snapshots

The AccountsDB database is **periodically snapshotted** (every 512 slots by default) to allow new validators to quickly sync with the network - the snapshot file represents the state of the blockchain at a certain slot, the new validator loads this snapshot file received from another full node into their database and replays all slots that come after it instead of replaying the whole history from scratch, which would take days.

#### AppendVecs

Solana stores all account information in a set of memory-mapped files called **AppendVecs**. Every time an account state changes, this change is appended to the end of this file without changing the previous records. An **in-memory index** that lives in the RAM on each full node maps every account's pubkey (address) to the bytes that represent its latest state in the AppendVec file, which allows Solana to **answer state queries and execute transactions** without having to scan the AppendVec file itself, contributing to speed. The latest state of the blockchain can be forked, so the index keeps all information until a slot reaches finality and then deletes all unneccessary records. AppendVecs are handled by **Cloudbreak, Solana's sharded storage engine**.

#### Cloudbreak

AccountsDB is the public API layer the Solana runtime talks to, but most of the logic in the database is actually implemented by **Cloudbreak** under the hood. Cloudbreak handles both AppendVecs and the in-memory RAM index that works with them mentioned above (and other things).

Cloudbreak breaks down the full RAM index list into **32-64 shards called buckets. Each account (with a unique pubkey "ID") on Solana is assigned to one bucket, has its own** [**read/write lock**](https://en.wikipedia.org/wiki/Lock_\(computer_science\)) **(mutex) and can be processed by a standalone CPU/GPU thread\*** - this implementation reduces **contention** (when two or more threads try to use the same resource at the same time - only one will "win") and makes Solana the first production blockchain that has successfully implemented **parallel execution** on a single layer.

{% hint style="info" %}
\* Imagine books in a library - each individual book has its own dedicated spot in a bookcase (this is the pubkey lock), but there are different sections with different bookcases (these are the buckets). This helps with efficient resource usage and processing - individual pubkey locks prevent multiple threads from interacting with an account at the same time (which could be used to double-spend), buckets help with managing RAM usage, cache bloat and other things.
{% endhint %}

Most blockchains have a **single global mutex**, which means that transactions can only be executed **sequentially**, one-by-one, because each execution locks the global state of the blockchain until it's processed. Solana is built around efficiency and parallel execution is one of the key aspects of this, but the whole picture is not complete yet. Now that we know that each individual account has its own lock, let's have a look at how the **Sealevel** engine actually leverages this in the next section.

### Sealevel

Sealevel is Solana's **parallel execution engine** - this section ties up every everything we've written about so far together. **Every Solana transaction must contain a list of every single account it will interact with (read/write) when it's submitted**. Declaring all accounts a transaction will touch up front like this allows the Sealevel engine to sort through the submitted transactions and execute non-conflicting ones at the same time (with the help of Cloudbreak) **without locks on global state**.

Everything a Solana transaction does NOT declare up front is simply inaccessible, which guarantees **determinism** and prevents malicious attacks. Overlapping transactions simply wait until the previous "batch" of transactions is processed and the state of the blockchain can be altered again, in practice this happens in milliseconds inside the **Sealever scheduler**.

Executing transactions and code on Solana is measured in **Compute Units - CUs**. Each action performed on the Solana network costs a fixed CU amount - each transaction has a hard CU cap and every slot has a CU ceiling (if you remember stake-weighted QoS, the mechanism that prefers incoming traffic from staked validators over transactions from non-staked nodes and prevents network buffer overload, hard CU caps perform a similar role when it comes to the CPU budget). Measuring execution cost in CUs prevents DoSing and also gives developers a predictable performance cost of their code.

If a Solana transaction goes over its CU budget, it will just be **aborted** and has to be submitted again, it doesn't stay waiting anywhere like it's the case with Bitcoin and Ethereum mainnet mempools, where transactions wait until they are picked up.

### Solana Program Library (SPL)

The **Solana Program Library** is a collection of audited on-chain programs (**Solana's smart contracts**) that allow developers to build on Solana without having to reinvent low-level token/metadata logic and serve as the building blocks for most dApps on Solana.

The most commonly used one is the **SPL Token program**, which provides minting, transferring, freezing, and burning of fungible tokens and NFTs on Solana - the equivalent of Ethereum's ERC-20, ERC-721 and other standards combined into one. The newer **Token-2022** program builds on top of the original SPL Token by adding transfer hooks, clawback, confidential balances and other functions.

Holding Solana tokens (other than SOL) is different than it is on Ethereum - Solana uses **ATAs, or Associated Token Accounts** (managed by the ATA program). Every user wallet that holds a coin on Solana is assigned a new address that's different from the user wallet's pubkey and whose `Owner` is the SPL Token program (or other managing program) and this address then holds the actual tokens. This is why you see **two addresses** on [**Solscan**](https://solscan.io/) when you look at token balances on a coin - one is the **account** (the user wallet) and the other is the **token account** (controlled by the `Owner` program).

Other programs from the SPL commonly used on Solana include the **SPL Memo**, which lets anyone attach a 32-byte custom note to every transactions (used for human-readable notes/logs) and the **Address-Lookup Tables (ALTs) program**, which is a program that compresses transaction headers for storing batches of addresses on-chain and is used for complex **DeFi** operations without going over the 1232-byte size limit for a single data packet on Solana.

{% hint style="success" %}
And that's it! If you've read all the articles in our Solana series, you should now have a decent understanding of all core Solana technicals. There are of course other things and some proposed changes that will change the network that aren't implemented at the time of writing (July 2025), but all the info in this series should serve as a decent starting point for learning more. The best resources to check out if you'd like to learn more are the [**Solana Foundation**](https://solana.org/), [**Helius**](https://www.helius.dev/) and [**Anza**](https://www.anza.xyz/).\
\
**You can use your Lattice with the** [**NuFi wallet**](https://docs.gridplus.io/apps-and-integrations/nufi) **for everything you do on Solana.**
{% endhint %}